Animations ☆*:.。.o(≧▽≦)o.。.:*☆
All of my animations shall be dated and have a little reflection on what I found to be challenging and what I found to be fun and just overall what I did just like my other pages for animation
I did alot of animation projects in this trimester, but I still did pre-production drawings and illustrations for my animation projects I just thought it would be best too keep everything in one place!! (still cheak out my illustrtions though!!)
Everything is layed out in order I got them set besdies the puppet porject as it starts at the end in sequentail practice work but I started a little bit of it in the chirstmas holiday work
TRIMESTER 2 (2025)
THURSDAY LESSON (the projects I did this trimester are bellow!!!)
⊹₊˚‧︵‿₊୨ᰔ୧₊‿︵‧˚₊⊹
EXPERIMENTAL ANIMATIONS (。ᵕ ◞ _◟)
weeks 1 - 3 (Sequential Practice)
WEEK 1
CELL ANIMATION WEEK 1 (planning) 𐔌՞꜆. ̫.꜀՞𐦯

So for the first week of experiental aimation, the animation that we had to practice was cell animation with paper, now some of the work bellow isn't mine as it looks different to my style that I usally work into. Thats because this first task that I wa given hs to be done in a team. I decided to go in a team with ym classmate/friend Emily and to being with we made a plan for what out idea would be. We planned that we where doing this girl who was nervous in alot of noise and they put headphones on to clam down. We based our idea of off the song above and to be honest we where both pretty nervous/confident about this task consdering I really like this kind of thing I have allways wanted to do it and emily didn't particually wanted to do it as its not something she was interested in. But we worked otgether and I made the mindmap and the breif first frames of basically what it might look like and emily did the better story board and planned out the charater we made sure to split up the work evenly because its team task and we both havn't worked in a team before. It was actually quite fun to work in a small tea others where working in groups of three but we worked in a too and to be honest this was helping me see my own style agaisnt some body else, seeing how to work with someone else to make sure our work was readable but emily let me add my own style in it as well, but doing this is really helpful because I felt like merging our skills togetherand actually talking to others about wokr and collaberating was a really enlighting and helpful expereince.


⠀
⠀⠀ ⠀⠀ ⠀⠀ ⠀⠀ ⠀⠀ ⠀⠀ ⠀⠀:¨ ·.· ¨:
⠀⠀ ⠀⠀ ⠀⠀ ⠀⠀ ⠀⠀ ⠀⠀ ⠀⠀ `· . ꔫ
(˶˃ ᵕ ˂˶) .ᐟ.ᐟ
⋆˚꩜。
CELL ANIMATION WEEK 1 (making) (¬`‸´¬)



˚ʚ♡ɞ˚


⭑。𖦹°‧
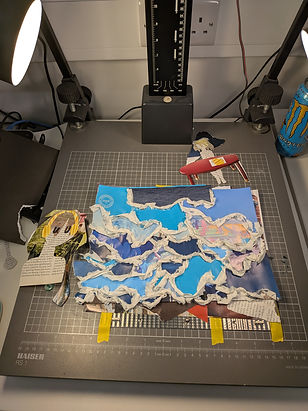
So for making the actual animation me and emily made differnt backgrounds with all different magazines and papers to push the idea of the of the noise beingtoo much meily deicded to let me be in charge of the noise feelingbecause I am autstic and the feeling of loud noise would be better coming from me and it affects m the most, so we made the title called "the affect" because thats how it feels too me. EMily looked throuhg all the magaziens and news papers and piked out what wee needed to use and the transistions but. idid all of the movment andemily was in charge of the camera pictures.
This was a really fun task and at the end of the animation we had to completely stick down 2 bacgrounds so emily did one of them and I did the other, I deicded to do the "loud" background because it is just how I feel and we also burned paper that was super fun and emily did the calm one as the music was her idea to be honest so it made sense if she did the happier background. This was just an overal really fun learning experience. Of course I am not saying that our animation is the best thing ever its just I have allways wanted to do this and we only learned how to use onion skinning at the end (which is why I feel the animation near the end is smoother) but even with out of the onion skinning I believe that it went okay. I think my favoruite thing we did was we made the character with words because it felt just like she was nervous and all of the hair we did made out of leafy paper as it just felt the most "hair like??" out of all of the paper we found and used. For me I got a bit too excited when doingthis project, I mean we where given a very strict deadline it needs to be finsihed by week 2 to show to the class and it also needs sound in it and emily dosn;t have the diting software so thats MY JOB!!!!! but emily is finding all of the sound for me. With my exictiement I kpt causing my hand to be in the frames os frames had to re done multi[ple times and we also sturggled to make sure all of the frames lasted longer and we had to go through every single photo we did an change some of the speeds which was really anoying because we stayed longer to get this done on the day it was set so then I can edit it on the weekend, and we had to just figure it out ourslves on a completely new software we never used before but we figured it out eventually and we think for our first stop motion project it is alright!!

⡤⠒⢤⡀⠀⠀⠀⠀⠀⠀⠀⠀⠀⠀⠀⠀⠀⠀⢀⡤⠒⢤
⢣⡀⠀⠉⠲⢤⣀⡀⠀⠀⠀⠀⠀⠀⢀⣀⡤⠖⠉⠀⢀⡜
⢸⡉⠒⠄⠀⠀⠀⢉⡙⢢⠀⠀⡔⢋⡉⠀⠀⠀⠠⠒⢉⡇
⠀⠉⢖⠒⠀⠀⠀⣇⠀⣸⠀⠀⣇⠀⣸⠀⠀⠀⠒⡲⠉⠀
⠀⠀⠀⠉⠙⠫⠤⠚⠉⠀⠀⠀⠀⠉⠓⠤⠝⠋⠉
CELL ANIMATION WEEK 1 (the video without sound) ≽^• ˕ • ྀི≼
Here is the animation completed with out sound, so because our sound we based off the whole idea is a copyrighted music, emily found wave sounds and I am going to edit 2 differnt versions one without copyrighted music to be able to uplaod it too socail media and the copyrighted music one we where told it is okay to use for uni work subbmission as it is an educational setting. I am proud of what we have created besides how one of the frames looks a it wierd as we forgot to move the cameradown to fill the screen but I am going to try and fix it in the editing software that I have and ask emilyhow she feels about everything and how it all looks and the sound being all together as we still need to record loud sounds for the beinging and I really want to make sure i commincate with emily as it is a group project and I am pretty bad at commincation but this project ishelping me realize how to work along side others it is difficult but actually quite fun :D
𝄞⨾𓍢ִ໋♬⋆.˚𝄢ᡣ𐭩
CELL ANIMATION WEEK 1 (adding sound) ∘ ∘ ∘ ( °ヮ° ) ?


So after emily had found me all of the audios we needed to edit I got straight to it honestly i thought it would take a longer than it did but it only took me an hour. Somehting I am proud of is that I manged to edit the part of the frame we messed up n my just overlapping videos just like emily told me too do. That was the bit that took me the longest as I had ot learn a new skill. I kind of already know how to put sound on things not the best but I mean it works for what we needed.
Emily found the sounds on Epicdemic sounds (link bellow), and told me excly what to do after i had done the eiditig i sent it over to her so she could cheak it out. I had speseific instrustions for when making the first version with the song that we based it off of, to not use the lyrics just the melody at the beginning so i stuck to that and I am really proud of the simple editing I did. Because i was nervous that the naimation wouldn't showcase out skills well enough or be engaging but adding the sound that I did reallt helped and I feel like it imporved os much.
I of course edited one with just wave sounds so I can upload that vrsion ot my instagram blog an not get told off for using copyrighted music and because its really ismilar to the one with music I belive it worked rally well. We where going ot record sounds oursee but completely both forgot as we both have other projects ot work on as well but luckily free aduios to use exist which is super helpful :D and I think next week if I eed to add audio again I am going ot ty and record my own (if I can't I don't ind its just last triemsters audio project was super fun, but I have ot be aware of deadlines I have ot work toward to make sure I ge things done on time)
﹌﹌﹌﹌﹌. >⩊<
THE USAGE OF CHAMPAGNE SUPERNOVA BY OASIS IN THIS SHORT FILM IS USED PURELY FOR EDUCATIONAL REASONS I AM NOT TAKING CREDIT FOR THE SONG, ALL RIGHTS ARE RESEVED BY OASIS
this is the sound I used for the beginning of each video and the video in this section has the free use wave sound :D
WEEK 2
2D ANIMATION OVER LIVE FOOTAGE week 2 (Making the live footage) ( ꩜ ᯅ ꩜;)
So this week's experimental animation is the kind of animation I have wanted to do for YEARS. I thought that this style of animation was just to do with stop motion and the 2d things that were on the people were real life things. Now it can be that, you can use acetate and draw it in real time and take photos. But of course, people don't really do that anymore because modern technology is a thing and there are easier ways.
So the way that I have been told was to act out what I needed to do and then have to animate on TV paint instead and not to do in sort of a stop motion. Now as you can tell from these videos these are the raw footage with nothing on them and, this process was the most humbling process that I have ever had to do. It was really hard to envision what I needed to do as what was going to be a 2d animation over the top of me. I could have done something simple and just moved a leaf or something and had a little character to do it but I had an idea and I wanted to stick to the idea I had.
This animation I didn't make a storyboard or anything I was just told to think of an idea and film it, not to spend too long mulling over what I needed to do and what sort of storyline I needed to create just think of something thatI can easily use for the animation principle squash and stretch and possibly add a secondary action to it.
Hopefully from the raw footage you can totally see that I was super nervous and awkward because I wasn't holding the camera. I mean I can't make things float with my mind. It was my friend Emily who I worked with last week on cell animation. We both decided to help each other with film as both of our ideas included us as objects or important parts of what the 2d animation would interact with.
Now the first video next to this text I was super panicky and nervous as well as I wanted to get it over and done with as fast as possible so I didn't remember to do the one important thing that this animation has to be. It has to be a looping animation. The whole point was to create this animation that could be looped.
The idea I had, hopefully you can tell from the movements I did, was that I wanted to animate the squash and stretch a really long snot that came out of my nose after I sneezed and I wanted it to snap back. At this stage I wasn't really thinking about any secondary action I was simply just focusing on the squash and stretch principle as that was the most important one that needed to be done for this experiment.
Trying to work out how long I had to hold for and how i had to look without actually seeing it as a animation or keyframes before hand was really hard as well as I just felt a bit stupid when doing it because nothing was happening I was just acting in thin air, no speaking no making noise as that is what I will add later once the animation is done.
૮꒰ ྀི◜๑◝ ꒱ა
────୨ৎ────
2D ANIMATION OVER LIVE FOOTAGE week 2 (making the animation over the live footage) (๑>•̀๑)

This is where everything got fun, actual animating and doing the part that I have been wanting to do for a SUPERLONG time. Now this actually crashed twice because when filming the footage me and Emily accidentally filmed it in 4k which made it massive, no originally we didn't see a problem with it but after it crashed 3 times, there definitely proved to be some form of problem. The problem got fixed from altering the video aspect ratio down to the correct sizing that it needed to be after asking help from a teacher and a reddit forum.
Now because I was already angry because the animation had crashed multiple times I couldn't figure out how to animate the snot properly and I kept re-trying with multiple layers and re-did the same animation 3 times before I just got to the point where I was almost crying. I expected it of course to show what I had but I was so close to giving up and just having to film something else.
Though I really wanted to do this idea, I thought one it was gross and I have never really explored nor drawn anything even vaguely gross and two I thought it was a really cool way to show squash and stretch and work on my skills. After stressing over it I decided to ask others around me for their personal opinion. I was given super helpful advice:
- not the change the volume of the snot keep it the same volume
- when keeping it the same volume as it stretches out it would get tighter and thinner to show the tension and the stretching it is going through
- make the snap back and squash part more snappy and short
- try to make sure that the focus is the snot and not making it go everywhere and be too complicated. Sometimes things being simple are perfectly fine and work great.
From that advice I really managed to see my work from a different perspective and completely go for it, but thus tue feel more confident because the advice that me and emily where given for our cell animation was also to keep things simple and make sure things hold on frames for longer and I promised I would try that for this animation. I learnt that I really need to keep asking people around me what they think about my work and not to get afraid of thinking that they will say it's bad and judge me. If I ask for help then people will help not be mean.

૮꒰•̀༝ •́꒱ა .ᐟ
This is the animation that I didn't like and asked for help on, its just too chaotic and too much going on, the lecturer I was talking to told me that it being chaotic is fine I just need to make it make sense. But I couldnt work out how to change it from where it was at this stage so restarting sounded like the better option.
. ݁₊ ⊹ . ݁ ⟡ ݁ . ⊹ ₊ ݁.
⊹₊˚‧︵‿₊୨ᰔ୧₊‿︵‧˚₊⊹
﹌﹌﹌﹌﹌

This is me remaking the animation and because I liked it so much and felt as though the squish and stretch was good enough I actually finished just the squash and stretched apart with an hour left to spare in the day so I decided to add a whole nother section to the animation. The secondary action...
Now for my secondary action I wanted to add something that I have always used to represent me and I really like bunny rabbits and when I draw myself just in general I always add bunny ears just because I like them. The character on the homepage of my website is a bunny and she is one of my characters. So I thought why not actually add those bunny ears in and then I felt like I could also redeem myself for trying to do a bunny themed thing last trimester for the head turn because the one thing that I struggled completely with was the ears. To do the bunny ears I actually did plan them out unlike the snot that I did. The snot I just used pose to pose because I felt like it gave it a more organic feel to it. THough the ears I planned out key frames then I asked teachers how to make it better, and honestly for animating on ones and having to really think about what movement did what. I think it is AWESOME!!!
Of course it isn't the best thing in the entire world but I loved doing this task, it has been my favourite and super duper fun, I got to merge everything I enjoy together, drawing, film and sort of like stop motion. I really like this style of animating :D
2D ANIMATION OVER LIVE FOOTAGE week 2 (re making the animation!!) ໒꒰՞ ܸ. .ܸ՞꒱ა
໒꒰ྀི ∩ ⸝⸝ ∩ ꒱ྀིა
݁ ˖Ი𐑼⋆ Ი⑅𐑼
﹌﹌﹌﹌﹌
2D ANIMATION OVER LIVE FOOTAGE week 2 (adding sound) (˶˃ ᵕ ˂˶) .ᐟ.ᐟ

── ⟡ ˙🌱 ̟
── ⋆⋅☆⋅⋆ ──
This is the editing and all of the different sounds I used. I really thought this was going to be difficult because the length of the video is quite short. But actually it porved to take really no time at all.
I used a website I am most used to that i used all the time when i was in college "PIXABAY" its just a website ot get royalty free music. That was the part that took a long time, just scrolling through a website to find the correct sounds that Iwanted for my animation. Though after i found all of the sounds, because I knew exactly how I wanted everythingto behave it just came down to cutting the tracks and making everything sound how I want it too sound.
The only thing that was wrong with my animation is, that. Iwant to a purposefully quite area with pretty mich no soundbesides emily saying "3,2,1 go". To have the ambeince that I am outside I found just a corridor school noise and think that completed the animation making it feel like it is real with a mixture of sillness due to the 2d animated part.
(„• ֊ •„)
2D ANIMATION OVER LIVE FOOTAGE week 2 (final video) ദ്ദി(˵ •̀ ᴗ - ˵ ) ✧
Here is the final video with the sound. I really like the sound and what it has done for the animation, it just feels more alive.
I added a stupid qucking noise because I thought it was funny and just cool to push the cartoony feeling that I am going for. I really did enjoy this task, and it is something that I defeintly would like ot contuinue doing, I mean it was fun to act out and the nsee everything get put together, I also got to just merge everything that I enjoy about animation and illustration.
Its mixed media in a digtial form and I LOVE mixed media , I would totally love ot add things like drawings done with paper to something like this and scan things in, it just has so many different posiblities that I can do.
(˶˃ ᵕ ˂˶) .ᐟ.ᐟ
⋆˚✿˖°
WEEK 3
PIXALATION week 3 (working alongside a new group) 𐔌՞ ܸ.ˬ.ܸ՞𐦯
˖ ࣪ ꉂ🗯˙🫐⃟.꩜‹—


𓎢𓎠𓎟𓎠𓎡
❦

This week's experimental animation was pixalation. Now for this project, I wasn't allowed to choose who I work with nor the group it was randomly selected, so yesI wasn't with any of my friends, I was with 3 people who I haven't interacted with before. This did make me really nervous, I always find talking to people to be the worst task ever. Something that almost made me not pursue this course was the thought of having to collaborate not because i dont want to, it's just I have really bad social anxiety but I know the only way to get better at is, is to try.
Even though I was nervous and didn't want to talk to the people I was partnered with I gave it a go, I mean I talked to them and laid out all of the ideas we all had, we ended up merging what we all thought of. I mean I did most of the idea generation, but the people I was with (Luci, Inés, Jean) they all gave their input and I put it all within my own idea. Even though our idea that we chose to do isn't the most original we made it unique and gave it personality, by one being super giddy and excited about doing this project and two just agreeing on something and being excited about it made the experience of just planning it fun.
Now Jean wasn't there for the initial planning he was late to uni but we still included him making him the "bad guy" who kills me and Inés. From the images next to all of this text. I know that our planning is confusing, but the idea we went with was this fake video game and these characters going on small adventures using magic and swords, and a bad guy killing the main characters and gaming over. We decided to go with gaming over because winning is what you do in a video game even if you do lose you can just restart and try again so we went with gaming over because it just felt right to show the side of gaming that happens a ton more than winning.
Now with these plans that we made, we couldn't really take any screenshots of the process of what we were doing because we were using a camera to film ourselves as well as when we were filming we couldn't just stop to take a photo as we had to move along with the camera to make sure it would look correct and smooth.
But even though we couldn't take any cool photos of what we looked like when doing it, and how we did it, I will say it was probably the funnest animation that I have ever done, I got to be physically part of it, I know that. I was in the last experimental animation that I did last week but I then had to add that animation on top. The animation that we did with this was stop motion but minus the cutting out and having to lose our minds.
I mean it was harder than normal animation and the stop animation, with the paper but because it was so physically involved I enjoyed it so much. Being directed around, while doing slow movements, feeling silly in a corridor full of people, connecting with others, collaborating and talking about how to improve something and make a shot better, just felt nice. I felt like I really was a part of something and collaborating with people is much more fun then doing it by yourself, there isn't as much work to do of course. But the fact I got to just like to talk to people and constantly get the feedback that I would usually get with others after I had finished something then realised that an animated section or a frame was wrong.
Collaborating also helped me really understand how to make things simpler for readers to understand, all of a sudden instead of jumping frame to frame I was thinking about how we should showcase how we got from one area to another. Something that did go a bit wrong when doing this task was the fact that we sort of took not enough photos to make it a bit slower I did try to fix it with in the editing but I mean after all this is experimental and this is the first time that I and the rest of my group have done this independently, and I feeling like with all of this knowledge of the different kinds of stop-motion animation, I feel a lot more incident to do the puppet project, and start it, it just seems easier and not as daunting.
The differnt roles that we had where:
- I started off the planning
- Inés and Luci made cut outs for the first few scenes
- The frist few scenes we all have a go at filiming
- Luci takes over filming as me and Inés are the main moving compnants
- Jean finnaly turns up so include him as the bad guy (he left afteer he had done his scene he was in)
- Luci and Inés find sound for me to use
- I edit all of the images to look correct, add transistions and sound
- subbmitt :D
✎ᝰ.
⊹ ࣪ ﹏𓊝﹏𓂁﹏⊹ ࣪ ˖
⫘⫘⫘⫘⫘⫘
°❀.ೃ࿔*
PIXALATION week 3 (editing all of our work together) (。ᵕ ◞ _◟)
/ᐠ > ˕ <マ ₊˚⊹♡


𐙚⋆°。⋆♡


Here are a bunch of screen shots of what I was doing for the editing. As I mentioned I edited the whole thing with of course the help from my group (but not Jean he left after he was recorded). My group was helping me what kind of effects I should add to the photos we took (as that's what pixelation is, a bunch of photos, its stop motion but with real people). This editing was super fun, tiring but fun. I find editing to be really enjoyable. That's why I offered to edit it all. I wasn't forced, I offered and everyone else had to get other work done as well so I didn't mind doing it as it is just fun. All of the sounds I used were given to me by my group mates.
But because I really wanted to push what I could do this experimental animation and try my hardest, I added transitions to make it feel more like a video game as well as I added a game over text, the text I wrote on paper to stick with the stop motion theme and not doing it in just digital text, I photographed it as added it to the end of the animation but lowered the opacity to make it overlay the last few frames. I am really proud of our animation, there are so many different shots and different things we did, it was fun to try out everything we were told you could do in pixelation.
I really really am proud of the editing, it of course isn't the best but I felt like with the editing I did the animation feels more like a finished project than just a bunch of photos we all took. I had to go through some of the frames to extend them and even now, though i have finished editing as my group said it was fine and of course, I will do what my group says as I also do agree. But I think if I were to do this again, probably at least hold more pictures for certain movements and try to make sure it isn't as fast, because going through and picking frames to cut up and put together and make hold was a super tedious task. I really like the transitions added with my work.
I think using them helped give the feeling that it's a video game and not a bunch of uni students running around their uni (even though that is what it is).
The part I am most proud of is the fight scene, I cut up all of the different shots we took and made sure that they fit together, I also had to get rid of a lot of photos and frames and whole sections because after watching it over and over and over again, somethings weren't needed/where too much/just didn't work.
I think the reason we had to get rid of so much is because you kind of can't watch it all back until it is in a software like premier pro but being in the software was like doing all of the drawings for an animation without seeing them all moving then having to go all the way back over it just to fix it.
The sound I added took a lot less time than going through the animation and fixing scenes, especially considering the sound was already found for me all I had to do was line it up and time it right with the actions on screen. I managed to do that and I think it came out pretty good. Something that I tried to make sure that I cooperated with in the editing that people didn’t seem to care about was i was given feedback from last weeks work and I should be afraid to add exaggeration, I still think things maybe could of been pushed a little bit further but because I am working in a group I can’t just do what I want I have to abide by what everyone else thinks and compromise.
𓂃˖˳·˖ ִֶָ ⋆🌷͙⋆ ִֶָ˖·˳˖𓂃 ִֶָ
☆⌒(ゝ。∂)
⊹₊⟡⋆
༘˚⋆𐙚。⋆𖦹.✧˚
⋆˚☆˖°⋆。° ✮˖ ࣪ ⊹⋆.˚
PIXALATION week 3 (finished product) (˶ᵔ ᵕ ᵔ˶) ‹𝟹
♬⋆.˚
Here is the fisnihed video, I am so so so proud of what me and my group have been able to produce. I love the editing, I love the sound, I love the concpet. Theo nlt things that coul be better is the speeds and totoally taking more photos to make it slower but besides that I am proud of what we have been able to create!!
(credits: Jean, Luci, Inés)
──★ ˙🍓 ̟ !!
・・・・・
≽(•⩊ •マ≼
PUPPET PROJECT ⸜(。˃ ᵕ ˂ )⸝♡
chirstmas break - the end of the trimester (starts properly at week 6)
CHRISTMAS HOLIDAY ILLUSTRATIONS ⋆⁺₊❅.☃︎⋆⁺₊❅.


For the Christmas work that I had to do it is all research that I need to have for a few weeks into trimester 2 where I will be creating a puppet for an animation (now that will be on my animation trimester 2 page bit the illustration for it go here!!). For this project I have to choose someone interesting from my town I grew up in or a interesting family member now where I live I couldn't really think of anyone interesting but someone who is very much alive and is interesting is my own mum. Now she might not look interesting or anything but I am thinking to base my mums puppet off of her interesting life. Her life is interesting but quite upsetting so TRIGGER WARNING FOR MENTIONS OF ABUSE my mum comes from an abusive household and has many mental disabilities like Complex PTSD, Functional Neurological Disorder (FND), Depression, Anxiety and Autism. Though eve with all of those 'hinderances' (I DON'T REALLY SEE THEM AS PROBLEMS THATS JUST MY MUM WHICH IS WHY IT IS IN INVERTED COMMAS) to her daily life she's still my mu show works hard every day and is super cool. My research was literally just to draw her (as well as an interview about her and her issues so I can apply all of that to my own puppet and work I do). Now at the moment I am thinking to do a porcupine puppet because I could make her just my mother bit I don't want to mess it up as Ive never actually made a puppet before, drawing her I found to be not too hard but still difficult because it was the sort of [pressure of making sure it looked like her as well I see my mum all the time and to draw her accurately is sort of nerve wracking. But I feel like making a realistic puppet of her would be even harder. Either I want to do a porcupine or another animal similar for her being a strong individual with a lot of barriers around her or a phoenix because my mum has a phoenix tattoo on her back because she "came back from hell" and is now in a happy and loving family. I have to make sure that the puppet does an action and all the drawings I did I tried tot get her full body as well as she is allows sitting (so a phoenix might be good because birds mainly sit..?). But my mum is ALLWAYS DOING some form of craft and I thought if. Ido a phoenix maybe she has magic or uses her feathers to create art. also playing into how her body has been through alot as phones do set things on fire alot and are accidentally destructive and even though I love my mother her own problems are alot to know and sometimes it isn't easy for me too watch my mum struggle and have things like seizures.
But enough about my mums issuers the drawing I did, was super fun because it was just well drawing her. I got top use different material and I did 8 double page spreads to make sire I really practiced how she cries herself and the way my mum looks. My mum ALLWAYS has her head down and is always looking down and I think for a phoenix they are quite maghestic and strong having their head down in respect for others, and I think if Incorperte that for my ,puppet for my mum it would be cool as its just a part other. Also the drawings I feel look like I drew the ball in the same day because she is always wearing the same thing but thats just my mum signature outfit. She's always wearing a long t-shirt with trousers underneath, so that also something I want to incorporate within my work in trimester 2.
-ˋˏ ༻𖤓༺ ˎˊ-
‧͙⁺˚*・༓☾ INTERVIEW THAT I DID WITH MY MUM!! ☽༓・*˚⁺‧͙
*⣾⠛⠛⠲⣤ ⣠⡴⠞⠛⢻⡆*
*⣿ ⠙⢦⡀ ⣠⠞⠁ ⢸⡇ ⁺⊹*
*⢿⡄ ⠹⣄⡼⠁ ⣼⠇*
*⠘⢷⣄⣀⡀. ⠙⠁ ⣀⣀⣴⠟*
*⣼⠛⠉⠉ ⠈⠉⠙⢻⡄*
*⠘⣷ ⡞⣦ ⣰⡟*
*⊹ ⠈⠻⣦⣤⡶⠋ ⠈ ⠳⣦⣤⡾⠋ ₊*
TRIGGER WARNING FOR ABUSE
This is the interview I did with my mama its quite heavy and its a lot for the both of us so TRIGGER WARNING AGAIN
THE STARTING OF PLANNING FOR MY PHOENIX PUPPET ִֶָ. ..𓂃 ࣪ ִֶָ🪽་༘࿐


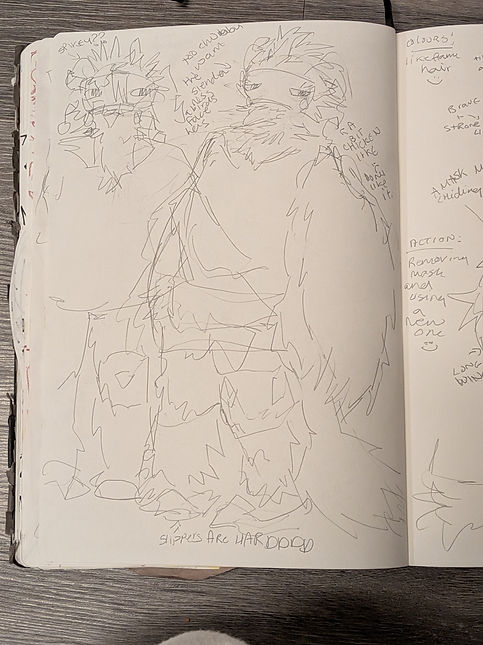
So after the interview. I did with my mum I diecided to create pintrest moodboard while listening to it back and I deicded to just draw out basic ideas for what I want to do for my puppet, in theroy I didn't have to do this I just wanted to understadn what I want to to make for the puppet so then the supplies I need are easier to get and not stress over. Of course these are rough drafts and the shapes and things could totally change when making the puppet because I have never made a puppet before so I may have an idea but it may not come out like that. I have made bad plusheis in the past with fabric and I kind of have made clay sculptures.
So I do have some confidence in the kind of puppet I want to make but I have never made a moveable puppet before as well as its gotta stand and I want to add more than just whats in the drawing.
- The basic idea on the page. I want it too look more messier than that because I want it too look like the stres my mum has been under in her life effecting her body because I mean it does she has FND and multiple issues with walking (I drew her a leg brace but it is a bit hard to see because of the fact it s a qick sketch, I labled it :D)
- I wanted to add her physical appearance into the puppet so she has glasses and a nose stuf becasue I mean thats what she has in real life too, I like her long t-shirt she has as I added a belt too because the diea is this phoenix version of my mother is a mask maer one because being creative and making her own pieces of work is one of her favorutie things to do and also because I think being a mask making sort if like a doll includes my first diea of wanting to do a double headed animal but in a different way and showing my mums different feelings from her trauma I haven't fully decided what is going to be under the mask.
- under her mask I think I want it too be an empty hole because my mum allways talks baout how if she didn't have me my brohter and my dad she wold feel incomplete. She allways mnetions how she feels like she can feel and I REALLY like the idea of the phoenix character making these masks to feel a certain way as even though sure my mum goes through therapy to help her, her feelings are soetimes hidden behind dissassociation and having flashbacks, she allways tired but around me and my brother she trys to keep up with us allways trying her hardest but sometimes has to ask for help an give in to her own body, before she got diagnosed with Fnd the forcing herself to do this was more frequent and now it has backfired and taken a toll on her body so the idea of it being this leaking black whole realsing all of these feelings and her hiding behind these masks she makes is important as it is taking a hoysical toll on her body hense the leg brace I think I want to show this wear and tare on the feathers with wires and beads and just ragged piecees of fur with leaking black holes.
- I want the mask she si wearing to change from tried to happy to show how she is allways trying even how bad her life may be or the trauma she has experienced, it showsto people who experience horrible things thta things can get easier with others around you
- The more I make these drawings and talk about my mum the more personal this project feels I didn't think it would take this much feeling for me to do this but it is I suspose its because its my mum and I am very emotionally attached to her. I want the colours to also shwocase period of my life that I enjoyed the most in my mums hair colours. The frist time my mum dyed her hair she went this red colour then she treid to fix it and it became this friey hair colour and we used to call her fire mama because her hair looked like phoenix colours my mum ahs allways refered to her self as a phnoeix and I think this era of her hair colour works well and I want to use the colours for the feather colours and the phonies itself (my mum also dyes her hair to no look like her family and. Itihnk showng her roots of a darker colour of feathers in the puppet would be cool to show that depression amkes it hard eeven to keep the scary parts of yourself away)


(๑>•̀๑)
𑁍ࠬܓ


<----- Here is the moodbaord for the pheonix puppet ideas that I made (it is labled trimester 2 pheoinix puppet)
┈┈┈┈┈┈┈┈
REDRAWING THE DESIGN (week 2 of the whole trimester not the starting week, week 6) ദ്ദി ˉ͈̀꒳ˉ͈́ )✧


There is a reason I decided to redraw the design from the Christmas break this early into the trimester before week 6.
The reason is we have been doing a lot of character designing things and something that I realized is to have a fun silhouette. I also felt like for my first puppet maybe the design I went with was too ambitious and I also felt like it didn't represent my mum enough, or well enough. So I went back through the designs I drew for Christmas and went for the one that looked more owl-like. The reason being is because owls are EVERYWHERE in my house I realized that coming over the christmas break and not being there for a while and also I felt as though owl faces give off more of a mask like feeling and remind me a bit like comedy masks. I also felt like my mum's character being small and round gave her this comforting feeling because I mean she is my mum and she doesn't bring me lots of comfort but at the same time her being small shows how she's still stuck as a child in her head from the abuse she suffered from.
I also wanted to make he look a bit more like a stuffed animal, one because stuffed animals are something that is super important to me and I want this puppet to showcase the importance my mum is too me and how strong she is for battling with constant reminders and traumatic memories but still being my muma, and two my mum has always made an effort to stitch together any of my teddies that are broken or damaged its a big part of who my mum is a caring person who just wants to help others. I want to show that through herself that she is so strong she's managed to rebuild herself maybe through some bad means (so I want to add sticking out feathers to show stress) but also through her family and talking to others (I want to show that through little beads and buttons)
I just felt like this design feels more like who my muma is and how much I love her and how strong she is for what she has gone through.
shes still a phoniex even though the change in design I am not changing the phoniex idea I really like that
(⸝⸝> ᴗ•⸝⸝)
┈┈┈┈┈┈┈┈
𝄞𝄢
⌞ ⌝
ADDING A VAUGE COLOUR PLAN (ᵕ • ᴗ •) (week 3, not week 6 but I've got to do this for reasons bellow)


⋆ ˚。⋆୨♡୧⋆ ˚。⋆
໒꒰ྀི´ ˘ ` ꒱ྀིა
┈┈┈┈┈┈┈┈

As I will be making this physically take this colour palette with a grain of salt. I don't think it will look as cool as my drawing does but, I will try to make it as accurate as possible. This colour palette is more of a reminder on what I want to make sure I add, as well as, above there is a small screen hot form I had to fill out.
As I am collaborating with another course for this project they need to know a bit about my idea, so then someone can choose what to do and make my set, I tried to give as much information as I could, But I decided to also do this drawing to send in my form so the people who will be making my set will understand the characters dimensions and hopefully also understand the kind of colours i will be using (or at least trying to recreate with the physical material I have.
I don't want the puppet to look as perfect as this drawing because I want it too have a sort of unruliness to it, so all of the different colours in the feathers are to remind me that I want to make sure I add these fiery type colours all over the place to emphasise not only a phoenix but also the unkept nature that my mum holds with her own problems and how it affects her.
All of the random splashes of colour that hope convey the feeling of beads and buttons, just reminds me i want to add buttons too it, I want to make her just chaotic and messy to show what goes on side her, mind but with a positive colour palette so then it gives the illusion that she just eccentric but actually underneath the mask she using it to hide from the fact there is this dark hole that can never be truly fixed regardless of how much she might improve her self worth or her body.
The damage is there and it cannot be undone but you can learn to live with it, that's the kind of feeling that I wanted to remind myself of.
The way I did this drawing was actually the same method that I lear in my fitz william character designing, which was to draw it physically then colour it in digitally, I just thought it looked cooler as well as I love using mixed medi and, good things was if I messed up ion the digital version when colouring with the section tool thing, i didn't have to start all over again I just had to click undo!
ﮩ٨ـﮩﮩ٨ـ♡ﮩ٨ـﮩﮩ٨ـ
(´∇`'')
New planning for the puppet I want to create ദ്ദി◝ ⩊ ◜.ᐟ (week 6)
From my other planning that I have done, well it's finally week 6 so the whole puppet plan and the whole process of what we will be doing as a class to make our puppets and what we need to do for the puppets is the kind of feeling we need to create. Now from the other planning I was certain on the whole mask thing. I am not saying I don't want to do that, but after being told that we should find something to be able to create from the character and find a moral or something important to showcase from the person that I researched.
I thought well.. I mean masks are pretty simple and the whole crafting thing felt also super simple. If it is a moral I want to be able to showcase the problem that I believe is the scariest to witness my mum go through which is Post Traumatic flashbacks.
These flashbacks make it so my mum can smell and hear and sort of just overall believe she is in a completely different area and not at her house, almost like he is a child again getting abused.
`I want to make sure that by showcasing the abuse that my mum has been through who she is stuck as and who she is growing from and how much abuse affects her but not just her, hopefully it will apply to others who experience abuse and other similar things.
I think the best way to showcase this was asking my mum how she thinks about her trauma in her own head. She said that the way she thinks about her trauma is that there are 2 young children in her head that are constantly battling and arguing about what she needs to do and how to protect her. Those figurative small girls get worse when she is experiencing negative thoughts or things like seizures or flashbacks. I thought it would be quite cool to use the little innocent girl that my mum used to be a small child forced to be an adult trying their hardest to keep going but being a phoenix as it shows that each time a flashback happens and cause that small girl to die out she grows right back to help and protect my mum in 2 different forms.
Something about the new experimentation that I did. I referred a lot more to my Christmas holiday work that I did (as well as I did initial research which you can see below alongside a cool new moodboard that I made). to make sure i captured my mum as timidness though kind hearted ness. I still want to stick with the bright colours i think because I believe it is one linking to the supplies that i have been collecting in the past few weeks as well as trauma is a very life effecting thing and making the character bright i feel like brings attention to them and makes the person or viewer of my hopefully super cool animation to understand what I am thinking about and what I am portraying.


Due to the new thoughts on how I was going to portray my mothers trauma, I thought that it would be simpler to make into a puppet compared to the other ideas I have. I also know how I am going to be making the puppet and what supplies that I will be given. I thought maybe really pushing into the little girl I dea would be god and making my mumma into a little girl possibly how she looked when she was little.ow I did actually use a reference photo for this planning that has my mum in it when she was a child but it also has the rest of her family and I will not be using on this website for her personal safety and also I think its wrong to showcase someone's abuser.
But I tried to base all of these ideas of how innocent my mum looked and the things she has been through. the more thought that I had and the more drawing experimentation I did, I started off with birds to get the phoenix ideas slowing I eventually moved onto things that I thought matched up with the kind of person my mum is, as well as things that she likes/things that link with her favourite hobby which is craft/ I chose to think a lot into moths, lion fish and tulips. Tulips are my mum's favourite flower and you can get bright orangey red ones that sort of portray fire and they have cool curly shapes I thought would be nice to use for something like the wings. Moths are actually something my mum hates, simply because it flies she hates things that fly around her and even though she hates them I personally think they represent her as a person really well. Moths are super attracted to light and determined to do what they can to get to the light, the light can also kill them because its fake light as well as moth's wings are super fragile. I could have chosen butterflies but most people like butterflies and moths are the unseen beauties of the flying insect community. My mum was pushed aside and hurt her childhood and I thought for a moral stand point months were a perfect choice as well as they seem very stunned in photos I don't know, sort of like a deer in headlights and I want that quite terrified feeling to carry in the design I am thinking of creating.
Finally lion fish because not only are they brightly coloured they have spines on their back and I think that it feels pretty cool almost like a crafty fish. I quite like the thought of the lion fish having things like needles for sewing as their spines instead. I like how it also makes them look dangerous but kind of pretty too.
After all of that research or drawing and making a moodboard to refer to when doing things like the other experiments that I started creating after the mindmap I made that helped me just remove all of the ideas I had about this project out of my head and onto paper.
HWen making the other drawings I took inspiration from my first planning that I did before the project officially started making sure that. I didn't ignore the fact that I still do love that planning and that design is still a very valuable design I will go for. But in these new design I wanted it too feel more human one because i am more comfortable with the thought of making a Juan as a puppet and also I think it would be cooler to try and make a human that looks like a child as well as a phoenix or maybe just phoenix inspire or all of the other inspirations I looked into.
These designs I felt more comfortable with as well, I felt like the creation of what I was thinking felt more like me and not like I am trying to force myself down a creative path I don't really like nor am I interested in. Through the creation of the new drawings and figuring out what the new design will look like, I have thought of ways to incorporate the idea about the mask and this is when the idea came together believe. I want to showcase the story of the phoenix through my mum's support. The story of the phoenix is that it was immortal and just wanted to die so tricked a god (i cannot remember the god) to fire a beam of sun at it and instead of dying it rose from the ashes and i think to also link in with everything I have researched into from the animals to the moodboard including Tim Burton and wanted to create that kind of feeling with the puppet, and including my mums favourite tim burton character which is salty. Is ot make my mum like a teddie thats arms and things fall of and release a sort of terrible back goopy and terrible mess that appears and my mums puppet just stitches and stabs herself with needles to keep it all under wraps and her being a child showcases how she feels like sometimes she is stuck there.
I think pheonix's are the knights of mental health. Lots of people refer to themselves as a reborn person after recovering. I mean , I would have recovered from anorexia and yes I still struggle but I am like a whole new person for the help I got through. I want to show that my mum is always going to have that trauma and always will be that small girl in her head though every time she breaks and everything spills out and she gets worse she always rebounds putting herself back together, to protect her children and to stay here for the people who love and care for her. I want her to be like a teddy simply for my ask I love teddies and I want to also keep certain aspects from the other design even though I like it I think this idea is a much better morally and good shower of my mus issues and who she really is then just being a big fat bird who wears masks and i think the bride is my mum but not her mental health which is what I want to focus on and showcase to others that PTSD and trauma is not cool and anyone can help themselves no matter how bad things may be there is a reason to keep going and things to keep going for.
⋆。゚☁︎。⋆。 ゚☾ ゚。⋆
────୨ৎ────
⋆.˚
ᶻ 𝗓 𐰁
✮ ⋆ ˚。𖦹 ⋆。°✩
here is the moodbaord I created it is called 'Trimester 2- phoniex puppet updated" ---->


Turnaround and skeleton!!
Final design for the puppet (so I can make it !!) ૮ ྀིᴗ͈ . ᴗ͈ ྀིა (week 6)

To create the actual final design for what I will be making into a puppet. I felt a bit sad for the other design I did like it and It wasn't a bad design for something I just felt like this portrays things a lot better I did a lot try to keep the ideas with the other and who my mum is now with a long shirt and I wanted to make sure that it ha a knight feeling so a halt fell appropriate From the old design they had a owl like face and I wanted to keep the nose and no offense to my mumma but she doesn't have a big nose and it is quite noticeable and a big thing that everyone talks about, but in this form of her I think it is cool cause it is sort of like a beak and follows the bird that I thought would e a good reference for this design the, Harpy eagle. From the a4 design that I drew I then needed to plan colors so I tried to look at the old design and take inspiration from that as I don't want to leave it behind. I also too inspo from the tulips I mentioned and I stuck with a bright colour scheme to also match the supplies I have at home.
I thought about different types of fire so some have a blue and pink on them as fire can create those colours but I thought it was too many colours. I want this design to be simple but detailed at the same time. I aed these hands on the shoulders and pins everywhere to keep my character together. I thought the hands were a good idea. I was actually going to do a hand face originally but I preferred this idea much more butI still wanted to include hands because there are many different ways hands can be interpreted, either as manipulative/evil, forgiving/pleaded, care/grounding, anger/sadness and I went for the car/grounding with hands on the shoulder keeping my puppet tied to the ground because the idea is that they are grey to symbolise metal as well as the hands hold a little metal pouch that hold more needles and fabric to fix herself and I just think everything about this puppet works with it self and I have been able to include all of my references within it all, which is something I can never usually do, i always end up having to drop a few because the idea became too much and too detailed for me to even comprehend or make.
𝄞⨾𓍢ִ໋
── ⋆⋅☆⋅⋆ ──
(。ᵕ ◞ _◟)


. ݁₊ ⊹ . ݁˖ . ݁
SO I had to do the skeleton that was mandatory I had to make that so I know the size of my puppet and fit it with in the limitations of how bug/small it had to be(15cm smallest, 25cm tallest) so then i could make the wire frame hopefully next week for the puppet and be able to build around it. I also did a turnaround for the puppet because I think it will help me when I do the skeleton and I am adding things to it because I will know how I would draw it and how I would hopefully transfer it into real life and hopefully make it look accurate to what I want it to look like. I am going in with this idea being completely understanding that if this doesn't work or doesn't look perfect like I want it to look because I have never made a puppet before and I fear it won't be the easiest to create a puppet but I will try my best. THe turnaround I did I did it physically because I wanted to redeem myself for the bear princess turnaround I did for the other module that I am doing. Aksi for the skeleton and the wings, the reason I added only those to the skeleton is because I want to add them as wire and create a stitched part to go over the top of it because I feel like that will be easier to create then make real heavy wings out of clay or something like that and the puppet might not be able to stand if it is like that. I also think it being felt makes it feel more crafty and fitting into the things my mum always says that she is, which is a raggy doll.
I am quite nervous for next week to create the wire frame or even start the puppet but I can do this. I am the most excited for this project out of everything that I have been doing this trimester and. I am so glad I am finally doing it !!!

˖᯽ ݁˖
˚₊‧꒰ა ✦ ໒꒱ ‧₊˚


Here is the coloured turnaround so you are aware of what kind of colours hopefully the puppet will be of course I expect the colours to be different then they are digitally to physically but I know how I want whatever equivalent colours I have to look like and where I want them to go.
Also as you can tel from the images they are 2 serate images but. Iedited it together so it was one whole turnaround!!!

──── ୨୧ ────
☆⌒(ゝ。∂)
Making the puppets skeleton (´∇`'') (week 7)

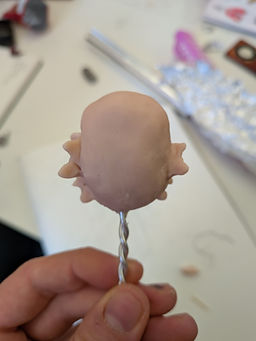
The head is complete, of course it is bald and has no helmet or color but the base is done and thats the goal for this wek, I made the forhead bigger than it was orignally when I just started so the helmet has enough space to be placed on.


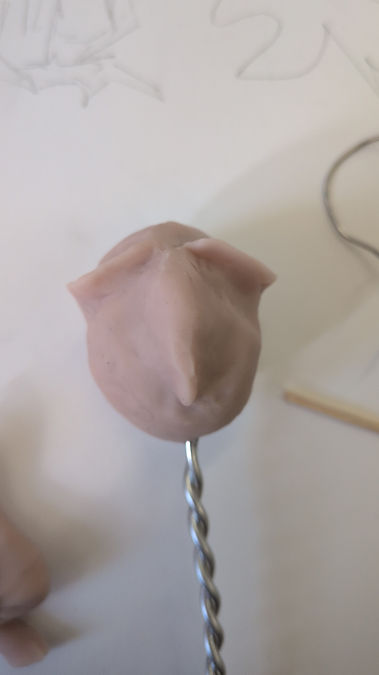
I honestly didn't think that we would be making the skeleton for the puppet so soon, I thought that we would at least just have a suepr long lecture. I mean I did miss the first 2 hours of the day due to a hospital visit/blood test, and when I came into uni I was debriefed that we were making the skeleton. As I missed the lecture I sort of was slightly lost butI wanted to make sure I caught up with everyone and most people had already finished the heads of their puppets. I didn't realize that when making puppets you need things like drills. The twisted wire in this photo was done with a drill and ye I was very scared to use the drill just in case i messed it up and I will say throughout this week of making the puppet I always forgot to hold the wire with a pair of pillars when I first spun it so the wire would fling around like crazy.
Something that i really enjoy is clay and sculpting, I would say I am the best at it I am pretty mature but stop motion and puppet making is something I have always wanted to get into so I went in the class with determination and a lot of excitement, the clay being used wasn't normal clay that is sort of bitty and you have to use water for pottery it actually was much more fun to use as it didn't get all over my hands and it just got put in the oven to harden up, which was also quite cool cause my puppet skeleton got baked which is just a funny thought.
This photo and most of these photos aren't very professional looking as I cannot scan a 3d image with a paper scanner and I have no idea how else to show my process without just taking photos of the different stages that I was at with my puppet as I went along. This photo is the first stage I got too, I used my skeleton drawing I did on paper to measure out the spine length and something that I had to consider for the head wire is that the loop that the foil had to go on had to be smaller than the drawing as once added clay and foil it would grow in size and if I didn't make the wire frame smaller than my puppet would be much bigger than I planned. I am going to be so honest I thought my sculpting was going to be really awful and it wouldn't look very good, Though with what i have produced in the first hour of working which is this image I am super proud of the head shape, It looks like my drawing sure maybe a bit more rounder and not so stunning but I really like it, I had done all of this sculpting and I felt as though the puppet looked very empty on the face.
I am aware that she will have hair and a helmet in the end as well as pins on the face but it just didn't feel as bird like as it should do, so to finish of the head I added feather that I made with my hands and the clay and I pressed the already completed face. Now the head had to have foil in it to make it lighter so the upper wouldn't be top heavy. I was sort of confused but the whole top heavy thing?? wouldn't it all be pretty heavy?? but no I am very wrong, the thing that has to be done in full clay is the feet to keep it anchored to the ground and everything else can be done with foil to ensure it's lighter. Now something that i was very scared of doing was the wings I didn't know how on earth I was going to plan that or make that, I felt a bit nervous but I thought as long as I got the body done I would then figure it out later after I had the main frame done as that is the most important thing I need a body and legs and arms for the puppet.
˚₊‧꒰ა 𓂋 ໒꒱ ‧₊˚
⊱ ۫ ׅ ✧
(๑>•̀๑)
ꪆৎ
⋆✴︎˚。⋆


Like I said I wanted to get the main body done so I made sure I did. This is where the puppet starts looking really creepy. I am not sure why I chose the flesh coloured skin. It just unnerves me a little bit but I mean I am proud of what I have managed to create. I attached the arms at home as when the day ended they were separate but attaching them without pillars proved to be quite difficult and the arms kept spinning around the frame instead of staying still which is why it is propped up against my blanket. That's when I decided to make the purchase of pillars and wait until I had them to continue. I wanted to make sure I got the skeleton completely done, I mean that is what I need for next week so I sort of HAVE to have it done though it's different for me slightly as I have had to make sure I got to the doctors for check ups for my health as it hasn't been great recently so a lot of time to work has been taken away from me for health issues.
Though as you can see from one of the images the way I was measuring things was directly from my physical sketch and making sure the clay and sculpting I was doing was matching up with my runaround I had it on my phone at the side of where I was working to refer back to it constantly. You cannot see in these photos but the feet of the puppet have holes in the bottle to where I shall be putting magnets in the next week to keep the puppet fixed to the ground and so when shooting the stop motion port if I accidentally hit the puppet it wouldn't move out of place otherwise that would make the animation all shaky. Once I had the body I became more nervous about the wings because I'm afraid that it wouldn't stand up. I mean I had faith that I could do it and make sure it did stand up but at the same time I was quite nervous, that no matter what I did it wouldn't stand?? I have never made a puppet before and I now understand why people do so much planning for it, my idea that. I had to make sure that the wings sort of touched the floor to ensure that the puppet had something to lean on, though I also want the wings to be moveable so they have to be made out of wire framing and clay and foil. It was quite a scary thought.
˚₊‧꒰ა ✦ ໒꒱ ‧₊˚
── ⋆⋅꒰ྀི১ ໒꒱ིྀ⋅⋆ ──
I made the wings!!! I just used the same process I did for the whole body, I ended up not adding loads of wing parts to the skeleton because I had to make sure that the skeleton have space to move as well as i needed to add this other type of clay called milliputty that would help shape here the "bones" where on the body and I thought I would add that to the wings middle instead of more of the heavy clay to one make sure it wasn't too heavy and too heavy as well as to make sure the wings would move. The way I cooked the clay was I put it in the microwave in my dorm room, I worked and that's all that matters.

・・・・・
˚.🎀༘⋆


⋅˚₊‧ ୨୧ ‧₊˚ ⋅

⋅˚₊‧ ୨୧ ‧₊˚ ⋅
As I had the pillars now I made sure that everything was tight enough so the puppet limbs didn't spin around the wire frame and I got to adding the "bones" on the puppet with the different clay this stuff did actually stick to my hands a bit which bothered me but it was actually the quickest part of the whole skeleton that I did, It wasn't hard at all I just put the clay here it needed to go and done, I have to let it dry but besides that its done now the whole skeleton and for my first puppet it may not be the best and there is definitely flaws in it but I am very proud of what I have created and making a puppet skeleton/frame isn't as scary and hardasI thought it would be, it si hard but I assumed it would be insansely difficult.. it wasn't.
⋆.˚
Making the puppets body (˶˃𐃷˂˶) (week 8)


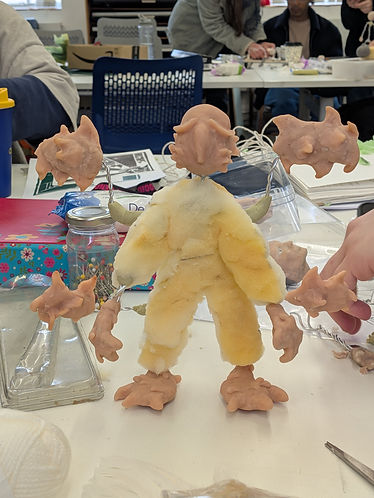
So to make the body. I had to add a foam body. The foam body proved to be quite difficult to ask. Due to the wings. The wings proved to be a slight issue through the whole body making process, but I didn't mind because I know the wings are a crucial part of the design and I don't want to change them. I was given the option to do that when I first presented my final turnaround to my teachers, and I chose not to because I want to try and make something that looks a lot like the original design. (which you will see changes quite a lot as I start to paint it, but that was the thought process throughout the whole thing).
To make the foam body I had to cut multiple different sections of foam and stick them all together very carefully which did prove to leave some gaps and I had to go through and fill those gaps repeatedly, and once the glue had dried I had to shape it which then a lot made me accidentally cut out pieces and cause tears so I had to fix those multiple times as well. But once I had the body I felt more confident. My puppet felt more like a puppet and was coming together. I did have to go home early when doing this part of the puppet due to feeling quite awful as there were so many super glue smells and it was quite bright causing me to get really overwhelmed but I knew all I needed to do was the fun part. Colour and making the puppet feel alive, and finally getting rid of the scary flesh coloured clay...
ᯓ★
.ᐟ.ᐟ
₊˚⊹ ᰔ
✮ ⋆ ˚。𖦹 ⋆。°✩
⋮ ⌗ ┆
✶⋆.˚


. ݁₊ ⊹ . ݁˖ . ݁


The next step of the process was to start painting. I thought this was going to be the hardest part but honestly this part was suepr fun. What I found more difficult was adding the foam body. As I already had the body shaped and done I decided to get some white fabric and paint it the right shade of orange that I wanted. Now as I didn't really understand how to make this look right nor how to really keep the fabric that I painted on the foam I used quick drying super glue. I didn't think it was that much of a problem at first but as I kept adding layers of paint and paint pen the fabric got more logged and tougher, which then caused the biggest problem I have come across so far. The arms stopped moving. They no longer stayed down and it caused me to panic.
I was so proud of the puppet I didn't want to have to remove the marks or have to fix something this drastic. but I managed to fix the problem by adding tears in the body to release the bind the glue had made on some of the parts. I was quite afraid to do this as I thought I was going to have to go back over everything but I actually liked the teared look. I felt that it gave it this more hurt feeling and isolated effect so maybe the mistake I made proved to be really helpful. Due to this creative decision, this is where I started to get ideas to change the puppet a bit. Not drastically I was still planning on using the white top and the oranges and reds for the wings but I wanted to make the puppet feel more childlike as it is based of my mums childhood trauma and I based it off of a childhood photo of her (that I cannot show due to privacy) but I also wanted to show the damage that has been caused not just through stitching but through other ideas. I wanted to keep parts of my mum that I see now with all of the mental health issues she has and, well this weekend that i continued the puppet on was mothers day so i had to go home anyway and off me and my puppet where on a train to see the person who I based the whole puppet off of, which was quite helpful as i got to talk to my mum about whether she thins the changes i want to make are a good idea.
The specific changes I want to make are:
- adding things like buttons and beads everywhere
- where the black whole section is I want to make that he main point of the whole puppet that the darkness she experiences spills out but she mixes it with craft and the safety of her hobbies
- Due to me upsettingly not leaving enough to have the neck be super long, i can ad he hand apron I was going to add so I thought about making a little satchel instead to hold all of the pins in and have to scrap the ide of the hands as there just wasn't enough space of any of it
- adding a giant needle sort of walking stick thing as my muma has to use one of those currently in her life due to physical problems and neurological issues that sometimes prevent her from walking well.
Me and my mum discussed all of this some of this being helped by her talking to me about how i should take my digital drawing into real life to physically hold. We both agreed that these changes were important to make and mummy said it feels more closely linked to her own internal thoughts and views of her traumatic experiences and her life currently.
Something else that happened was was finally incorrect with the person making my set now I did;t know this but the set that is being created is to be shared between 2 people so the set ideas I had originally had to be altered quite allot so someone else can use the set for their idea and there to be interchangeable parts. This has proved to be a stressful thought and I am quite nervous now for how the set will work as well as filming but I will get round to that part once the set is finished as it hasn't even been made et so theres not point planning who's going to use it when and what times as the set hasn't been created yet at all.
𓏵‧₊˚ ┊
.𖥔 ݁ ˖
୭ ˚. ᵎᵎ
﹌﹌﹌


₍₍⚞(˶˃ ꒳ ˂˶)⚟⁾⁾


── ⋆⋅☆⋅⋆ ──


☆
⭑.ᐟ
Here is the process on the puppet so far. So I haven't gotten round to the satchel, the bag, the walking stick or any other props that I have been thinking of creating ( I have tiny puzzle pieces I was thinking of using as a prop for my puppet to use in the animation I will be creating). Though the reason I didn't go any further with it is because I need stuff to do next week, as I am working with other people and I cannot go too fast or too slow, It. It's quite hard to do things like that as I always like getting things done straight away, but I understand that others don't work that way. Working like this has proved to be a challenge but I am glad I am doing it now and learning about it and not in my first ever job.
Now I would have taken more pictures of the process of doing the wings and not the finished product covered in buttons and beads, but I completely forgot as I was watching playthroughs of games while adding details to the puppet. But pretty much the way I did the wings was i got felt and wrapped it around the exposed metal and to give it more of a feather look I wrapped wool around the felt so you could no longer see the felt but the felt helped pad it out a bit more, and then I originally was just going to leave it here but everything felt too boring as well as I wanted to make sure I included everything me and my mum talked about and what i should add, so I added a bunch of small feathers using felt. I was actually going to use normal fake feathers to do it, but I decided against it as then it felt too real and not childlike enough. Once. had added all of the fake feathers I got bored of working on the feathers and moved onto the hair. The hair was so much harder than I thought it would be. To do all of the extra parts and details I have been using A LOT of super glue to keep all of this together and from the knowledge of the mistake i made when making the puppets, body look more orange I didn't get fast drying stuff I got slow drying glue but it worked much better and didn't harden like the other glue did. HWich yes made the process longer as I had to wait for parts to dry each time but it was okay as I know it would ensure the puppet could move properly. The hair is a mix of embroidery thread and felt that I glued on top of the bald head, and it is so much better to see the head like that then bald and shiny. The hair cut is bob hair cut and I really like the hair I did, I felt with the thread and the mix of felt made it feel more scraggy and messed up/uncared for but at the same time it had this sort of childlike joy to it, it reminded me of a reference my mum used when she was talking about my puppet raggy dolls were something she really liked and she wanted the puppet to resemble something like that and the hair i added apparently did that for my mum she liked it alot, which is important as if the person i am modelling it off of likes it I think am doing something right.
I then had to add the dress. This took so many attempts trying to figure out how I would work around the wings. This is where I started thinking maybe I should have done them separately but then I wondered how I would get them to attach afterwards?? so maybe the way I have done it was the best way. I don't know as I haven't done it the other way. But the way I got around this problem is with the fabric that i had I made this sort of poncho style thing I put over my character and i cut a completely empty space out of the back to fit the wings and then just sewed around the arms ensuring there was still enough space left so the arms would move as i refuse to have another not moving arm incident. Once I had done the shirt I just started adding things like more feathers and I worked on the back hole in the s=center of the chest making sure the t-shirt was still connected but also cut open and raggy using chalks to rub on the fabric making it look worn down and used. The black hole part was quite fun as I got to use different colours than red, orange and yellow like I had been using for the past 6 hours already.
The best part about making the body of the puppet this week was the stabbing of needles. I got to pretty much destroy the puppet for the sake of beauty and aesthetic so I ripped the cloth, made sure everything felt dirty and scraggy and stabbed the puppet with a bunch of needles ensuring that the needles didn't cause any problems with movement.
The holes in the feet also got filled with magnets and in the photos where she is standing on a white floor is actually my freezer at home as it is magnetic and it was cool to see her freestand.
﹌﹌﹌﹌﹌
⋆⭒˚.⋆
Finishing the puppet (week 9) ꉂ(˵˃ ᗜ ˂˵)


˚˖𓍢ִ໋❀
. ݁₊ ⊹ . ݁ ⟡ ݁ . ⊹ ₊ ݁.
⋆.˚
── .
This week I completed my puppet!! Now there have been some changes that happened to the body that were advised to me by a guest lecturerer. The guest was a stop motion animation and she gave me feedback on how to create an effective puppet with how detailed mine is. I was told not to get rid of any of the detail though make the parts that are more important well more visually eye-catching. The guest advised about the centres, so during this week I also planned the story in my head and knew I had to actually think about the characters' design alongside the story. In my supplies I have to make this puppet I found tiny puzzle pieces that I can draw on.. Now I haven't done them this week yet but I plan on doing it next week as this week I also did storyboarding and talking about the set design with the team I am a part of and planning out who is going to use what and when. The parts that I added to the puppet this week to complete it is I made the helmet, added a needles walking stick and made sure the limbs were reinforced as well as made the big black crater larger.
The black mass in the center I plan for it to be the main part of the animation as I made the idea that along with the puzzle pieces i am going to draw the dream version of what my mums puppet would look like without the trauma and the puzzle pieces to come from that broken part of the puppet symbolizing longing for change. I also want some sort of physical puppet part to represent the trauma and the puppet to have some sort of conviction along with the physical personification of the trauma. I really enjoy the other parts I added, especially the helmet. The helmet took such a long time it took around 4 hours because I struggling making it fit onto her head properly and when i baked the clay the tinfoil expanded changing the shape of it once i had got t too fut and the way I solved that was by lining the inside with padding of felt to ensure that the helmet wouldn't fall off the head. I really like the needle, I wanted it to have the same metallic feeling as the actual needles inside of the puppet but of course i don,t have a piece of metal that big so I used tin foil and felt instead and I think it came out pretty good, I chose blue for the top of the needle because its a contrasting colour to orange and th puppet is quite orange. With the extra props and parts I added I wanted it to all fit the vibe of my whole puppet carrying the feeling throughout everything so I added buttons and lots of thread. It was quite difficult to do the flame like pieces on the helmet which is why I think it took so long because the flame pieces were smaller than the biggest wings on her back making the process of not trying to get my finger stuck on felt quite difficult.
Now the guest lecturer was really helpful for me to think about the story and how I would do things, we were shown this 8 minute animation that took her a year and a half to complete and how she used different trash pieces to create things, it doesn't have o be expressive it just has to be effective and making the viewer believe that this world made is real and everything fits alongside it. I was told to get rid of the coat part but when I took it off I just didn't like it, I also realised once i cut it off that it did actually restrict a lot of movement, but I kept the coat as I felt that It completed the design though I made sure the black mass was more eye catching than it was before hand and I think the white coat also helps keep your focus on that section of the body which i was I want, I really want people to understand that this part of my puppet is the trauma, the hurt and things that wanted to get rid off all manifested. The manifestation is destroying the puppet, causing her to be covered in stitches, buttons, needles and other tears that are keeping her together.


As I mentioned I thought about the fact I wanted a physical representation of the trauma. I decided to create this trashy wired looking fish from some old socks, a bunch of left over beads and string and an old pair of tights. I was inspired by the guest lecturer to do this because I also felt like not only does it include a lot to my story it also just uses materials that don't really cost any morey. The reason i picked a fish is because a phoenix is a bird and USUALLY predator big birds hunt fish and eat them and are usually the stronger counter part, though I thought the trauma being represented as a fish is cool showing the fact that it doesn't matter if you are strong things are still affecting everyone no matter what. I really like how this looks, as it looks just like the inside of the black concave/mass in the phoenix's center but bigger and cooler. I also like how it is flat an sock like because it gives me the choice of making a slinky movement with this puppet in animation phase and I hope that, that also create this feeling of uneasiness and scary factor or just upsetting factor that its slinking around and feeling its way all over intruding on my characters life.
⏔⏔⏔ ꒰ ᧔ෆ᧓ ꒱ ⏔⏔⏔
⸜(。˃ ᵕ ˂ )⸝♡
𐙚
Storyboarding drafts and the plan of how I think the set may look like ot give ideas to my team!! (˶˃ ᵕ ˂˶) (week 9)


𓆝 𓆟 𓆞 𓆝 𓆟


⋆⭒𓆟⋆。˚𖦹𓆜✩⋆

These are the storyboards that I did this week. These are all a bunch of drafts though I have an idea of what I am going to do for the final storyboard. I plan to send the final one next week to my team so then they are aware what I will be doing with the set and how I will be using it as the plan is for me to take the set over ester so then when the other part of my team needs to use it they can. The set is split between 2 people, I don't get my own set it is a merge of 2 people, so my team is someone from my class and an interior designer and we are all communicating to ensure that we all do the correct things as each others grades and what we make depends on the communication of each other. I think so far the communication is doing alright, honestly I was really nervous to communicate with everyone but everyone being 2 people and the talks we have only lasted around 20-30 minutes and we've done 2 the rest had been over text, it has been pretty chill.
𓏵‧₊˚ ┊
.𖥔 ݁ ˖
⋆✴︎˚。⋆


𓆝 ⋆。𖦹°‧🫧⋆.ೃ࿔*:・
The whole idea of the storyboard is the phone box comes into contact with the scary blob version of the trauma and the puzzle pieces either she is going to rip them from herself or they will appear from the blob. I actually quit like the idea of the fish blob trauma scary guy popping like she's trying to get rid of it but it leaves behind the residue of what the damage is which is an almost finished puzzle with the last piece being inside of her chest and she rips it from her completing the puzzle. Now that's the sort of center and the main action, the start and the end is the thing that I am struggling with, I think for the end i want to make sure the camera gets to see all of the damage that is on the character and how much she has been affected by everything while it flickers through the face or the whole puzzle itself, but the start is where I am lost on where to start. Do I have it appear from her, or is she already locked into some form of battle in the beginning, does the fish even disappear or does it enter her and return showing that the trauma never leaves???
As these are drafts they are going to help me next week when I do the final storyboard. I hope by then I have figured out from the drawings I have done what kind of start I want. So here I have thought about the fish curling around the puppet and ending up ripping it in too with the needle walking stick and then that's where the puzzle pieces appear because. I think it utilises everything I explored in these drafts, as I quite like each draft by themselves (besides the unfinished one, it's unfinished because I just didn't know how to lead it onwards)


These are my ideas for the set, we all decided that making a treehouse like set would be interesting one so it links with my idea but having a dentist character (which is my other partners character he is making) to be there would be quite interesting and bizarre to make it slightly bizarre for my character I made it just very happy looking where as what is happening in the animation is quite dark I thought the contrast was quite good, now of course this isn't what the set will look like this is just my own idea that i have sent to my team to see if any of it will help!! next week is the last week at uni so the set I get to see then !!!! Well I hope so as I sort of need it for easter... to you know do the animation
𓅰 𓅬 𓅭 𓅮 𓅯
𓂃 𓈒𓏸
Planning for the final prop and a new storyboard !!! ꒰ᐢ. .ᐢ꒱ (week 10)

✦•┈๑⋅⋯ ⋯⋅๑┈•✦
═══════
𝄞𝄢

As you can tell from the title of this weeks work and what I planned last week things haven't gone to plan, this is just planning I have nothing else to show for this part of the plan i made due to something else taking up a lot of time but regardless these images are the plan for the puzzle and what I am going to draw, I was actually doing this is in lesson hoping to just move onto it immediately but once I had panned the puzzle I suddenly realized about the storyboard and re did it better and sadly for the time limits I have on this idea I have to upsettingly change what I was going to do, it is still going to be the same sort of premise but I have decided to not use the walking stick or scary fish I made as I am afraid that it is too ambitious. I mentioned I hoped the set would be ready in the easter well it definitely wont be.. the interior design class students deadline is completely different to ours and by this week they had only JUST started getting the final designs down and also my partner was sick and has been forthe past week so no progress has been made. I have decided to get off the walking stick not just for simpler reasons and practicality of using the puppet but because of what else I did this week which made me realize I feel like it is an unnecessary part of the puppet. THe scary fish that I made I am not using, I would love too but I just can't seem to fit it in with in the idea that I want to use and I feel like there wouldn't be enough time to fit it all in as when I come back I will only have a small amount of time to animate as well as edit it all together. As I also have to share my set the other person needs to be able to use it as well.
So the idea is I am still using the puzzle pieces but I want my animation to be very sound based on sound. I was thinking back to the guest we had last week and her animations had a lot of sound which made it feel much more real and I think to showcase trauma in a child is quite hard considering trauma doesn't have a look its not like a car you can invision, I have got to do it in creative ways. So the idea is for the animation to focus a lot on different sounds, which is fine because I LOVE sound editing. I also feel like with the new storyboard the idea has more readability than the other storyboards that I made last week, sometimes all i need is a break from thinking and I came up with things that felt more secure.


This storyboard even though it is very rough and isn't very detailed (which I do want to change as I have relaxed form a different project that clear storyboard not only have a satisfying feeling but they also help quite a lot) it has much more writing and understanding to how I want to convey the feels, I even planned out how lighting changes will affect the idea and how it will assist in making sure that the feeling of being different and traumatised is horrible. Everyone as a class also watched an older student version of their animation and the deliverables were released, 30 seconds of animation with lighting changes. Then media services people came in explaining how to use the lights which is where I had to stop all of this planning and focus on lighting.
๋ ࣭ ⭑๋ ࣭ ⭑
˚ ༘ ೀ⋆。˚
Lighting tests (っ˶ ˘ ᵕ˘)ˆᵕ ˆ˶ς) (week 10)
Now the media people came in and showed how to use all of the lighting equipment and it was incredibly overwhelming due to how bright all of the lights were and everything was humming, it was slightly awful, but I could leave as then I was told.. over the half term I would have to figure out how to book everything out and do lighting tests. Me and my friends didn't want to do it on the half term, considering a lot of the half term for easter is closed and many people will be doing it we decided for the second half of the lesson and sort of the rest of the whole day that we would all help each other do our lighting experiments and stay until we all got the done so then over the half term we could focus all on different work and not worry about having to create experiments for the lighting. I was honestly even though overwhelmed, quite excited the thought of using a bunch of film equipment and finally doing something I've wanted to do for years was really exciting, a good thing about the filming rooms is.. well they had to be dark when shooting as the lighting needed to be the thing that gave the lighting tests atmosphere.
Below this text are pictures of my process, and there are my friends. there because we all helped each other with things like understanding how the lights worked, how to set up the lighting, how to change colours, how to make a set with limited supplies, how to just use everything and we had never done any of this before. It honestly was really fun, I mean I was suepr overwhelmed but I had so much fun doing this especially when I got to do my own animation because I felt so professional and it just felt amazing to do it. I have wanted to do things like filming and stop motion for years. Ever since coming to uni I have got to do the things I have always wanted to do and this was like the icing on the cake, I had so much fun. I really would like to continue doing stop motion in the future. The whole process is so involved and it also made me communicate with others and work in a team which is something I usually don't really do as I get quite nervous to do things like that but doing stopmotion and just this whole process has been so fun and I felt so cool being able to branch out and help others as they helped me as well.


──── ୨୧ ────
⋆.˚ ☾⭒.˚
⊱ ۫ ׅ ✧
⭑


✮ ⋆ ˚。𖦹 ⋆。°✩
The whole process of setting up the lights took forever. They not only were heavy but like we had to set them all up carefully and in the right place and when each other used the lights of course we had to move them and change how the lights worked for our ideas. I didn't have any ideas for this task I just sort of went in blind using the lights as the main feel and gauge of what I was going to do, it is just an experimentation so it doesn't need a narrative, something about this process as well is I got to try a small movement with my puppet to see if they actually worked in a movement way and well they did and I was really happy that it did because I was so nervous that the puppet would have issues. The first experiment out of the 2 that was mandatory to do the animation is a bit more janky because I didn't realise how big the movements should have been and how they should have looked but once I had done it once I realised the movements needed to be smaller but more frames. I really wanted to create different contrasting things that happened and conveniently that day I had one of my favourite teddies with me so she appears in the first animation. I really like our animations so much that when I was editing all of the photos together in premier pro to make sure the timings were correct and it met the deliverable of it being the minimum of 4-5 seconds long I decided to add sound. It was more of a use for practice on what I am going to do for the actual full animation when I do it. I wanted to make sure the tests of light that I tired had one a warm feeling and the other to have a sort of cold/spooky feeling but in the nontraditional way and the sound ideas were super important on how I was going to do this. Just pretty much I used the experimentations correctly, usually I rush experimentation because I really want to just do the main idea but considering I was having a lot of fun doing it I spent 3 hours animating my short clips and I also spent 2 hours editing them together, and I wasn't bothered because I just really felt proud ofwhatI hadmade!!
I will say what wasn't very fun was how bright everything was I did end up having a meltdown when animating because I just can't really handle bright lights very well I prefer the dark much more and what was a problem was we couldn't figure out to use the camera for about an hour due to the buttons of the camera working differently to the lights which yes makes sense but we spent already around an hour learning how to use the lights properly. (I actually was the on helping everyone on the lights as I figured out how to do it while everyone was trying to do the camera and also figure out how to transfer images from the super slow computer.
⋆。‧˚ʚ ୨ৎ ɞ˚‧。⋆
final animations ദ്ദി(ᵔᗜᵔ)anima
Here is the first final video I am really proud of it I think the sound idea that I have thought of for the proper idea will work because even though that the background doesn't look anything like a field or things and you know the tiger isn't real the sounds help and the moon isn't actually there but the warm lighting makes it more convincing. With this animation I did have some issues with the exposure makingsure that both of the things in the frame were separate from each other and didn't get lost in the light but after fiddling for ages I feel like I got it and I think it looks pretty effective!!
໒꒰՞ ܸ. .ܸ՞꒱ა
˖ ࣪ ꉂ˙🫐⃟.꩜‹—
Here is the second animation this is me using clearer moments with the more frames and it worked much better than the first one, I also think the sound added so much to the animation and to me it sort of feels like my puppet is in an experimentation area to test her magic/power, ALSO FLASH WARNING NEAR THE END. Even though I know these animations aren't that good I am so happy and proud of what I have made I have always wanted to do this and I am finally doing one of my dreams, I can't wait for after eater to continue with animating and animate the final thingbut during easter I will get a better looking storyboard and finish the prop I REALLY need for this idea
(,,>﹏<,,)
⋆⭒˚.⋆
﹌﹌﹌﹌﹌
Jigsaw puzzle completed (easter)!! ݁ ˖Ი𐑼⋆


(ᵕ—ᴗ—)
˖᯽ ݁˖
This is the completed puzzle pieces, now I completely forgot to take my process pictures of doing this because it was really fiddly as the puzzle is not a normal sized puzzle it is quite small. I would say it is around the size of a palm of a child's hand which sure is big compared to the puppet but it is also quite small to draw on.
When doing this drawing I used the references that I had already drawn for ideas that I wanted to do for the puzzle pieces. The whole idea is I decided I wanted to base it off the tarot card judgement, the card usually has angles with trumpets on it or people listening to someone talking but I wanted to do my own take on Judgement the cards readability usually is along the lines of paths that you could of taken or paths that you made the wrong decision on, now in theory someone getting traumatised isn't there fault but when I live with someone my whole life who has trauma my mumma does get upset quite often that she can't be the mum that me nd my brother deserve nd its her fault. So I wanted to show that side, because I am so close to the actual filming now I have been conversing with my muma alot ot make sure i make it accurate for how she views her trauma and how it effects her she told me that using this idea with the puzzle is a very beautiful way of describing her trauma because it all happened when she was little so it's almost like she is realising what she lost through this frankly childlike acitvity of building a simple puzzle (not saying puzzles are childlike there are some really difficult ones and children could totally not do that, but the puzzle I have made its quite simple so a childlike puzzle)
I am glad that the way I am showing it is affective, becaus to be honest I hate how trauma is usally decpite, with just someone freaking out from an outside sauce reminding them of what happened (whih yes that is a big part of it but thats more PTSD reactions I want to spesfically forcus on the truama side) , I want to show that its imbedded within thay persn, it i something they cannot take away it is always going to be there but it built them as a person, sure they may always mourn what their life would of been like before hand but for someone like my mum and to anyone else who has sufferend trauma I wouldnt change what had happened to them of course I don't want it to of happened but it builds you and you learn from it and my muma wouldn’t be the person she is wtihout it which suks because I would prefer that she didn't have terrible trauama because it is diffcult and awful to see what she has to go through and I cant imagine what she feels like butshes the strongest muma I know and I am glad I get to be with her.
── .✦
Script (˶>⩊<˶)
Now I didn't plan to write a script and i dont need to like at all for this project but I have done it for a different project and I realized that it helps me a lot usually when I am making storyboards I get really confused on where to go from a place or I get lost on what I planned next, writing things like synopsis is okay but. I didn't realise how beneficial scripts were until I actually did one so I wrote on, to describe the draft stated so then when making the new storyboard it would be clearer and I would have a description to go alongside each part of the storyboard I make.
Now I have been in communication with my set builder over easter and when i am writing this the set isn't completed so for the storyboard I am going to just have to plan what the movement of the puppet will be without the background visuals which is okay I mean the most i need to know is the movement and then I guess I will just have to figure out what camera placement and where I want each of these moments to take place on the day of filming.
It isn't ideal butI don't really have the time to be picky. I need to get the filming done as soon as possible to edit everything together. I cannot wait any longer to delay the making of the storyboard I need to get this all down so then I feel more comfortable with the plan that I will have so then filming feels a lot more comfortable because sure I enjoyed doing he filming last week though it was hard to decide where to go from place to place in the small clips I made because it just wasn't planned out with a storyboard and for something that has to be around 30 seconds or more in the finished product having a plan is crucial so I don't get frustrated or things don't make sense. I need everything to flow and this script is going to help me not just for the film but also for the editing side of things due to the fact I can explain why I am going to use certain noises so then future FLYX!! has a clearer plan and they don't have to stress.
₍ᐢ. .ᐢ₎ ₊˚⊹♡
.𖥔 ݁ ˖


── ⋆⋅𖤓⋅⋆ ──
.𖥔 ݁ ˖𓂃.☘︎ ݁˖
﹌﹌﹌﹌﹌
❀
⋆.ೃ࿔*:・
꒰ྀི১ ໒꒱ིྀ
Storyboard ( ꩜ ᯅ ꩜;)
read left to right
*ੈ✩‧₊˚
⋆⭒˚.⋆


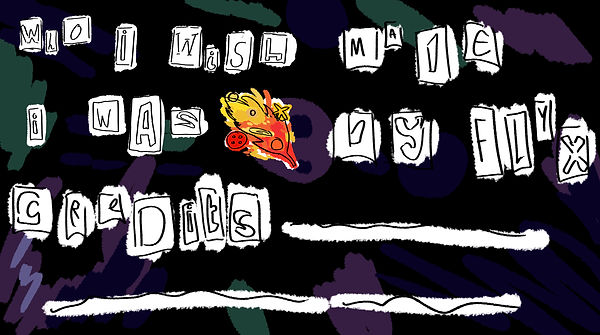
⋆˚☆˖°⋆。° ✮˖ ࣪ ⊹⋆.˚
Here is the completed storyboard. I am really happy with how it turned out. I didn't plan on colouring it but with the sketches I did. They were difficult to read and adding colour made it easier to read for me, Now i know it looks bit weird considering the set isn't done so the movement and what is happening has no setting or anything but the plan for this animation is that it is based a lot around sound and the sound was like the main part to the movements and why things happen. I didn't flesh out all of the movements entirely because when I get to the filming it is going to be difficult to gauge how much space I will have as the set isn't done and I do not know the dimensions for the space I will have for the puppet to pace around like it is in one of the scenes of the storyboard.
To show when the puppet stands up to pace around i made a scene with just a wings the idea is for the wings to go up showing the movement but from a different way as I am going to be honest my puppet is quite stiff and I don't think I could get a fluid standing motion so i have planned it around the movement abilities that I have given myself but it has given me help on how I will know how to do things if I want to make a puppet in the future (which i do so i will make sure not to use adhesive super glue as it made the foam really stiff and figure out how to cover the foam efficiently without messing up the movement that I had before hand.
The fade scene is to make sure that I don't spend too much time on filming and get caught up with movements that don't need to be shown as they are repetitive and just boring to watch over and over again. It is also because I want to use it to show a timeskip and change the lighting to be more of a nighttime lighting and hopefully it will show a time skip effectively and be easy to understand, not too confusing and out of place.
⊱ ۫ ׅ ✧
˚ ༘ ೀ⋆。˚
₊ ⊹
˚₊‧꒰ა ✦ ໒꒱ ‧₊˚
The set... and the changes (·•᷄∩•᷅ ) (week 11)
It's after Easter and a lot of things have changed, I mean the whole set has I had to take off the clothes for my puppet, and I basically had to build an entire interior of a set in 1 day. It has been a really long and tiring week.
First up the interior design student that I have been working with well.. lets just say th set was not great nor useable it was bent at the bottom and didn't have a magnetic board to keep my puppet in place, everything was extremely unstable and half of the props I never asked for as well as everything inside the set was way to high up and a camera wouldn't be able to fit in the design at. Now of course maybe I should have communicated more I don't deny that but I did see this outcome before this week in the half term in easter and I said it looked good because I THOUGHT it was the beginning stages not the final stages and the student who made my set also barely spent anytime on it. I think the more annoying thing was that this set isn't just for me. For me and someone else in my class and we were both pretty displeased with the set it was quite discouraging. I do feel bad for saying I didn't like it because I did, I thought it was fine it was just practically unusable as well as everything about it just seemed rushed and unfinished. It didn't feel complete at all whichI think is the reason why I felt so displeased. It was a good start and I think if the student had spent more time on it then it would have worked. But the interior design teacher was very nice to me and my other partner in this set. We were allowed to modify old sets from a few years ago or just destroy the one we already had and work on making it look better. I decided to take old art and tailor it to my own idea and my partner took the old set because he needed a different bass to me and he thought it would be more efficient to what he wanted to do.
So I was given an old final major project from an old student from 3 years ago and I was given full freedom. I could destroy it and do whatever I wanted. I originally made these cardboard prop things that I was going to stick on the original sett but they just ended up looking very good i wanted to make sure that the set as I know had control over the whole thing would match the chaos of trauma that i wanted to dictate and the childlike feeling that my mum describes and her loss of childhood that comes with the trauma she experienced. All day I spent pretty much pulling apart and old set and practically destroying it I made so that the walls looked like a child had painted on them but tallys were there to show how long the puppet had lived there for and counting the days that the trauma may finally be over, I took pillows that were made from old sets as well as these tiny books I made 2 soft toys and stuff them in the set as well I made a blanket and I chose this old set specifically for the windows in the back I thought it would be cool to use lighting from the windows as well it created this sort of charading feeling. I added lots of purple and black string hanging from the ceiling because it felt like a visual presentation of the trauma looming over my puppet at all times because it matches the inside of the puppets chest. While I was making the set I used a lot of cool colours to ensure that when the puppet was placed in there she would stand out.
Just because this is a physical project doesn't mean I can give up on the fact that I need to work on colour theory and how things react with each other so I tried desperately to focus on that. While I was doing the whole set, I was given the recommendation to take off the phoenix's clothes. I was already given that recommendation beforehand by the old guest lecturer that talked to me and the class about stop motion. But this time when I took it off I didn't hate it I thought the set was busy and chaotic enough but a different colour so that the phonies stood out a lot more, with the jacket on that she had it made her sort of blend in to the background and loose the importance of her chest cavity. I'm glad I finally took off the jacket. Something about this set that I have altered is that it's much smaller than other sets for the puppets but I plan to showcase the fact that trauma is something that feels inaccessible but you can heal from it. Using a smaller set I hope to bring some of my clothes when I a filming the video and create and set outside the set showing that at any point the bird can leave the cage but this is safe and familiar no matter how painful it may be, and that also solves the problem of the set being smaller than it needs to be.


This is what the set looked like beforehand. It had a very peaceful feeling. All of the pros inside were things that I had found from other areas that I intended to use. I took these photos specifically to show the change in what I did, everything feels very inviting and fresh look to the set due to the windows but I saw how I could take that and turn it into something more unfriendly but friendly to a child who is traumatized ( I also communicated with my mum about this new set to get her opinions as i mean this puppet is based off of her after all and her trauma and she liked this set due to how caged it felt even with the windows having a big open space.

Here is how it looked after as well as with the puppet in it. I really like the after and how it looked, the bottom of the set is black because that is a metallic sheet that I have so my puppet will be a bit more secure when I am animating.
I plan to do the animation this weekend as I only have a week left until uni finishes and I need to make sure I can use the facilities of uni as much to my advantage and I can edit the rest from my house until the deadline on the 5th of may!!
⋆。𖦹°⭒˚。⋆
✩₊˚.⋆☾⋆⁺₊✧ 🌌
✧˚༘⋆。˚✶⋆.˚
⁺˚⋆。°✩₊✩°。⋆˚⁺
ʚ₍ᐢ ›̥̥̥ ༝ ‹̥̥̥ ᐢ₎ɞ
.𖥔 г ˖
⊚⃝⸜(。∵。) ⋆。
✶⋆.˚
*ੈ✩‧₊˚
⏔⏔⏔ ꒰ ᧔ෆ᧓ ꒱ ⏔⏔⏔
˚˖𓍢ִ໋❀
﹌﹌﹌﹌﹌﹌﹌
. ݁₊ ⊹ . ݁ ⟡ ݁ . ⊹ ₊ ݁.
﹕ⵌ┆

Here is the set I didn't use :'( I do like it, it just doesnt feel completed
Stop motion animating, the final video ૮ ྀི◞ ⸝⸝ ◟ ྀིა (week 11)


.✦ ݁˖
✮ ⋆ ˚。𖦹 ⋆。°✩
﹌﹌﹌﹌﹌
໒꒱ིྀ༝⁺
੭﹕﹒
.𖥔 ݁ ˖ִ◝(ᵔᗜᵔ)◜༄˖°.
── ⋆⋅☆⋅⋆ ──
𝄞⨾💿✮˚.⋆
✶⋆.˚
˖ ݁♬⋆.˚𝄞
༘˚⋆𐙚。⋆𖦹.✧˚₍ᐢ. .ᐢ₎.⋆♱⃓
*ੈ✩‧₊˚༺☆༻*ੈ✩‧₊˚
( ⸝⸝´꒳`⸝⸝)✮
(´∇`'')๋ ࣭ ⭑๋ ࣭ ⭑
‿‿‿‿✶𑣲⋆
༄.°
☆⌒(ゝ。∂)
✶⋆.˚
-ˋˏ✄┈┈┈┈
On the weekend of week 11 I did the filming, not the editing, just taking the photos to then be put in premier pots and made into a complete video. But for the filing process it was a lot of fun but very tedious and time consuming. When doing the animation I actually restarted twice because I couldn;t get the lighting correct in the first scenes. That was the part that took the longest taking the lighting and changing it when needed or making sure the lighting gave off the right vibe for the scene. In certain parts of this animation I used the lighting to my advantage to make it seem like something magical was happening. Though a lot of it was ensuring that my character was in the focus not in the background. Luckily without the top that she had it did make her a lot more stand out from the background due to the difference in warm and cool colours.
Now due to my smaller set compared to what it WOULD have been, I needed more space then I had so I used a table and brought in some bedsheets of mine to create other parts of the set. I had a box in the right corner so I could put little led lights in there and could change how far away and how close that particular spotlight lighting would be on my puppet. Now only a few days ago did I say I wanted to break the fourth wall and show that she can leave at any point . Well when I started filming the reason i had to restart twice is because I realized that my storyboard that i Planned, one didn't work very well for this new set as I never planned for this to be the final set as well as even though the story is big it was more like keyframing than a storyboard and it didn;t have enough frames to make the video as long as I wanted. So instead of completely giving up I used the final storyboard image as well as sections from the planning storyboards where the phoenix does actually kill this weird sock fish. I am really glad that I kept that in right to the last second. I feel like it really added to the final video and helped convey the anger that trauma does create as it affects your whole life.
Something that I was super proud of when animating this was I moved the camera around a lot, I wanted to make sure that I tried to ensure that I responded to feedback that I got this week from my lighting tests which was to make the movement a bit more fluid and use different camera movements to make the story a lot more enjoyable to watch. Due to the lighting practice that I did, I did actually find that those particular lighting tests I did really did help as I stuck with the purple and the warm lighting I also did keep cold lighting but compared to my script the cold lighting was at the end not the beginning because I felt like it fit better being this warm environment that the comfort comes from but it being a whiter colder light to show that it actually is hurtful. I know that moving the camera around isn't that impressive but I wasn't proud of just close up shots or anything I am proud of the fact I did over the shoulder shots of my puppet as well as a shot from being outside the window I felt that they really elevated my work and made it just that bit better.
I did do this filing process with a classmate who is a super good friend and we helped each other set up nd fix out camera as for a long period of time when we were filming my camera refused to focus no matter what we did and we had to watch tutorials and go through all of the settings together trying to fix it. Now the animation only has to be 30-40 seconds. I am not exactly sure how many pictures that is but I have taken 540 photos and I am going to make sure that when I edit it I focus on the timing as that is one of the biggest responses I got back from my practice tests. Though instead of it being about the tone/colour this time I was actually told that the colour and everything was working well I think it is because it is not digitally?? I am not sure what difference it makes for me but doing things physically makes it easier for me to understand how things should look. I really enjoyed messing around with the lightings to create dramatic shadows and I also used different ways to show the puzzle pieces being ripped out and being made because I felt like if it was the same actions over and over again it would be pretty boring to watch and in the 'final' storyboard I did plan to focus on different parts of the phoenix body but I had trouble getting the camera set up to do that so I had to compromise and use that idea but change it slightly using lighting and jump cuts to help along with the passing of time. I was really nervous that my puppet wasn't going to be articulate enough considering when I did one of the tests I found she couldn't move her legs very well. But I got around that by just cutting out the legs when I was framing and moving it in certain ways that was better than the tests I did to make it seem like she was walking or moving around the set properly when realistically she cannot bend her legs at all.
Something that I do regret is this animation took a lot out of me. Now I am disabled and I sort of neglected my own personal needs when it comes to something like this because I just want to do it and get bored with the world and universe and story that I am producing. Now that's good for work terms as I get it done, though for me as a physical little guy who does need rest I suffered. The day after the filming as I was there for 11 hours alongside my friend, I could barely walk and I was incredibly overwhelmed. I still am a bit and my legs still hurt quite a lot but not as early as bad as it was the day after all I was doing was laying in bed and crying because it was really painful and I was exhausted. This process has taught me that i find stop motion really enjoyable and fun and it's much easier to understand what I need to do for the animation as it is all physically in front of me and I sort of just get into the zone and let it take me but I think ifIam to do this again I need to find ways to work around ,y own health as I really regretted how I felt, not the animation just the physical and mental exhaustion I put myself through.
Now besides that for the next stages which sis next week and a few days after next week before the hand in is I want to add tears to my puppet but with 2d animation, I also need to just edit the whole animation together so the images aren't super fast, I need to add sound as that is a very important part of stop motion animation it makes these puppets feel like they are in. real space, and i also want to add a title and an ending card for it, it will be difficult but I am determined to do it all before hand in and have it ready to submit because I am really passionate about what I have created and I would love to continue doing things like this.
ᝰ.ᐟ
Making 2d animated sections (week 12) ꉂ(˵˃ ᗜ ˂˵)
Now I am very passionate about this project and I mentioned last week what I want to be able to do and I am sticking to the plan. I am not skipping out on any of the extra parts I want to add. I could just edit it and add royalty free sound on top but that isn't what i want to do, I want to try my hardest even if my hardest isn't a lot extra it is still extra that I am committing to. Now of course I didn't want to take away from the stop motion aspect of the film that I will be editing later but I wanted to use it to just give it a little bit more life. There are no eyebrows or eyes for this character so I have used little motion things you see on the side of her head to express times where I think it is important to show the exact emotion that she is experiencing. This wasn't that hard, I mean it was barely 2d animation. I did add tears to 2 frames that I animated on the one that is the sitting down one is very fast simply because I have learnt from my mistakes of doing my Wednesday projects. I can always slow things down in premier pro. It's much harder to speed the map and things start lagging. I also made it the longest clip as I want a sort of dissolve to the next last part of the short film that I am making, so then you can still see her crying but it disappears out of sight.
Even though what I have done is very simple I really like the texture of the brush I used. always forget that brushes have different presets and I used this charcoal brush I felt like it fit with the vibe of the whole animation and I also liked how it felt like a child's sketch and I felt like it fit with the subject of my animation quite well and th way that there are small gaps in the lines it self because I mean it is meant to give off the effect of charcoal which does happen when you draw physically. I don't know, I just really like it a lot. I didn't animate these over multiple picture as I am not reassure how to do that in position I believe it would be the same way as the experimental animation I did in week 2 but I don't want to mess this up as I quite like what I have so I did it on only singular images and i think it will give the animation once I edit it all together a pause every once and a hie in the animation and also shows the importance of the sort of emotion that the character is feeling. Purposefully pointing things out but not too much that it ruins the hidden mystery vibe I want with the trauma that my mum has faced as I want this mystery vibe to showcase the barriers that my mum has to break down in her own head to access the trauma and heal from it. (that is what I hope is symbolised by killing the weird little sock monster and then pulling out the puzzle pieces. It's like she's healing in front of the audience and it's hard, hurtful but she's doing it and that's important, moving from one place to the next. continuing to be the strong mama that i now her as)
Something that did occur when animating these small short clips was it was incredibly laggy I tried to originally do it on tv paint but every time i importate jut the one image it would important literally every single image i took in the folder. I tried to figure out why but it wouldn't work. I also just prefer animate?? I mean I am more used to it and I know how to import images there, I wonder if it just because of how highly rendered those images were?? that it was again I am not sure or maybe it was the software itself because in tv paint even with importing 540 images yes it was laggy but not s laggy as adobe animate, I did try fix it while I was animating but I just couldn't figure out how it, but whatever I got what I needed and wanted ot get done so regardless of lagginess I pushed through.


✮⋆˙˚. ᵎᵎ
𓏵‧₊˚ ┊
(ᵕ—ᴗ—)
♡⸝⸝
. ݁₊ ⊹ . ݁˖ . ݁ (¬`‸´¬)( ˶°ㅁ°) !!
Creating an intro and an outro I can use for my editing (╥﹏╥) (week 12)
An outro and an intro. I mean the outro was really simple just writing my name and credits to people on a photoshop canvas and I will just fade that in at the end of my animation once it is edited. Though one the intro I had a little bit more work cut out for me. Now originally from my storyboard I planned it to be the title "who I wish I was?' but I just didn't feel like it fit anymore it just felt.. wrong? Maybe something about changing [arts of the animation in the filming or the fact that I felt that the title didn't express the upset enough. So I decided to remake the title screen. The actual title was easy the same as the outro just wrote down the new title and had a colour in the back of it. Now in the storyboard there is a singular feather in the first frame of the title and. I wanted to keep that single feather but I wanted to do a little more to the feather than just being this suepr boring still image. I decided.. I ll animated a feather falling in front of the screen. I wanted it to be a little feather to hopefully showcase how small you feel against the big question that I wrote down on some paper to remind me what I chose. I changed the title to 'Someone I'll never be". I felt like that fit better because the tarot card that I based the puzzle off is about missed paths that are lost or not found and I felt this title also carried more weight and it felt much more like a personal grudge someone would hold against themselves and not let it be seen by others. The whole point of this animation is to visually represent how my mum feels towards her own trauma so I felt like this title was better.
Animating the feather falling. This is something I have never done before. I have never seen the need to try and find a reference of a. feather falling online but i couldn't find one i dont know if I was just searching the wrong thing but I kept finding experiments between bowling balls and feathers instead of just a video of one. So I had to make it up. Not ideal I am aware of but I don't just have a feather on hand and I didn't know where I could acquire one.
What I do know about feathers is they carry a sort of weightless quality and that was super important to be able to show that in my intro feather. So I decided to do keyframing which I completely forgot to export or take screenshots of as it didn't even take me 5 minutes. I just put blobs on my track path I made on where it would be at certain points. Anyways I continued to animate going back and forth creating more frames then changing the timing over and over again until I had the right speed. I did this animation in tv paint as it is much easier to use layers and it didn't lag at all. I did have trouble lining it, trying to keep it the same size and also make sure the easing that I wanted to do looked effective.
I am actually quite proud of this animation, I mean it isn't the most complicated but it was much harder than I thought it was going to be. It needed a lot more frames than I expected and I needed a lot of patience to ensure that the feather gave a sort of weightless quality. I didn't just want the feather to be falling straight down cause that was boring so I made it swirl around the whole screen as that felt appropriate. I want to do this more often adding 2d animation to things that might not require it but I think it just makes things more exciting and fun to look at. I originally was going to have the lettering of the intro and outro be like building blocks but once I had finished animating the feather I felt like the building block idea wouldn’t work i looked abc into my storyboard and thought well instead off the background being dark why not I just change that to have the background be light and the lettering be dark. I felt this was more effective and wasn’t too busy to take away from any of the text needed to read as well as the animation in the intro..Now the letter I used to write things, I just wanted something that looked cool and I am not GREAT at bubble writing but I din’t want to use text as feel like that always doesn’t have the write feel to it. So i tried don my best bube writing but song sure some of the letters backwards and some bigger/smaller as i felt it gave it more of a childlike though chaotic and difficult to understand feeling!!


This is the title but I exported it wrong and somehow I made the text bright I thought it looked cool but It would blend too much with my fether so I didn't use it
₊˚⊹ᰔ
﹌﹌﹌﹌﹌
꒰ྀི১ ໒꒱ིྀ
──── ୨୧ ────
<𝟑 .ᐟ
── .✦
༘⋆
⋆✴︎˚。⋆
⋆˚✿˖°
⚝
✩°。𓏲⋆.𖦹 ₊˚


﹒⌗﹒❤︎﹒౨ৎ˚₊‧
Editing to get the timings correct!! (week 12) 𐔌՞. .՞𐦯


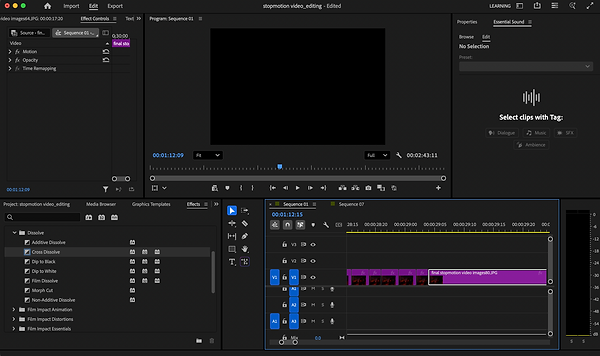


For the creation of the film itself this took ages, almost an entire week of editing. I think I may have over estimated how many pictures I needed. When I was actually recording it I thought it wasn't too much. I assume because it is in pictures and usually just simple animations there are unexpectedly a lot of frames. I just did as many as I could with the storyline that I have. Now I don't regret it becauseI am proud of what I have created but the editing which I usually enjoy was a really difficult process. Because there were so many images, premier pro kept crashing every time that I imported too many pictures at the start. I spent around 3 hours finding a system to make sure that premier pro wouldn't keep crashing. Putting all of the images in a sequence wasn't going to work. I tried that and it couldn't run at all. I tried to import all 540 images by hand without a sequence and it also crashed. I imported only 400 still crashed. I pretty much kept going down in the tens until I figured out what the premier could handle. Now it could handle around 30 images being imported at a time but I also found that when trying to use the scrubber along the time line the pictures wouldn't load fast enough and everything would lag. And so I had to break down everything I needed to do into 10's. Importing 10 pictures at a time editing them to be the right speed then importing another ten next to the ten I already edited having to go through the older edited images to make sure they all matched up.
Sometimes if it was a change in scene the editing for the other images wouldn't have to change but if it was all the same scene I had to go back and forth so much constantly changing the frame rate and the speed of certain pictures and how long they stayed on the screen. Some of them stayed on for a long period of time as there is going to be a louder longer sound effect but most of the movement (which was pretty much all of it) barely ever stayed the long on the screen so the movement was smooth enough in the frame rate that I had to stick too which was 12-12.5 frames per second.
The frame rate was the thing that caused my animation to be so long when filming I completely forgot that the editing could be done in 12fps and because of that I had 540 images doubled up some made even longer to hold on to a screen or make sure the viewer had enough time to process what was happening and it ended up being 2 minutes. The requirement is 20-30 seconds but I can do more if I please. I am still really proud of what I've made regardless of the time. I wouldn't say it is the best at all but I would say for my first ever stop motion animation I have had a lot of fun and it overall has been a really good learning experience for other aspects of animation as well. Doing the timings and editing it all together helped me understand stuff with easing and readability. I had to keep watching it back and forth to make sure even just me could read it. I have never really thought of my work like that at all I always get too caught up in what I am doing and what I can see but this time I think maybe because it was broken down bit by bit and i was just having to constantly change it due to the process of importing the images it made me think about my work differently.
I was thinking in terms of 2d animation as well that I should use a similar process not look at everything as one whole thing take it in sections, Doing this editing in sections yes took me longer than I t would off if I had just done it all at once but what It did teach me is pacing and timing , It helped me put in cross dissolves that I felt were necessary to show the passage of time. It helped me put the movements of arms or wings flapping that some of the frames need to be longer than the others. I thought about certain sounds specifically in only certain sections and how long I want the top rest for so the viewer can keep up with the storyline and not get lost. I also felt like this editing and filming process helped me a lot with colour theory that I struggle with using the warm toned phoenix against the cooler background and the different lighting really helped me think about shadows. I know this is a very silly thing to say but I think I should use more references more often for shadowing and things like that as stop motion do the hard part that I struggle with the most making effective and reliable shading. When editing I also had to add the animated clips that I wanted to add in and they were actually really easy to just import nothing went wrong with those for some reason only the image files kept crashing but I eventually did it after 4 days of editing it together and recording foley in that time as well .My final product that I made, isn't the FINAL thing and is missing the sound and the intro and outro but I have gotten the first step done in completing it and it makes me feel really accomplished, that I did that, i made a stop motion animation for the first time. I would love to continue doing stop motion or 3d making because I found the process of doing everything else in the animation much easier. Not saying I don't love 2d. I just found my style and the way I work very physically and sceptically with a lot of energy in my work. I just felt like I worked much better with it.
Something I'm really proud of in this animation is the camera shots, I usually always struggle with camera shots in animation and understanding how things would look but I could just move the camera and set it all up, I could see how different things looked through the camera and not just lay on a drawing, it felt more easier to understand that dynamic shots really do assist in film making and creation of mini movies or animations or even comics.
Her is a sequence of just the first movement I plan to have the phoenix puppet to be sleeping and waking up to a gross but scary noise I really liked how the animation worked alongside the movement of the puppet I think it just looks really effective and it doesn't feel out of place because the brush I used gave this pencil/crayon feeling and i think it fits with the vibe of my animation. Something that is slightly a problem with this animation is when I kept exporting it it KEPT crashing so I do have different versions of what stages I was at but I am not sure how well they will play as I didn't realize until when I finished making the whole animation one of my friends helped me fix the lagging problem by making the file less HUGE and I am so glad I found that out as it was becoming a concerning issue the further I got into editing.
I also realize that yes this is a very DARK scene and animation but I think for my editing I added enough light to make the background seem dark and mysterious and seem sort of protective but also have a set of sucking feeling like she's stuck inside the "black hole" of her trauma.
˚˖𓍢ִ໋❀
⋮ ⌗ ┆
⋆˙⟡
──★ ˙ִ ࣪𖤐 ̟ !!
。𖦹°‧
═══════
﹌﹌﹌﹌﹌ ૮◞ ‸ ◟ ა
These are my progress videos that I exported. They lag ALOT due to how large they are but I am happy with them. I do know I was so tired doing this it has been exhausting though i love it!!!!!!
The stopmotion final animation sequence!!
⋆.ೃ࿔*:・
── .✦
⋆˚𝜗𝜚˚⋆
──── ˚₊‧꒰ა ✦ ໒꒱ ‧₊˚────
˚˖𓍢ִ໋❀₍ᐢ. .ᐢ₎
I think the only thing I am going to change about this animation would be when the puppet puts together the 2 pieces of puzzle simply because the foley I have made I realized needs to be longer so it fits correctly and has enough time on the screen for readability and doesn't just skip past it. But besides that I really like this, I love the lighting changes as well as the puzzle making animations because I thought it would be boring to just watch the puppet put multiple pieces together over and over again so I used a different technique showing parts of the body moving and i will put the same noises that the puzzle pieces at the start will have to link that noise with building the puzzle.
So I started doing the foley recording when I was pretty much almost finished with the video that I was editing (as seen above). I got assistance from my partner to help me just click buttons on the recorder that I rented out to use. Now the recording process was really really enjoyable. I knew that I wanted specific sounds and the whole reason I decided to do finely was for that, I wanted specific noises, mainly squelching noise and sounds that I think would be good together for overlapping. As I mean, I will be editing some royalty free sounds in as some of the sounds I couldn't source that I wanted as well as I only recorded the magic sounds I thought off when looking through all of them. The images I had taken and the half edited video. I might just need over sounds effects that are different from the ones I recorded if I need something that I think I missed when I am doing the sound editing. I also want to use royalty free sound as I want to make sure that the animation has good sound. I am not saying that the sound me and my partner recorded is bad.I am just saying it might not be the right vibe or be too quiet or something might have caused it to go wrong.
Now to explain the sound recording I would have to explain it as interesting. It didn't go exactly how I planned . I knew I needed to record specifics but it was so much more different to what I imagined it would be. I wanted to make sure I didn;t get too messy as last time when I did the recording I made an absolute mess with pretty everything. After the first few sounds that I recorded everything was pretty average not too dirty though the whole specifics that I've been mentioning the main one was a sort of squelching flesh noise I wasn't sure how to make the noise until it hit me, I had old jelly that I forgot to turn into jelly in the back of my fridge as well as i have this jam that had barely anything left inside of it and instead of not using it and letting it go to waste as that was the fate of it in my fridge I thought I thought I would use it. Pretty much what I did was a covered my hands in jam and jerky and just started squishing like crazy.
Lots of the supplies I used to make the sounds were all pretty real supplies you would find in a house like rubbish from my bins I things like closable lids on tupperware and necklaces. Though these normal objects were being used weirdly like my partner dropped his necklace into a frying pan and it made just the right falling effect that I wanted. I also really enjoyed the fact that I truly thought about it in depth and knew that I was going to need to use my household items I just didn't know how but after cutting a pear up repeatedly laughing at almost every time I was covered in jam and ripping many things up to make the right sound was jsut a fun experience, of course it was stress full I mean making sure everything was quite was the great I have an extractor fan in my apartment building that doesn't turn off and shutter on many of the radio lips you can hear it my
But I honestly think it works quite well with the whole seriousness and mystery element that I was going for. I very much expect to be using royalty free sound most likely from pixabay as I feel like the quality would be better and also takes my life a lot more easier as i need to get this unfinished before the hand in date.
I have put the sounds I have recorded next to this text, some of them have aot of laughing in it because well being covered all up your arms in jam is quite a funny thing to expereince, and overal trying not to laugh when it is dead silent is super hard, though when I use the sound bites in my project I am going ot cut out the laughter from important clips I would like to use because the laughter doesnt belong in certain places and it also breaks the immersion of the film.
Recording foley (week 12) (˶>⩊<˶)
૮꒰ ˶• ༝ •˶꒱ა ♡
𑁍ࠬܓ
═══════જ⁀➴ ♡
═══════જ⁀➴ ♡
𐙚⋆°。⋆♡

Sound editing (week 13) ૮ ྀིᴗ͈ . ᴗ͈ ྀིა
⤷ ゛ ˎˊ˗
ִ ࣪𖤐
⏔⏔⏔ ꒰ ᧔ෆ᧓ ꒱ ⏔⏔⏔
₊˚⊹ ᰔ


For the sound editing I actually planned to get it done last week and well all of the other editing (which is just putting the intro and outro on the front and end of my animation), but last week I struggled with personal problems and I could barely move or do any work but after a few rest days and taking a break I got back to the grind and started doing my work. Considering I had everything to go, this was the last stretch out of all of the things I have done for this trimester. I left this task till last so I could give my full focus to it.
I was so ready to just throw myself into it. I used my own foley and the sounds I made I am really proud o, I mean everything works together. I thought that my sound recording would've been a failure. I mean I was proud of what I did but I was afraid that most of it was a failure and it wouldn't work. I am not sure why I was so negative, I mean a lot of the sounds. didn't use or I cut them up just to get the right part of the sound byte that I recorded. But the sound improved my animation ten fold. I was so nervous that the sound wouldn't have elevated it, I was more afraid that the sound would actually ruin the way my story was planned out. Considering all of my worries I still tried. I wasn't about to give up now at the end of the project. The week before hand in I have to make sure it is the best it can be.
Whereas the editing of the photos took around an entire week, the sound editing only took 5 hours. Which I am so glad. I always forget how much I get sucked into sound design. I may not be the best but it really is fun putting clips to images and watching the vibe of a scene change, watching parts of the animation come alive. Even though I enjoyed it this was a really difficult challenge, I mean there was so much in the animation to consider. Sure partially my fault I mean I didn’t realize it was going to end up to be this long. I really did think it would only be around 40 seconds, just a little over not a whole minute and a half. At the start of the animation that was the part I wanted to be the most sound overloaded but not too much that the sound would be incoherent. It was a tough process. I mean I had to keep going back and forth for the first minute of the animation for around 3 hours because I either added too many sounds or too little sounds. That was the hardest part of it all,finding a middle ground of all of the sounds that I was going to add. I wanted to make sure I took all of the feedback from all of the other animations that I have done for this module, making sure that hopefully the sound matches the types of movements I have within the animation and hoping that it all felt easy to follow and not too much. I did have to find some of the sounds I used on pixabay but that was because I felt like I didn't have ENOUGH sounds even with 52 sounds to choose from there were still things that were missing. I honestly think a way I could have made this easier with all of the sound is to start off with a plan, I mean I didn't write anything, I was thinking about how the sound was going to be down anywhere. I had it all in my head but not on paper or even on a document so I could refer back to it.
I feel like if I had done that I would have been more successful in the first few hours of the editing as once I figured out the amount of sound I wanted to add the rest of it was nice and easy just making sure that it all matched transitions and worked smoothly with other areas I had edited already. I did add a lot of the sounds going up in certain places and down in others because it made the sound trail off and not just end abruptly. Something I also did was when editing this as you can tell by the screenshots the blue bar is the video that ensured the laptop wouldn't crash. I just exported the video. had been made without sound and used that as my clip. Once it was all like that I did run into some things that I had to change but the fx was simple when it was one big clip I just cut up some areas and made the timings slower.
I did struggle a lot near the end of the sound editing because something felt off. There wasn't ENOUGH sound in the background to set an atmosphere, I added some different types of musicI found from pixabay and cut up all of the other sound parts but it still didn't work. I was at a loss. I already had an ambient quiet rain sound but every time I tried to turn it up, it just didn't fit certain areas of the animation. Then I remembered, I originally wanted to show a passage of time with the sound in my "final" storyboard I made well instead of only finding one background noise I found 2 i used a sort of nice time sounds near the beginning because everything is a lot more darker and it felt appropriate especially considering the puppet it sleeping at the beginning then I changed it to a sort of thunder stormy sound because I felt like it gave the animation life. The animation felt like it was reflecting the pain that time gives through the scary rain sounds. I am glad I didn't use music as the music took away the effect of the sound editing and all of my hard work. It was too much to focus on as well as the main sounds. But not having music and it being atmospheric instead really worked. I really enjoy what I have created for this project. With all of the struggle set backs and things I have had to push through no matter how tiring this project has really been one my favorite in the first years, i feel like not only have i learnt a lot about myself and how i work and things i need to put on place to keep myself happy and healthy but I have a lot learn a whole new skill that I want to continue using I don't want to give up puppet making at all. This has been such a fun experience that also taught me new things about animation (specifically pose to pose action and taking my time on different scenes going back to change them eventually, I I always rush through things not this time I really did want to make sure it was perfect) and helped me understand a love for 3d that I never thought I would hold.
✮ ⋆ ˚。𖦹 ⋆。°✩
♡⸝⸝
.𖥔 ݁ ˖
‹𝟹
── .✦
(˶ᵔ ᵕ ᵔ˶) ‹𝟹
⋆˚𝜗𝜚˚⋆
──── ୨୧ ────
˚꒰ა ♡ ໒꒱ ˚
✶
═══════ᰔᩚ✰
ִֶָ𓂃 ࣪˖ ִֶָᲘ⑅𐑼་༘࿐
༘˚⋆𐙚。⋆𖦹.✧˚
⋆⭒˚.⋆
⋆˚☆˖°⋆。° ✮˖ ࣪ ⊹⋆.˚
ദ്ദി ˉ͈̀꒳ˉ͈́ )✧
﹌﹌﹌﹌﹌﹌﹌﹌𓋜
Final animation !!! (。ᵕ ◞ _◟) (week 13)
𓏵‧₊˚ ┊✶⋆.˚꩜
.✦ ݁˖゛ ⸝⸝.ᐟ⋆ꉂ`𖦹.
Her is the final animation, I am so proud of what I have been able to produce for this trimester, this animation is something that i would love to use to show of my skills more so the puppet design because no matter how I feel about the fact that maybe the animation could of been better, I mean i should of taken more photos in some areas because they move a bit jankey like as well as next time I would like to figure out how to us dragon frame alongside this project. As dragon frames wouldn't work for me and I know it would have helped with things like moving more flowy and smoother, I will always love the effort I put into the puppet. The fact she was able to be articulated as much as she has been is a miracle, I was so convinced she was going to break but this has also taught me lessons on if i am to do this again in the future which i would love too this isn't something I just want to learn and throw away in the back of my mind I want to continue doing this.
I learned that If I am to make a puppet again I need to measure things better as yeah my puppet is wonky but it fits for the subject matter. I would like to figure out how to make lungs move better as the only thing that moved well where the arms and the head and everything else was quite difficult to move. I would also love to make a more simpler puppet I mean i love my phoenix puppet but she was ambitious I want to go back and have another go making a puppet that doesn't have huge articulate wings so I can focus on things like the hand/wrist movement as well as making sure the feet are flat because the one issue i did have when filming and just making this final animation was the fact that I didn't make the magnets in here feet all at the same level some of them were higher than others and I didn't try to fix it but it didn't work so i had to go along with it, which caused issues as sometimes she would fall over and was prone to being fragile when in poses that would require her wings to be off the ground, she also was slightly fragile I mean she was covered in buttons and things id fall of her during filming so next time don't make it so complicated otherwise things become detached once i am moving them all the time. Though besides al of these points that i want to get better at things i am proud of is the fact that I even managed to complete this project I didn;t think I would of because I went too ambitious on it, I had faith at the start but due to personal reasons that happened recently I was so nervous. Getting it done proves to me that I can adapt to change even if I hate it and would prefer to just keep everything the same. I feel like I have learnt a lot more determination and confidence during this project as it has just been a really enjoyable and fun learning experience.
WEDNESDAY LESSON (the projects I did this trimester are bellow!!!)
⊹₊˚‧︵‿₊୨ᰔ୧₊‿︵‧˚₊⊹
CHARACTER DESIGN STORY PROJECT ₍₍⚞(˶˃ ꒳ ˂˶)⚟⁾⁾
weeks 1 - end of the trimester (Sequential Structures and Contexts)
FITZ WILLIAM MUSEUM DRAWINGS ◝(ᵔᗜᵔ)◜ (week 1)


So this project started off quite weirdly I mean on the first week back to uni me and my class literally went to a museum not even on the second day of uni the literal first day we went on a school trip. I would say a pretty good way to start off the trimester. Anyway we were all told to draw things we saw in the museum that was interesting, now usually I would understand the task immediately and draw things linked to the task, but I was kind of left in the dark for this I mean it wasn't just me it was also everyone else in the class but I assume its because of the actual task itself. From what I have drawn above I need to create a character with a back story and everything to do with the character a script and a story line the, a storyboard to turn into an animatic. Now when I was told that I was like this is going to be easy I won't have to stress just use cool elements from the objects I drew. Now these drawings I'll admit aren't my best drawings but I only had 2 hours at the museum to get done 5-6 drawings so I was trying super hard to go fast and it was actually a really good exercise to focus on shape instead of detail, that drawing I did almost changed throughout trying to make sure they were nice and detailed to the shape and what that shape meant to me.
This is where the task gets even harder. We as a class had to pick out from different bags a random time period and a random emotional state to base the character we make off from. This is where I get nervous. Usually with blind picking I panic and end up bargaining with someone to swap my choices with theirs but this time I didn't!!!!
Even though the options I got, I wasn't the best pleased I decided to make sure that I would stick to the original things i got given because in a real life work setting I can alter a clients brief to what I wat it too be and i think it is a good exercise if I try and push myself to do things I haven't done before. As I also got my feedback from trimester 1's work and trying out different things is what me good grades and exploring into things so I think in theory it isn't exploring but to me it is because I always kick up a fuss if it isn;t what I want but this time I am TRYING SUPER HARD to stay to a brief a thats something I need to focus on, not make things up and stick to a brief!!!
݁ ˖Ი𐑼⋆
PLANNING FOR THE CHARACTER TO BE USED IN THE ANIMATIC (๑'ᵕ'๑)⸝* (week 1)


<---- this is a button to take you to my moodboard that I created on Pinterest it is labled "Trimester 2 - Middle ages, selfish character design project"

(,,>﹏<,,)


。°(°¯᷄◠¯᷅°)°。
This is all of the planning that I have done for this project. If I am going to be honest, out of all of the projects I have been set for animation in trimester 2 this is the one I am the least confident about because of the subject matter. I mean I have done research (I literally bought a book and read it for this research and mind maps, I also practised a new style for this as well because I just want it to be like the middle as best as I can). Because it's the middle ages from what I have learnt through researching and reading the book, everything about the middle ages is quite twisted and it's difficult to really pin point things and make it all make sense, so it was quite hard to make sure I have a solid idea. But something that was quite solid is the understanding of religion and divine intervention so I thought it would be best if I base my project off of something like that. Originally before I did the drawing in a different style I was going to do this evil man who was going around to sickly people and telling them lies to become more popular in a small village as my emotional state for this character has to be selfish. Well that quickly got scrapped due to when drawing in the style I realized that women are more fun to draw as well as women are drawn quite a lot in mediaeval paintings and drawings that have been found and they are usually quite beautiful. Because of the twisted middle age past people usually believe it was a terrible time (which is was I ma not saying it wasn't) but there was positive things to come out of it as well (for example they vaguely understood mental health - super small but it was a starting ground for other medical professionals later on in the world history to understand what to do next and how to progress - read that from the book I read 'Medieval Bodies Life death and Art in the Middle Ages by Jack Hartnell and how segregation started to appear through the fear of the unknown and bodies looking different (you can see that through illustrations of these freaky creatures that are pretty much just heads its quite unsettling).
Because of this knowledge i have aquired and did style practice I thought I should go for how pretty women were betrayed so I wrote down each idea that came to me one was about a brothel but I really didn't like that one after I wrote it all down but I am glad I did write it down because it made the idea get out of my head.
The next idea was the same as my original idea. Instead of a man I was going to do a group of religious females. I liked the idea but I felt it was too close to the original one that I was going to do which I didn't want to do anymore. So I wrote down my third idea which is using religion and fear together which I learnt from the book I read that fear tactics were used quite a lot in the middle ages because it helped govern the cities better and easier. This idea I actually prefer to all of the other ones the idea is to have this beautiful woman believe she is the best but be quite insecure and because religion and divine intervention was quite a big thing in the middle ages I wanted it to be like she has this sort of power to cause brambles to sprout out of her and infect people to take over their eyes and they get lead by the freaky head people depicted in the middle ages art work and history to do whatever the beautiful woman says as she doesn't want people seeing her as she is pretty insecure besides her self absorbedness she wants people to be blind to her in case she ends up looking bad as time goes on.
Now you might be wondering FLYX???? HOW DOES THIS LINK TO THE DRAWINGS YOU DID AT THE MUSEUM???? well the third idea was actually born from the weird bear pot that I drew the other ones where build off of the chainmail helmet and pots i drew because it gave a sense of interlinked ness but I chose to use the bear pot 1 because in the drawing (and in real like) the bear pot had this strange texture that looks a bit like brambles (it was actually fur embedded within the clay but it was still cool looking) and the bear pot may of been standing proudly but one of the legs was broken proving it was old and fragile and I just thought for a woman who is self absorbed but afraid to let people see who she is its a perfect reference and the bear pot I know is white in the drawing but was also actually white in real life and usually that colour is associated with purity and is she is a fake prophet that leads people to a "sanctuary" when they are dying of illness - but the "prophet" takes sort of their life source to keep her the most powerful fake prophet and the most beautiful woman. (hell yeah i am include the illness side of the middle ages the plague and everything was crazy back then I think its perfect these people going for help and it ends up backfiring) so i think the bear pot works perfectly as an inspo (especially considering the pot was quite cute and adorable but the knowing it is a bear is quite scary I mean bears are scary)
CHARACTER PLANNING 𐔌՞ ܸ.ˬ.ܸ՞𐦯 (week 2)

For this week I had to plan the character that.I will be using in my animatic (I will have more than one character but this is the main character being inspired by the Museum drawings that I did at the start) (next to the text are the bear pots that eerything was inspired by I went back to museum ot get a reference of them).
But before I could start the actuall planning as a class we all did this warm up task and I really am glad I did the warm up task because it helped me really develop my character properly. This task was taking objects put up on the board in class and using their shapes to turn them into characters. I really enjoyed this at the start it was difficult but it got easier as I contuined and it was a really challegning exersizer as I had to used multipel different styles. But using all of the different styles proved to myself that I do have a rang of different abilities !!!


bear pots !!
ʕ•ᴥ•ʔ


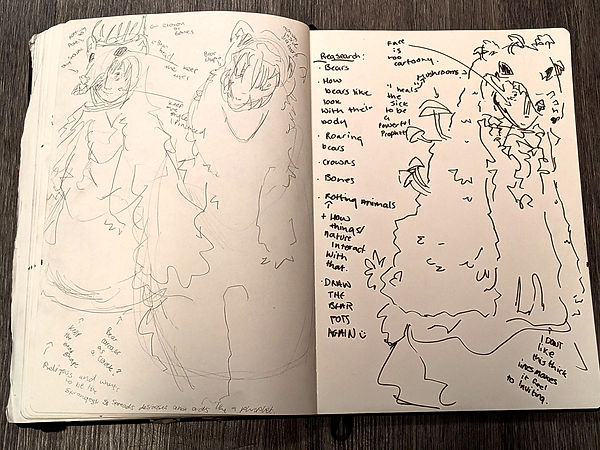
────୨ৎ────
So to start off with I did a bunch of drawings making this eldirtch horror kind fo character because one of the bear pots was turning to the right and I thought it would be cool to use that position as a sort of inspiration. But as I kept drawing the characters became less and less like the bear pot and I was completely loosing the inspiration. Now that isn't the task I need to show the inspo through my character so I started to make these rounded old lasy character and I likes them but I still felt like there wasn't enough "bear" in the character. ikept going with this feathery texture because the bear pot had like feathers and fur mixed into the clay to give it what I could only assume a bear like texture.
Though as I took a break and looked at what the task was I found maybe I could make this character that sort of looks like a bear but isnt its a cloack. That clicked I really, really like that idea and that what I decided I wanted to do. I knew I wanted to include bones now instead of balckberries and brambles because I felt as though its incorpating more of the bear ot with its white, creamy colour (sort of like bones) and the way the bear pots give off more of a bear skull and bones vibe instead of an actual bear.
I made constant notes around what. was drawing to help develop my ideas. The idea I had last week started to take shape into somerthing cooler. I deicded because the rogin of the pot is from stafordshire that I would search up what the ywhere ruled by i the middle ages it was the anglo saxons. So thats a new inspiration all ready. Then I deicded that I would think about how I want this main character to be a phrophet and I settled on a princess, who died because of relgion and came back. She spread desiease and plaugue around (as the bear pot is sort of creepy cute and well reminds me of bones and what is linked to bones?? rotting) and she claims she can heal the sick and dying but instead kills them to become more powerful and create her own relgion, hurting the ones who hurt her.
To come up with that Idea I looked back at my other mindmaps I made in the first week and something I write being selfish people are not bonr they are made I wanted ot give this charatcer a reason for why she is so selfish and only out for her own personal gain. The reaosn I chose a princess is because I just thought it would be cool as the bear pots as i mentioned are a sort of a creepy cute and in classic horror things, the little girls are allways the ones who are creepy.


﹌﹌﹌﹌﹌


ʕ – ᴥ – ʔ
༄˖°.🍂.ೃ࿔*:・
﹌﹌﹌﹌﹌
Once I had developed my idea properly. I needed to learn how to draw besrs or atleast get some idea on how to draw the heads atleast because well my character is based off of a BEAR pot. I spent a while drawing bears and then decided I wanted to redraw the bear pots to get a better understanding of how I should put the bear pot, into my character design. I realizd after drawing the bears I understood why the bear pots looked the way I did, the long snouts are hte bear noses of course the pots don't really have an acurate depiction of bears but after researching into bears the pots started to make more sense.
Once I did all of those drawing I decided to do more experimentation on how my character looks something about his task is that the character has to have a distinctive silohuette and I thought it would be cool is the silohuette looks like an actual bear but its a person. Doing the final experimentation I wanted to make the bear cloack to look like the bear pot, so I tried out making the bear skin to look like a cartoony bear but I felt like it took away the horror asepct. Then because I knew the bear pot reminded me of bones I thought to push the illness and desiease thing that it could be a rotting bear carcass spreading the desieases and killing others to I can have the fluff part of a bear, mould to push the desiease idea and bones to make it feel more like the bear pot.
These are the "final" sketches. They arnt the final ones this is just the idea that I want for when I plan the colour and I know when i do th colour the design is most likely going ot adapt a little bit (they allways do).
I did 2 versions because one is a skinnier version but I think the rounder version works better because the bear pots are very round and have 3 distinct circles and I think if I keep that idea will make it look more like the bear pot making the inpiration really push through but it still being something that is personalized and my own idea.
The rotting bear carcass on the princess looks a bit bad at the moment becaus it isn't coloured but I want the fur to be sort of stuck on the skull to sow the rotting and the eyes to be the skull to keep the large buldging eyes that the pots had.
I am going to make sure the deisgn when I plan the colour (which I am going to do digitally) the design is more simple because I was shown ideas of illustrations that this work should look like and it can be deatiled but making sure the shape is the main aspect of the way it looks (as well as the moodboard bellow this shows the kind of illustration style I want)

ʕっ•ᴥ•ʔっ ♡
Illustration style moodboard (╥﹏╥) (week 2)
⤷ ゛ ˎˊ˗
Here is a illustrated moodboard. All of these images are screen shots from the website:
PICTOPLASMA
it is a webiste where people pretty much just create characters, I was spesfically told by my techer to take screenshots from this website and I DO NOT CLAIM ANY OF THIS ART AS MY OWN ALL OF THE ART IS FOR ITS RESPECTFUL OWNERS AND CREATORS.
The reason I chose these drawings spesficzlly is because they are very shape based and have a distinct silohuette but also still have alot of detail. For my own design I want to keep it simple but still have the detail that my normal art style has. Honestley doing this task I still am not very confident about it but I am havingfun exporing a shape like style its actually really fun ot draw in or porduce from. As well as if Igetot keep it detailed but improved on my silohuete skills (which is something I really lack at) then thats SUPER AMAZING!!!
I think doing the next stage of my planing is a good idea doing it digitally because then I can make sure that the shapes and the details and everything that I want to do is esaxtly how I am imagining it as well as I mean the animatic that i am going to do will be digital and I also need to do a A4 balck and white illustration this week of my character and I will be doingthat digitally as well :D!!

﹌﹌﹌﹌﹌
🎧ྀི♪⋆.✮
Colour planning !!! (..◜ᴗ◝..) (week 2)
✦•┈๑⋅⋯ ⋯⋅๑┈•✦


⋆。𖦹 ˚ 𓇼 ˚。⋆


So I technically didn't have to do the colour plan yet but I am doing it because it will help me next week for the kind of colours i want to use when I start drawing the character constantly digitally and I don't have to think to hard about the colours that I want it to be or stress, I will just be able to move onto the task next week with a design and colours in mind.
Now for the colours that I went through I tried to stick with nature like colours but also on pinterest I searched up rotting colour schemes and some of the results where super vibrant, as I suppose mould isn't always blurred and fluffy and green sometimes it is multiple different colours so I wanted to try that out. When doing all of these different colour schemes I felt like I was just missing something, I kept coming up blank and feeling like my designs lacked just something. I wanted to give it this inciting feeling but without it being too inciting and bright because then it takes away from the middle ages, dirt feeling. It was really hard to figure out the balance and what I wanted for this character colouring. Considering the whole point of her looking like a bear is the important part, I don't want her face too visible as well as. I sort of want to keep the weird horror aspect I had for the other design before I settled on this one.
Before I settled on this design I was hoping to have the mouth of the weird horror like creatures to un hinge sort of like a snake and I think I still want to keep that because she is a dead princess, and once I have chosen a colour scheme and have to do the a4 black and white illustration I want to draw her, but also show what's underneath the bear skull revealing why she is so selfish and heartless to others because of her own insecurities and problems. But I do have the idea that she looks depictively cute and stunning but when completely revealed she's a monster to put it simply only looking for power.
( ∩´͈ ᐜ `͈∩)

Final colour plan (week 2) ( •̯́ ₃ •̯̀)
Here is the final colour plan. The reason I picked this colour plan was because I liked how the bear skin looked. It reminded me of wet fur and the pink outline on this really bad sketch is meant to be sort of like exposed rotting flesh.
All of the green is like mold and I also like the dress I sort of went with the vibe that the colours a muted for friendliness as well as its set in the middle ages and I want it to seem depressing even the colours but I also chose these colours for the entire character and especially the dress because I want it to feel a bit like the character is the meat inside of the bear, the muscle the things that is doing these horrible things and being selfish.
I just thought it would be a cool concept and something cool to go with and I wanted to add at least a standing out colour from all of the bright experiments did in the original planning so that's why the pink outline is quite bright, but I think that helps create distinction but also not too much that it takes your gaze away from the character.
⋆ ˚。⋆୨♡୧⋆ ˚。⋆
・・・・・
( ˶>˶˶<˶)
⋆˚✰ ݁˖⭑.ᐟ
A4 black and white illustration ٩(ˊᗜˋ*)و ♡ (week 2)
༄.°

I was actually gonna do this digitally but to the left of this text is my digital attempt. Something about sketching digitally just isn't my strong suit and I completely forgot to make it as a 4 and I hated the pose I chose. I wanted to give off this unthreatening feeling but creepy tp. I also wanted to show what was under the bear skull. It just didn't work out as a digital sketch.
Because of that I moved onto trad art which i am much more confident and happy to do things in, I made this sort of crouching position I also got to showcase the long neck I wanted to keep and also draw her face under the mask which I think I want to use in the animatic as now o have a character I have been attempting to think of the narrative for the animatic I am going to make. Something that is gross is I think I want to include vomit in the animation.
I have had a really disgusting idea but how in prophets and things you usually give a blessing sort of like a liquid and food, possibly some alcohol but I was thinking that because my. The character is such a "nice prophet" she claims she has a way to cure them from a kiss and as she kisses them she vomits in their mouth spreading the disease and gaining more power?? I know that is suepr gross but I think it's sort of a cool concept and also it kind of shows the disgusting feeling that people get thinking about the middle ages.
I am really glad I made her hair all crazy and wild as well as a sort of traumatized shocked look because she was murdered as the princess, I really like her design, I like all of the aspects of the bear pot I included, the messy hair was also to include the furry clay thing the stuff that created spikes that were sort of all over the bear pots. I am just excited to create her in an animation and show her selfishness of gaining power in a story as I do love storytelling and creating a narrative !!!

⋆✴︎˚。⋆
——⭑⋆⋆⋆⭑——
┈┈┈┈┈┈┈┈
A4 drawing re-done and coloured (。・//ε//・。) (week3)

While I was figuring out what to do with my drawings I did traditionally, I decided to draw my character just quickly on photoshop. Once I had drawn her here it suddenly hit me, this needs to be all shape based and not too difficult but detailed. The A4 drawing I did also wasn’t in a dynamic pose so these warm up sketches actually helped me to re do my work! but better :D
˚˖𓍢ִ໋❀
ೀ
✮ ⋆ ˚。𖦹 ⋆。°✩
——⭑⋆⋆⋆⭑——


I redid the a4 drawing and I prefer this one so much, I mean I am not saying the super detailed one isn't cool but this one I feel is one simpler to understand as well as I prefer the pose much more (for later reasons after I finished this drawing).
This drawing was done with a penicl sketch whic yes you can see because I couldn't rub it out properly as I used ink and quil to make the lineart and I didn't want to smudge it but rubbing it out.
Now this drawing, I knew I would have to draw it again but digitally but something I have always suffered with when transferring over to traditional sketch to digital is that the drawings just aren't the same. My style slightly changes and I feel like I always lose a bit of that feeling and movement.
But something that I learnt this week is scanning. I mean I already knew how to scan images and what scanning was but in terms of keeping my line work. I scanned the image with help from my teacher and I was taught how to add colour to the scanned image, which meant that the drawing didn't have to change. draw it and my style stayed consistent. The process of learning this new skill was a little bit tedious and annoying but I managed to do it and it was quite simple . All I had to do was multiply the imported image layer and then we'll do what these screenshots showcase. Using the pen tool and the bucket tool and vectors which. I sort of didn't really understand the point of vectors until this week.

┈┈┈┈┈┈┈┈
(๑ᵔ⤙ᵔ๑)
。𖦹°‧


Here are the coloured versions of the drawing I did. I used the colour planning that I did last week to help me with this and even though I had the plan for the colour and what I wanted to do, I made sure I tried out different ways to showcase the design that I wanted to try out. For the final one I liked the last one in the line of three because the first one felt too much and I felt like it felt like he was made of the bear flesh and that is NOT what I wanted this character to be and it sort of felt like sweets instead of flesh.
The second one I tried it without the bottom part of the dress being flesh because I felt that was the part causing too much going on, but I also felt like the pink was so vibrant. that it took you away from the character's face and bear skin which is what I want the focus to be on, so I tried with only a small amount of flesh and I preferred that much much much better , I t felt more right and more like a proper character design that would be animated and not just drawn for fun, for some reason I got the idea from the other 2 designs that they felt more illustration like because of how much detail there was.
A4 drawing completed ─=≡Σ((( つ><)つ (week 3)
Here is the final design; the only difference from the images above is that there is shading to this one. But I am super proud of this design. I like how it still holds detail like my illustrated inspirations that I looked into but also I did it in my own way. I like that her skin is grey to show her death, just I really think this is a strong character design that i have been able to produce as I always struggle with colour palettes and also this is the first time i have done something very horror and spooky based as I always steer clear from it all as I just don't think that my style and the way I do things works well for it all. But I mean for this, the fact I love using muted colours and I like things to look innocent I think it has worked really well and has been effective.
This project is helping me realise that maybe going for things that are unsettling is something I should go for as I have a lot of fun designing narratives and character designs are just more fun when I have to make them unsettling. As well as, going outside of my comofrt zone is quite fun.
𓆝 𓆟 𓆞 𓆝 𓆟

── .✦
₊˚⊹⋆
┈┈┈┈┈┈┈┈
Personality and story sketches ☆(#××) (week 3)


As I finished the design I needed to design the character's personality, I mean I know she's selfish, that is her main personality trait, that I have to stick to. But I mean I need to develop a story for her and a narrative as another part of this project is to do creative writing as well as a script and then the animation. These sketches, Not only helped me figure out why my character dynamic pose was vomiting and being able to show why vomit is an important part of her character but also I developed the cult that killed her and in turn caused her to be the way she is, I want the cult to look much more like the bear pots and I drew the sketches.
All of these drawings really have helped the narrative grow in my head. Something I totally want to include is why she kills. To also bring in the original idea of beauty and a prophet, I have a plan than when she awoke after being ea, she just wanted ot be loved again and pretty but the only way that could happen to stop her from rotting she has to kill people for their souls, the way she killed people is via illness and pretending she is the sort of god (she has a bit of a god complex). She finds out that killing innocent people helps her stay well for longer so she just kills nice people for her own personal gain. Pretty selfish if you ask me.
I made it so she has this scary mouth that opens with lots of teeth as well as I drew her using dead bears sort of like her friends and family, and they's all she has left. Because bears are pretty strong in the middle ages they would have been a huge threat not just illness but things much stronger and. have decided that dead bears that my character finds she nurses them back to health and she lives alongside them as the only thing she can remember from her death is bears being super important (due to the cult wearing bear masks) and also the longing for a family, and a deep sense of revenge and pain/sorrow. As I am sticking with the concept of selfish people aren't born they are made.
Something about her fresh body from waking up is that she is missing her enitre right side, and she is naked, shes missing her right side because thats how shes gonna die, I want it to be do with some form of freaky ritual and shes naked because I mean shes a dead body, she totally got radied for her possesions after she died.
.𖥔 ݁ ˖𓂃.☘︎ ݁˖
°‧🫧⋆.ೃ࿔*:・
┈┈┈┈┈┈┈┈
ᥫ᭡.ִֶָ𓂃
(๑'ᵕ'๑)⸝*
──── ୨୧ ────
⭑.ᐟ
The beginning of the character(s) turn arounds ⊂(・ω・*⊂)(week 3)
⤷ ゛ ˎˊ˗
✶⋆.˚

✮ ⋆ ˚。𖦹 ⋆。°✩
┈┈┈┈┈┈

✮ ⋆ ˚。𖦹 ⋆。°✩


✮ ⋆ ˚。𖦹 ⋆。°✩
✮ ⋆ ˚。𖦹 ⋆。°✩
┈┈┈┈┈┈
Here are the sketches. I am doing all of the turnarounds and extra sketches that I want to include to be physical so I can do it in the same way as I did the a4 drawing as I liked the line control and the way the lines looked for the character.
The images are pretty hard to see and I apologize for that, the sketches that I did were so light because I had to go over them with ink and quill (like the a4 drawing I did) and then rub them out after and I didn't want the original lines to make marks on the paper. I did edit the images in hope you could see the ambience easier, but these edits were as best I could.
I have never done a turnaround physically before. I have only ever done it digitally, I assumed that it would be super hard, I actually found it easier, I mean I didn't have to mess around with the line tool and accidentally do things on the wrong layer.
The only thing that I would say that I struggled with would be the fact that for the bear princess turnaround I didn't leave enough room and I made the original sketches too big but I really liked the sketch so I didn't change it I just did an extra page of sketches.
But doing that extra page proved to be helpful so I suppose it wasn't a total waste, I just guess if it was done digitally it would be easier to just move a sketch or make the canvas bigger, that is something I totally missed when doing these sketches.
I only really planned to ever do the Bear princess but because I will be writing a script and building an animatic and doing a creative writing task of her backstory, I must thought that I should do the religious cult and all of the different ways that they could look because then it will make it easier to build the story and make sure that the animatic has atleasy mortan one design for the characters and I can build a full short story :D
Something I learnt from doing this is that I might start doing things physically and scanning them in a lot more because I find it easier, though I don't want to give up on digital art I really want to get better at using the different brushes and understanding different ways to make the lineart good, as that's the reason why I prefer my traditional at I just cant make digital art look as good. But I will keep trying even though this skill is totally something I want to keep using in the future and has made me feel a lot more confident with my work and how it looks.
૮₍ ´ ꒳ `₎ა
ᯓ
The second stage of the character(s) turn arounds ⊂(・ω・*⊂)(week 3)
╰┈➤ ₊⊹ .ᐟ
‧˚꒰🐾୭ ˚. ᵎᵎ


As I said the sketches were light for this reason, as it was easier to do the lining with the ink. This was probably the most nerve wracking thing I have done this trimester, because OH MY GOD... it was so scary knowing that if I messed up or if think blotched on the page that I would have to completely re do it as it wasn't done-digitally and I couldn't just undo something.
I had to be confident within my strokes and I mean I suspose?? I was going super slow and this did take 3 hours to do. I was so nervous that I would have to redo everything. The pose I chose for the bar princess (who now has a name her name is Alis) is a vomiting pose to stick with the pose I chose for the a4 drawing but this time for the drawing, I made sure to include this cross matching shading as it gave me a old art feeling as its also done with ink, and I think for the animatic. I would like to include that kind of shading as it feels to me more middle ages?? sort of like the drawing is old and worn out. IEach of these three pages are a3 so the drawings aren't small, they are quite big. I sort of regret not doing the turnaround for Alis a little smaller but I am not saying it's bad I just think maybe it would have looked a bit better.
Next week I will be scanning these lined drawings as these are just pictures taken from my phone and when scanning it doesn't give that sort of distortion as if you are looking down at the drawings and I think the scanned images will be better to just show all of the lines I have done properly as well as to colour will be easier as th epicture wont have a tilit to it!!.
I will be colouring all 3 of these pages digitally as well as shading them, I am sort of dreading it because I am afraid that it will look bad but at the same time I am super excited for something I do digitally and something that I do quite often which is character turnarounds the lines will look nice !!!
✮⋆˙
The colouring stage of the character(s) turn arounds ⊂(・ω・*⊂)(week 4)
⁀જ➣
✦
ᯓ★
⋆☀︎。
𖤓˚࿔


Here are the scanned images that I took before the colouring, these are so much more neater than the pictures I took with my phone and there is no distoration from the camera lense
✮⋆˙
❀˖°
.✦ ݁˖
☼
── ⋆⋅𖤓⋅⋆ ──


༝༚༝༚
⋆˚₊ 𖤓☽˚.⋆

⁺₊⋆ 𖤓 ⋆⁺₊
✌︎㋡


Now all of these screenshots don't really make any sense to the random person looking at my website but I will explain. All of these screenshots is the process of me colouring and adding shading to the drawings that I did last week. As you can hopefully see from the screenshots, the images look a bit clearer. That is because I figured out how to use the scanner!!!
So the images where scanned in with no help from a teacher and I got straight to work. I sort of underestiates how much I had to colour in but whatI am glad about is I learned the process where I can just quickly colour things in on a different layer by utilising multiply. I fear this would have taken a lot longer than needed if I did it all by hand and this already took a pretty long time (it took around 5 hours to complete all the colouring and shading. The reason it took so long was because I was making sure that everything was coloured in alright as well as when it came to do the religious cult I was actually gonna do them exactly white like the bear pots i saw to stay true to it. Though looking at my other main character Alis I mean she is based off of the bear pots and she doesn't really hold any other colours but grey tint to the skin, I took more of the idea of a bear and the depiction of a bear for her.
Because I realized that, I spent a while just staring at both pictures the religious cult and Alis and I couldn't decide what colours for the religious cult, eventually I came to the decision that I think having this sort of friendly look to the cult would be nice, and as i started to colour it all in i realized that I should make these guys have very simple colour because from my research the drawings from the middle ages, would only be a few colours. I changed that Idea for Alis and made her more detailed to follow the kind of illustration style I wanted to go for. She is more based on the disgusting and plagueful world than the middle ages, so I should have my religious culture based on the art so I get a mix of both of the things that I looked into for this project.
Even though this colouring took a long time I found it super thera-putic and enjoyable, usually find colouring to be super boring and difficult but the colours this time as I new how to colour big chinks of colour in and i just had to tidy up theedges was more enjoyable than slowly colouring in by hand.
From the colouring in of the religious cult I have realized I cant just call the religious cult and they need a name and because I added a yellow aspect to the design as well as a brown mask (I am intending its clay as well as brown bears make more sense than like a white bear which would imply a polar bear I really don't think they are in Staffordshire in the middle ages or even now). I felt as though the design was leaning towards traditional viewing of bears. They eat honey and are brown and are cute animals. I thought it was cool to incorporate that feeling into the cult because the cult is well a cult, they sacrifice people and kill others but they give off this persona that they are nice guys.
I want to call the cult:
“Honey-Eater Affinity” (Meaning bear following lord)

𖡼.𖤣𖥧𖡼.𖤣𖥧
𓆈
°❀⋆.ೃ࿔*:・

𖤓☽
⛧°. ⋆༺☾𖤓༻⋆. °⛧
This screenshot doesn’t really relate to the colouring but, while I was colouring because I had so many different ideas flowing through my head and it was getting pretty overwhelming I thought I would do just quick sketches as well... me and other versions of me that I have (they are all personal characters, it's slightly embarrassing) I was doing this actually for a reason.
Due to all of the ideas going through my head I realised that next week I will be doing creative writing and then making a storyboard and finally creating an animation.
Now I have always had trouble with the photoshop pens, the reason I really enjoyed learning how to scan things is because I have control over the line I am using as I feel more comfortable using traditional art than digital. But I wan;t to make my storyboard digitally and I will be making the animation digitally so I was looking through different brushes. I found this brush that i used to d all of the doodles in this screen shot and, the reason I am adding this here is more for my own personal use, so I remember what I clicked on to get this brush because when using it, it felt more like a traditional brush and had a nice active feeling to it and I like how the pressure sensitivity worked with it.
The completed character(s) turn arounds ⊂(・ω・*⊂)(week 4)
⪼------➢
★
₊˚⊹♡
❀
𐫱 ✿ ❀ ❁ ✽
⋆✿
⋆.˚
· · ─ ·𖥸· ─ · ·


Here are the completed turnarounds/character sheets, I am super proud of them and I really REALLY like the second page I did (second being in the order I have played them out on this section of my website). I just think it is a really good example of my character and who she is as a person. I think if I were to do this again (which I mean I will be doing more than just this character sheet in my entire time at uni I want to plan out how big I make things as the drawings overlap each other. But besides that I am super proud of what I have been able to make :D especially the fact that I actually really like the line work and I think when I move onto the story board I way to keep the cross hatching as I feel like it gives it the sort of horror feel I want and also feels just old, I don't know how some lines have given me that feeling it just has.
˙✧˖°🪷 ༘ ⋆。˚
Extra planning for the overal theme and story for this project ꉂ(˵˃ ᗜ ˂˵) (week 5)
₍ᐢ. .ᐢ₎ ₊˚⊹♡ᰔ


⋮ ⌗ ┆
✮ ⋆ ˚。𖦹 ⋆。°✩
໒꒱ིྀ༝⁺


── .✦
𓆟 𓆝 𓆟
. ݁₊ ⊹ . ݁˖ . ݁


── ⋆⋅☆⋅⋆ ──
₊˚⊹♡
For a bit of extra planning I did location ideas. I started off with thumbnails of the things I wanted to explore, first being the human village where the religious cut and innocent bystanders who upsettingly get murdered would be. I then did a set of thumbnails of the sort of area where the princess would have gotten murdered/where she resides. I struggle with these thumbnails as I have never been very good at location design, I just prefer writing stories and drawing characters. Though I believe these thumbnails went really well. So well in fact I decided to do red thumbnails that were the inside of the village and then the inside of where the bear princess is.
To be honest design the village wasn't too hard I wanted to give it this peaceful vibe so then it's a juxtaposition to what is happening around the village and its people, when it came to the bear princess's 'living' space, I don't really ever draw things like that so it was a challenge to try and draw something like that. But to help me make the thumbnail I did make a moodboard (like next to this text). That moodboard helped me a lot, considering there really aren't any photos of the middle ages (they didn't have technology of course there would be none), I sort of went off of old villages that already exist or people's depictions of middle aged villages in art. I also wanted to show case even though its peaceful it still feels quite barren and i wanted to give it this sort of adventurer vibe where you pass the viewer are seeing it all from the bear princess POV so the village is over crowded where as where she lives is peaceful and cosy alongside her 'family' of dead bears.
I had to fill out a form on things about my character (screenshots below) and that really helped me develop these ideas. I think with the location design and understanding how I want things to look will help me a lot next week with the creative writing.
here is the link to the PInterest moodbaord (It is called "Trimester 2 - Middle ages, Selfish location inso")


૮◞ ‸ ◟ ა
°❀⋆.ೃ࿔*:・°❀⋆.ೃ࿔*:・

Here is the form I filled out :D its pretty much just a good overview of my character I have fleshed her out completely now!!
⋆✴︎˚。⋆
⊱ ۫ ׅ ✧
Bigger concepts of the locations in the thumbnails above !! 𐔌՞ ܸ.ˬ.ܸ՞𐦯.✦ ݁˖ (week 5)
˚ ༘ ೀ⋆。˚


These are bigger concepts for the bear princess living space from the inside and the village from the inside, these are drawings. I did from the thumbnails that have a blue heart next to them in the drawings above. The drawings that I liked that I think I will use as reference for when I do the story board and build the story are the ones with a star next to them. The reason I picked the ones with the star next to them is because the fourth human village wish is the image on the left. felt like the design for the center of the village felt more middle ages with a communal well and fires, as well as just a lot of random boxes and barrels it just gave me a more rural vibe. For the bear princess inside living space I chose the one with a body of water because from that body of water it sparked ideas on how I would show her sacrifice and how the religious cult disposed of her body once they killed her.
໒꒰՞ ܸ. .ܸ՞꒱ა
゛ ⸝⸝.ᐟ⋆
These drawings are drawings of the outside view so what it would look like if you saw the human village from afar or if you saw where the bar princess, own religious sacrifices and soul stealing happens. Once again like the drawings of the inside view I marked the ones that I want to use as a reference for when. I write creative writing and when I do storyboarding for animatics. I chose the human village image which is the image set on the left again because I thought that it gave a fun and whimsical feeling and I want that feeling to juxtapose with the rotten and down night evil things that are happening within the village and around it and the design being spread from Alis. I think it would be cool from the outside if it just looks calm and peaceful though entering it is like a place from hell with people dying and dead animals everywhere.
For Alis and her living space from outside not the inside, as I liked the body of water idea so much and in the thumbnail I did eart a design that looked like it was grounded in water. I kept this sort of enclosed, desolate creepy vibe with a broken building in the centre which is where Alis resides as well as got killed there and all of the trees are birch trees as they sort of look like eyes and that helps it feel creepy. because this is where the bear princess lives i wanted it too feel homely to her and I hope the vibe of the safety she feels from that place is shown through it but at the same time like with the pictures above this Next there are brambles and depictions of death littered around but I feel like it's taken away from the center which is what I want, I want the centre to be the focus to show the selfish manipulation that Ali's does to incompetent people to take their souls.


═══════
Illustrations inspired by my location ideas ദ്ദി◝ ⩊ ◜.ᐟ (week 5)
These sketches are sketches that I did from inspiration from my other location designs. I thought it would be cool to show how the sacrifice worked and how Alis herself stays safe within her living space after she has died and is taking people's souls. I have come to the decisions that her body once she as been killed has been thrown in the water and the reason she is so grey is because when bodies get thrown in the water in tv shows the are usually depicted as grey and bloated once they are pulled out of the water and I think that fits her character.
I also like the idea as I feel like it plays back to my original first idea of it being someone who selfishly kills for beauty. The reason being is because it's sort of like a siren and sirens in folk lore are usually these beautiful creatures that lure people in the water. I like bringing back ideas from the original idea because it just makes me feel like I have really developed what I have done and are able to include things from past ideas. ( i also really like merging ideas together its like my favourite thing do to)

・・・・・⋆⭒˚.⋆
୧ ‧₊˚ ⋅ ☆
´ཀ`
⫘⫘⫘⫘⫘⫘
Fixing the turnaround for Alis ≽(•⩊ •マ≼ (week 5)

. ݁₊ ⊹ . ݁ ⟡ ݁ . ⊹ ₊ ݁. ✮⋆˙
──★ ˙☆ ̟ !!
I had to show my teacher my work so far before I started the creative writing and she helped me turn the turnaround that I messed up on as something that is full and all on one page in photoshop. I sort of didn't understand what she meant when she started mentioning I do this but after she showed me and did it for me I totally understand why I should do something like this. Next time I make a physical turnaround I am going to make sure I plan the space properly so I don't have to do a lot of this editing all the time but it wasn’t too hard so even if I do have to I suppose it's okay!!
Synopsis (that needs to be 500 words but I haven't written down the actual idea yet sooo.. development time!!) ☆⌒(ゝ。∂) (week 5)
So I decided to just write down the ideas i had for everything so I have the full idea and then will shrink it:
A little girl growing up in the middle ages alongside a father who “loves” her a lot being a part of a cult, who claims they are only there for the wellness of the world but in reality hurts others and only works for the profit of society's chain.
This religion rightfully called “Honey-eater Affinity” follows this good all based around the feeling of fullness from eating and sleeping, wellness and goodness in community and being the strongest in the “forest”. This universe is based around when the vikings and saxons and other religious people came over to the UK and spread their ideals but in this universe the concept of vikings/norse mythology who have gods for everything in this small village they follow only bears as their god and who to look guidance from. Other villages around all follow one god (possibly the sun or wolves etc) and the villages are very closed off from each other pretty much having their own world in small sectors of the UK.
This little girl named Alis from birth and grew into the name with long black hair and beautiful pale skin, her father was always “sick”(he takes the blood from bears and eats organs of people causing him to go crazy and die, but the cult makes it so that it is all kept hidden).
Alis’s father died when she was 12 years old and the religion that pretty much controls her village takes her and uses her for religious ceremonies, due to the religious cult blaming the death of her father even though it was really the religious cult that caused that because of the insanity they just cause for people.
Making her once pretty and innocent childlike composure to go frail, traumatised and quiet. By the age of 14 she is pretty much a walking dead body and there is a final religious ceremony where her chest gets ripped open and her lungs are taken from her a she “loose the right’ to speak from going on a silent strike and “causing” he fathers death, as well as she already had infected wounds and loss of movement in her limbs. Alis’s death is quick but painful; her dead body gets disposed of in a water hole in the forest nearby their village (it is an area that is secluded hidden within brambles and birch trees, an old building that is used for offerings to the bear god) and after a few months of her death she wakes up in the water with no memory but revenge, sadness and confusion, her body is rotting, grey and eaten by fish and falling out organs from her chest.
She wants to know why she is dead so she finds the village she comes from (as there is a path just a few hundred meters away from the forest) and ends up killing a cult leader without even thinking about it, it was more of just a reaction then a thought through act.
She realizes that she can take their souls and they keep her from rotting, so she ends up becoming this fake bear god to lead people to her, for their souls. Her victims are innocent people and their souls are purer than the bad abusive people (that caused her death and hurt others which in turn makes the abusers rethink their lives and showing that selfish beings are born and they are made).
After killing hundreds and manipulating her old town in insanity and believing in the bear god from originally just being this money grabbing scheme to this insane actual problem that is affecting loads of people.
She didn’t mean, all she wanted was to understand her existence. She ends up finding pictures and proof of her life and what her father did, causing her to go and live in sorrow underwater killing anyone who comes near, no longer in the act of wanting to stay alive she just is taking whatever she can to remove the fear and depression that she has. Due to her existence of being a fake god she regularly gets bear sacrifices and after 3 years of moping and being in sorrow she decides to build her own family through the rotting dead bear bodies. Becoming an urban legend and a scary story told to the villagers of new generations never to go to the forest, as if you smell rotting flesh, you find dead bears, it will be your turn next to die. The village ends up leaving the bear legion behind in the future due to the tragedy that the religion caused.
Here is the synopsis for real this time:
A small girl with black hair, pale skin, dark big brown eyes and a smile that warmed her fellow villagers called Alis. grows up in a rural village that all believe in this religion called "honey-eater Afinity" the girl grew up alongside her single father who without her knowing his heavily involved with the relgion. Due to the insanity that the religion caused him as the religion isn't really a religion it's more of a cult, only following the bear religion for profit. Her father became a cannibal aswell as drank the blood of bears, just eventually killing him. Due ot her fathers involvement with the cult the cult takes her as a replacement for her father though instead of her obeying like he did. She starts to go on strikes, going quiet, traumatised and wounded 24/7. She gets tortured for 2 years until she turns 14 and eventually the cult has enough of her and commits a sacrifice taking her lungs away and disposing of her body in a hole of water.
Even though she dies, gods in this world are real, the bear god that everyone falsely follows takes pity on her and brings her back to life. She comes back to life knowing nothing but confusion, revenge and the need to understand her death. Alis travels to her old village and kills a cult member on instinct with no thought behind her actions and in turn she gains the realisation that she has to kill others for their souls to keep from rotting and fully dying. So she becomes a placeholder for the actualy bear god, entices people to come to her section of the forest to kill them to take their souls.
Killing hundreds she realises the best people to kill and keep her alive are innocent people due to the purity of their souls. She ends up killing hundreds, offerings of dead bears given to her all the time but she just doesn't care, only souls. Until she finds out the truth behind her fathers actions and her death, and her need to be this selfish god. The knowledge of her actions drives her into a deep depression and she lives underwater killing anyone who dares to come near for 3 years, though due to the village still believing in her they regularly give her bear offerings and throughout the 3 years of her sightings coming to a halt the village removers from the manipulation and torture they were put under which causes Ali to venture outside of the underwater hole she has been living in. As she has no other family she makes a family from the dead bears riving them through her own power she holds from people's souls, and she eventually becomes this legend that is actually true but told to children before they go to bed to prevent them from staying up too late. If you enter the woods you might become the bear princess's life force, or next victim.
‧₊ ᵎᵎ 🍒 ⋅ ˚✮
・・・・・
(๑'ᵕ'๑)⸝*
⋅˚₊‧ ୨୧ ‧₊˚ ⋅
✧₊⁺⋆.˚୨ৎ
Development and visulaizing the characters behaviours/ the world and other elements after writing the storyoutline (⸝⸝> ᴗ•⸝⸝) (week 5)
°‧🫧⋆.ೃ࿔*:・


So after writing the synopsis, I had really nothing else to. do. I wasn't sure what to do to lead on from here, I mean I know I have to make a storyboard but I can do that yet as I was told I should do that until everyone else is at the right place so we can learn together as a class.
Though in my synopsis is the larger one that 500 works. I mentioned other villages and other places around the bear village and I also need to know how Alis progressed from being a nice person to who he turns out to be. SO!!! I decided I would make different tribes and a map and how the different tribes act but in this storyline I am only focusing on the bear tribe and how they get eradicated and changed from the most religious tribe out of all of them to a dead tribe that is only a legend of stories.
Even though you never see the dead father that causes this problem in the first place I thought I should do a depiction of him, I like to think it is all that Alis can remember dishevelled hair and the fact she used to wear his clothes and was a closed off man. I want him to stay a sort of mystery and something you never see because I think it helps push the fact he is a bad father and is really just more of a memory than a figure in her life that Alis can look up to.
Anyways enough of her bad father the other tribes and religions. There are three others. tribes that all worship other animals. One being fish (specifically tuna/trout), the other being wolves, and the last being birds (specifically Spoonbills/goldfinch's), of course brown bears are Ais tribe but. I have already thought them through and have built a whole story around them. The fish tribe is the tallest of all of the tribes, though stay hunched over sort of like a fishes back, they are either naked, or wear minimal clothing and are all quite stunning and wear leather gloves and socks for fins and wear nets and use spears and just overall live sort of like fish, they live in a boggy swamp area close to the water and their houses are on silts in the bog but they love to swim and feel connected to the water to follow their god. (they are called Shimmer Scale)
Another tribe is the wolf tribe. They are the most successful out of all of the tribes and the most harsh. The bear tribe may be the most religious but the wolf tribe is second though much more stronger and more powerful. They are suepr body positive and don't really mind if you are naked or wearing minimal clothing though they do insist you keep lucky charms of wolf feet chained to you, they mainly all wear hoods that have real wolf ears stitched on them to keep them looking like worms as well as to hide within undergrowth and scare their prey for food. Their housing situation is very castle-like but very close and knit together like a pack of wolves and they have an extensive trail where by the age of 10 years old you have to survive a week by yourself to truly be a part of the Howling moon.
Finally the last extra tribe I made is the bird tribe. They live in mountains and in high up houses and they love to spy and learn. They dress very colourfully and are the shortest of all the races making it easier for them to develop things like flight suits to feel more closer connected to their gods. They wear all aero dynamic clothing so a lot of clothes and not much clothes that make them less heavy and they all are born with suepr curly and spiky hair that they style in cool fashionable ways to represent feathers. They also use a lot of face paint that may or may not be poisons and shorten their life spans but it's the middle ages they don't really know much about illness and chemicals or anything like that really.
The secret hidden tribe is the lost tribe which is the tribe where everyone used to be in harmony before other religions came over to conquer and forever changed the way this part of the uk acts and works alongside each other.
I have had a lot of fun going really in depth in the world developing stages, it feels more like a real story as well as. I figured out what will happen to the bear tribe in the future. I want them to die out and get taken over by the wolf tribe, so then the existence of Alis really does feel like just a story even though she is real !!
-ˋˏ✄ ༘˚⋆𐙚。⋆𖦹.✧˚
♫
*ੈ✩‧₊˚

Concept for the end of the story and how it will play out (week 5)
Once I had done world building and everything well I did illustrations physically of the torture and then the existence of Alis as a false god. Well why not do a concept of how the ending of the story might be and how she is more at peace with her new family. I know this isn't the best drawing I have ever done before but it shows Ali peacefully sleeping alongside a dead/revived bear with a dead person near her feet. I thought the dead person (who is also surrounded by vomit) shows the fact that she still is deadly and she still selfishly will kill for her own personal gain. But it isn't really doing it all the time anymore she understands what her actions did, she knows who she once was and she has a new family a new home where she feels loved and that just makes she feel well safer.
ᓚ₍⑅^..^₎♡
˙⋆✮
*ੈ✩‧₊˚༺☆༻*ੈ✩‧₊˚
・・・・・
Planning for a script !! (week 7) ⋆𐙚₊˚⊹♡
As you can tell there is no week 6 for this project, that is because there was no class and I had already done the handing on week 6 for the other work so I got to have an extra day off for uni. Which I would say was a good bonus as in week 6 I was trying to do a lot of different things all at once and. I don't think having this to do as well would have helped my mental health. Now I actually wasn't in class to do any of this planning, I had to go to hospital for personal reasons so I ended up doing this at home as I couldn't make it to the lesson but I always find working from home better and more comfortable and just overall get the work done better. The planning that I had to do was all about summarizing my idea into a sentence or two sentences, which was much easier then I thought it would be. I mean considering I was at home I was expecting everything to be much harder but I got to do things at my own pace, so looking through all of the slideshows and things that were shown in class were easier as I usually struggle to concentrate in a group and it doesn't really stick until I ask the teacher personally and they explain it again for me.
Writing the summary, is to help to create the next part of the planning which is more like the entire story but this links into planning as it isn't the script it's just figuring out how the whole story works. From looking at all of the slides as well as communicating with friends they all said that I only have to pick what I think is going to be the most visually interesting scene to turn into a 3 page script.
\This is the part that took the longest. It even took longer than the script itself because I had to think about the whole story but shorten it down into smaller sections, so i couldn't write long explanations it was just an overview because with the overview it should be simple to then understand which is the best one that will be for the visual element which is the animatic I wanted the scene that I choose to be a challenge, not so much a hard challenge but a challenge for me as I always struggle to make things especially like storyboards, visually clear to others and I have scene other peoples story boards as well as movie professional ones in just not only this project but during my time at college and seeing how people communicate ideas well and I really want to make sure I make this story board good this time and that each panel is not too detailed but enough to understand what it happening.
All of the writing I did for each scene made me realize how different this project is from my normal work but how invested I am with it. I always make things that are child friendly as everyone always tells me that my style works the best with it, and I should just stick to childhood books and things like that. I mean I dont mind it, just one thing that I always struggles when doing things like that is finding an ending and knowing that I had to write the story scene by scene in a short way made me worry, do I really have an ending for this story, or am I going to get stuck. Because this work is much more tailored to how I have always wanted to create work I actually managed to produce an ending and a full story that I am super proud of. I don't know why I have never ventured into the kind of work that I have always wanted to produce.
I should totally do it more often, I love cute styles alongside either a reality that boring or depressing or manic like or cute styles along side things like horror and unsettling things ad I just even though yes scary styles are meant for that kind of work and work much better I like the contrast that you get from different styles for different projects.
I believe that this project has made me search deeper in the way I want to draw and make work. I don't need to have one style or once way i draw faces/one way to deng characters, I can't draw them however I want and I can explore what I want as well, trying out different ways to express and idea through styles is actually quite fun and i want to keep trying it out not just this module or this trimester I want to keep developing my style until I find the style that is amazing, and even if I ont have one style i feel like being able to raw in utopia is also helpful and with the planning of the script I am usually pretty bad at explaining how things will look but alongside all of the drawings and planning I have done for this idea its almost as if I could envision each scenes separate storyboard, and the feel I would create for each different scene.
All of the scenes that I planned have a spesfic way of the outline I needed to do as that is what I gathered was required from me after reading all of the slides, communicating with my teacher and friends, usally I dont use layouts that people give me as I always find them too confusing and I don't really understand them or they are too simple for the kind of explanation I want to do but for this I wanted to use the simple layout to try and limit myself to explaining things in a simpler way or atleast simpler to the way. Iwould describe things.


૮ ྀིᴗ͈ . ᴗ͈ ྀིა
⏔⏔⏔ ꒰ ᧔ෆ᧓ ꒱ ⏔⏔⏔
── .✦
★
୭ ˚. ᵎᵎ
. ݁₊ ⊹ . ݁˖ . ݁
Script writing (week 7) ˚˖𓍢ִ໋❀
Script writing!! I have never actually written a professional script before and turns out the text does matter. It's traditional and standard to write it in the certain font that scripts are written in, which is quite cool. I think it gives it a typewriter look, I am not SURE why it's standard. I decided to choose scene 6 because I thought that the drawing will be super fun to explore with all of the different layers and the sounds will be pretty fun to use and make if I have to underwater talking, and sort of magic noises. I first planned the whole thing out on paper so then when I did it digitally I had the option to get rid of certain scenes that I didn't want or make the scene a better description/ fix all of the spelling mistakes. My script is 3 pages and one single paragraph long. so 3 and 1/3 pages long. It is standard for a script for animation for 1 1/2 pages of the full thing to be an animatic description, I think I got that part done pretty well. Writing this script was easier than I originally made it out to be when writing it on paper. I had so many ideas and I was just putting everything down and was getting frustrated that it was suepr long. Though when I did it digitally to improve what I did I decided to have a reference page on the top of the script writing I could look back to which had just the scene I wanted to focus on and a description on the aims of the script as I wanted to make sure the I didn't forget myself that aims I want to be able to accomplish and work towards/get better at.
I am really proud of this script. I think it is pretty good for my first script as well as I had to do this without the support I would have at uni and after I had been to the hospital, so sure this did take quite a while due to being sleepy and exhausted but I managed to do it and I love it. This project has genuinely been the project that has helped me this trimester realise things about my own art and my own creative process i need to work on but also has taught me a lot about breaks and how important they are otherwise you end up in hospital.
Now I have a completed script I feel so ready to make an animatic and storyboard it all. I am so excited for next week ot start planning it visually!!
(..◜ᴗ◝..)
✮⋆˙


── ⋆⋅☆⋅⋆ ──


。𖦹°‧
♬⋆.˚
<-- this is planning!
༘⋆


°❀⋆.ೃ࿔*:・°❀⋆.ೃ࿔*:・
໒꒰՞ ܸ. .ܸ՞꒱ა
⋆˚✿˖°
༘˚⋆𐙚。⋆𖦹.✧˚
<--- This is the actual script (˶˃ ᵕ ˂˶)
₊˚⊹ᰔ
˚ ༘ ೀ⋆。˚
⊱ ۫ ׅ ✧
Storyboard drafting !! ꉂ(˵˃ ᗜ ˂˵) (week 8)
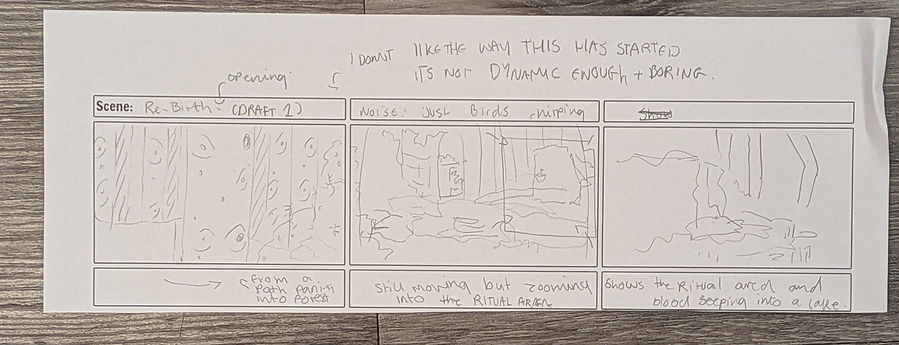


For the storyboarding I was glad I made so much planning and my script was really thought through. I was quite nervous for this week with storyboarding as it is my favourite part. I love story boarding, it just isn't the part that I am very strong at.
I really want to be able to good storyboarding or take this skill further as I grow up so for this project due to how much I have been working and putting every ounce of effort I have into it, as I mean to be honest I have and am really enjoying not only the story i have created but the whole idea and what I have developed. I want to make sure that the storyboard that I create doesn't fall short. I can story board I just always struggle with making the shots look good enough/ explanatory to the viewer though as a class and on canvas there was lots of resources to look at and watch and even though I have been doing this practice and skill for almost 3 years now just refreshing my mind on what different short are how how to use the, where to place a camera and how important all of these thought processes are, it helped me generate ideas.
I already did have ideas of course for this section of the project. I mean I picked this scene as it proved to be the one I could definitely develop, but when I say having an idea. I mean all of the resources helped me feel ready to kick off with the storyboarding. Now I only wanted to do one draft. I thought I could get everything right the first time. I am not really sure what I thought that would work because 3 frames into the storyboard I hated . It wasn't flowing how I imagined, it was too slow and it didn't feel right for the sort of uncomfortable and unsettling vibe, it felt more like a story book introduction. When I realised that this wasn't going to work the first time round, I had the realisation and also from the help of watching the videos that storyboard, well it isn't easy and to be effective with it you must think about each frame as its own thing but be able to flow from it.
I need to be able to create a narrative engaging and interesting, so I took another approach at what I needed to do and this time I managed to get a bit more further in though after I got to the second part of the script in my storyboard I felt like it had the same problem as the first one, there wasn't much variety, there wasn't much horror aspect to it because I used it all up in the first few scenes, there doesn't have the feeling of deprivation or re birth, or life. But what I did like was the intro from this idea, this intro is something that I really wanted to stick with though it being deer in the draft didn't really make any sense. WEll It did as they are in a forest and deers I mean live in forests but for the context of the animation and story that I am creating is the whole thing surrounds bears and from the resources I was referring too and how to make an engaging story I am also aware that background and possibly foreshadowing is something that you can portray subtly with in a story or a scene and hint at certain things for the viewer to keep watching and second guessing.
So once again I tried again, the third time's the charm, but it wasn't. I didn't like the third one though I stopped immediately due to the fact that I finally had a plan in my head. Doing these drafts before the final draft for next week to create a polished storyboard helped quite a lot. It got about all of the things that I was visioning in my head to make my thought process clearer. Also making all of these storyboards helped me merge each idea together in the final draft so I was able to incorporate all of my visions but create something much easier. The third draft that I did, I decided that the eye should be a bear's eye and as it pans out it should be a dead bear, eyes glossed over looking at the brutal place where ALis died. Though with this draft it wasn't so much that I didn't like it, it was more that I couldn't understand how certain frames would work. I didn't know which position the dead bear would have to be in and yes this idea is definitely more spooky than the other 2 but no i think the focus is too much on the dead animal and I felt like I couldn't develop any further from the point that I stopped at.
⋅˚₊‧ ୨୧ ‧₊˚ ⋅
𖾕𖾝꙼ᩚ𛲕𖾟
₊˚⊹ ᰔ
Final storyboard draft ദ്ദി◝ ⩊ ◜.ᐟ⋆˚࿔ (week 8)
✮ ⋆ ˚。𖦹 ⋆。°✩
✮ ⋆ ˚。𖦹 ⋆。°✩

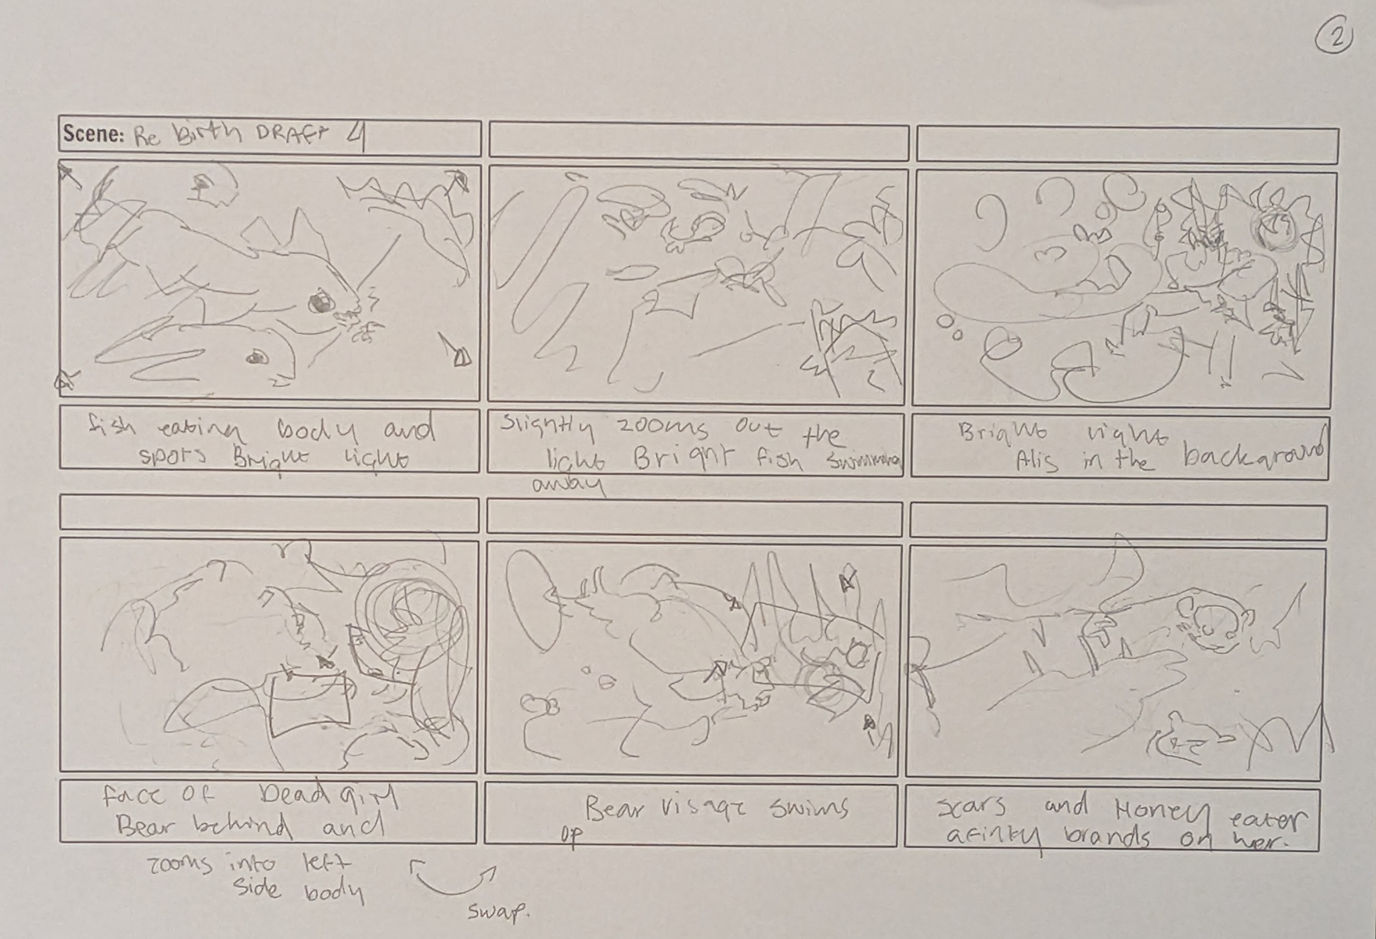
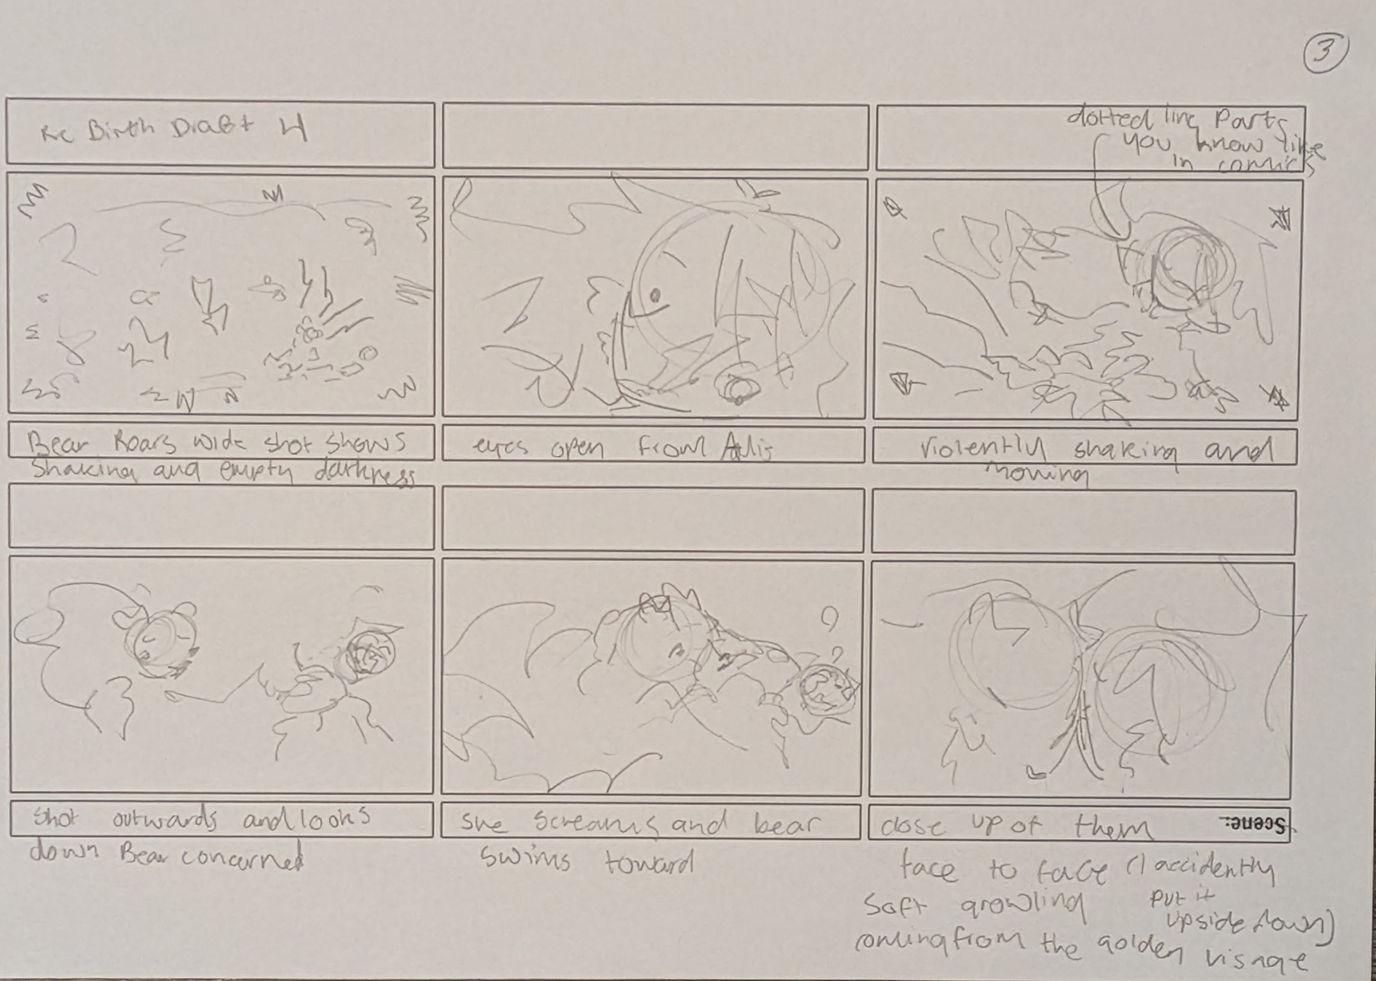


Usually for storyboarding I would finish here and jump right into the animation/ anaimtic though I know that I need to get better at drawing things to be clearer on a storyboard, two make sure that final storyboards aren't this loose due to the fact I have to consider If I was to give this to a team of people they need to be able to understand clearly what is happening and three I just want to improve my storyboard creation skills better because I think storyboarding and comic making is one of the coolest things to do and learning that they need to look better then just some stick figures and messy drawings unless if I am the only one working on it then it should be fine but still just for me its important. make a clear storyboard otherwise I might just get confused with the way things look (which is also why I put a small descriptive sentence so when it comes to next week it will be simpler to just know what is happening. (as an extra fourth point, this storyboard just isn’t enough for the level Iwant to woro at now, during college it might have been fine but now in uni?? And from the feedback I got given last trimester I got to work harder!!)
To be honest I am not sure how I managed to just lock in and create the final draft considering I struggled mainly with the opening for the first 2 hours of doing this work. I always struggle with things like openings and once I have gotten that the rest seems natural and feels like everything can flow easier as I have a start that I believe is very engaging. All of the uses of the different shots as well and making sure I included the understanding of making sure the eyes would get confused, I can't have things competing or overlapping for stage presence which is something that my trimeter 1 feedback was for my final animation I made last time. I need to be able to ensure that everything is clear enough and I personally think that this is one of the clearest storyboards I have ever made. I added directional arrows which always helps but that mainly ame from the fact that I had written things like that sown for my script .
Writing the script even if it had no dialogue I didn't realise how important it all was. DUring my time at college I had never made a script and always worked on my synopsis that I created but doing this project with breaking down each step has really helped. Usually during my ime storyboard I always get things mixed up as. I am going off of a short description in a synopsis. But doing extra steps of planning has turned out to be the most helpful and I have created a draft storyboard that I genuinely am super proud of.
The poses for the body I am also really happy for, I always get things like body drawings wrong but going ot lige drawing and constantly drawing had ma me so much more comfortable in crawling things ;like bodies twisting and turning, showing emotions with a small amount of body twitching or movements that are large and all over the place. Lots of the skills I learned this week in class I have taken and bent so that the skills apply to this storyboard and I think it helped, just. Overall this story board I have made is cool. I am quite excited to be able to draw the finalized storyboard next week. I have never taken a storyboard and brought it away from the stick figure random swiggles and shapes before and it sort of feels like practice for the future I really want to be able to do something like this with things like comics or just voeral storyboarding and I am determined to keep on trying an expand my skill set and how to work out problems/ how to do things like a storyboard that I really do want to show off to others.
I am a little nervous ot create this better next week incase I can't do it and it looks awful but I am wanting to do each frame in this storyboard and I will od it with utmost perfection that I can manage as a finalized storyboard.
⟡ ݁₊ .
🎧ྀི♪⋆.✮
Making the final storyboard that will be turned into an animatic ʕっ˕ -。ʔ ᶻ 𝗓 (week 9)
read the storyboard left to right!!


✩°。🧸𓏲⋆.🧺𖦹 ₊˚

As this storyboard needs to be turned into an animatic we as a class were told that we have to do the drawings well... I mean good and like a professional storyboard. I actually really want to go into things like storyboarding or comic making (and recently found out I love doing puppet making) so this is actually a really fun task to see how well I can do this and if I have given myself too much.. I was told that maybe I should have done what I did because we only have around 2 weeks left to get the storyboard done until we start the sound editing, though I believe I will get this all done. Now this is as much as I have done this week, and next week I plan to work on the days I am not in uni asI am going somewhere on the weekend and that's when I usually do my work so I'll just spend more time next week working on this. What I need to do is I need to finish the sketches that i have done (may I add these are all there own separate pictures in the aspect ratio 1920x1080) then I need to shade all of them with greys and just the characters do I need to add colour to show my process of what I did and not loose all of that work I di in the storyboard and make it much more professional like the ones everyone was shown in class. I am quite proud of what I have been able to this week, I honestly thought I wasn't going to be able to do this, with these sketches looking so similar as I usually have the issue of drawings I do never looking the same and i loose detail as I go through but I actually managed to do these frames so far really well, I am quite impressed of what I have done!!!!!! I feel like it's because I have drawn these characters multiple times and I have made sure that I understand her before I do it. I know it is quite silly but I didn't realize all of this and drawing her all the time would assist in doing it. I never really look at my drawings once they are done but I have made sure to pay attention too every detail and pull up my own work as references and unsurprisingly it really helps, really don't know what I have never done it before.
I did add extra frames in the storyboard as well as removed some so far because it makes more sense to read it like that!!!
Finishing off the sketch stage of the storyboards!! ꉂ(˵˃ ᗜ ˂˵) (week 10)
⟡ ݁₊ .


﹌﹌﹌﹌﹌
As I mentioned last week I said I was going to do lots of this over the first 2 days I wasn't in university and during that time I made sure I completed the sketches and started the colouring so then on the holidays I could start doing the editing. There isn't much to say on this process considering I did this last week I was just continuing the whole process, and I did add some more frames and also thought about when i was going to colour it what frames where I going to get rid off, because some of the felt unnecessary but also felt important, I was thinking whether I should move some of them around. My favourite frames that I have drawn are the ones where Alis is throwing up on her self I just think the composition and everything about that section of the storyboard is perfect, sure gross but I the whole point is she is gross, she's died and she's plagued and causing problems for everything and well every living creature.
I also liked how young it made her feel just something about a child being alone vomiting and curling up into a corner feels so childlike it's scary and feels bad so you just want to disappear and want it to go away/want love/help from an adult.
Colouring in the sketches ૮₍ ´ ꒳ `₎ა (week 10)
𓏵‧₊˚ ┊


𓂃˖˳·˖ ִֶָ ⋆⋆ ִֶָ˖·˳˖𓂃 ִֶָ

So the image next to this text of course has NOTHING to do with this project though it did help me figure out why this colouring looked so bad. I started colouring some of the frames that I had sketches and I just colour figured out why it wasn't looking how I wanted it to look, it was too messy I couldn't understand certain frames and whatI was meant to be colouring in. I thought about lining it all but I didn't want the storyboard to look like that I wanted it to have the same vibe as the illustrations that I researched into look like, but in the form of a storyboard, as well in class the storyboards that was shown as examples the lineart if there is any really isn't that much and looks like a beautiful completed piece though enough information to see the vibe.
So I took a break, I just wanted to draw something for myself, a personal drawing and the character here is my bunny space rabbit celeste and even though this was a personal illustration i was using it as a way to practise the idea of no line/lack of lines because I keep suffering with the same problem over and over again with readability, but I didn't want to do it with the bear princess storyboard because I was sort of losing it and just getting angry that I could figure out how to fix it. Doing this illustration really helped, I liked the lack of lines, the colours work so much stronger in illustrations and the lines on the stars sort of frame the illustration and I thought, yes this is how I want to do my storyboard, this style, its readable and perfect and I really do feel like during this project and just overall this trimester I have learnt so much about readability and discovering that lines just sometimes aren't needed has made me feel more confident in digital art, of course i want to keep going and improving but I really enjoy how this looks!!
The whole storyboard completed and looking how I want it to!!! (week 10) (。ᵕ ◞ _◟)

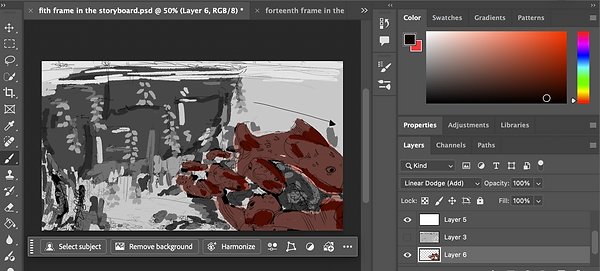


˚₊‧꒰ა 𓂋 ໒꒱ ‧₊˚
So here is just a process of what I was doing for 54 frames. I started doing the first 5 frames from home then at uni on the day where we were actually in class. I kept going and then came home and continued to keep working on it until I finished every frame. I am really glad I got all of this done because now I can actually use the time in easter for a break (as I really need one my mental health isn't doing great and I keep having to go to the doctors for other things as well) and I can use the time for actually editing this stuff together. I used the sketch as templates for the colouring stage and then went over everything with thick black lines but only on places where I saw fit to make sure that the no line style I kept but also so it has definition and detail. I really like what I have produced, I haven't been proud of a storyboard before. I usually feel pretty disappointed with them and then I dread the animating stage, but doing this troyboard, the colours, everything about it, I just love it. Also when colouring to make sure that the colours gave it the correct vibe and looking just right?? I played around with lots of different layer features and they helped to create some frames that look darker, the colours to be brighter and look better as well as it helped create an underwater feeling in my opinion!!
To read the storyboard read it from left to right and the way I am going to do the camera movements is I am using the sketch of the digital versions to see where the camera movements will happen and where I will get cross dissolves and things like that :3


⋆⭒˚.⋆
Camera movements edited together (easter !!) (..◜ᴗ◝..)


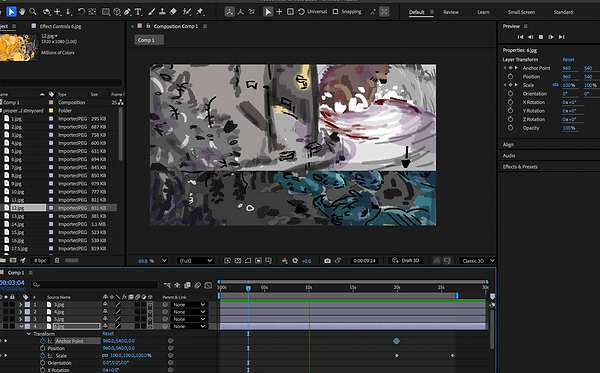


Over Easter I spent time doing specific camera movements that I implied in the sketches of the final storyboard. As when I edit this I will be editing it in Premier pro not after effects where these camera movements have been edited. Due to already doing a project before this in after effects I knew the gist of doing simple camera movements of just implying that there would be a bear moving across out of the frame or following fish that are swimming. This editing was a lot harder than I thought, I mean it was simple enough to understand it was just hard to gauge how fast things need to be as well as how the camera needed to move to be just like a hint of a camera movement.
It was quite weird to add these movements as well because things aren't really moving, it's just the images that are moving. I quite liked doing this though it made it easier to understand the storyboard. Usually I get a little lost with my own storyboards because the storyboard is never this fleshed out but adding these camera moments it also helped me understand how fast things would have to be if I actually animated all of this together. Of course I don't have any sound at the moment with the camera movements I have because I want to make the full mini movie/animatic before I add the sound. But like I had quite a lot of fun doing this even if I did struggle a bit all of these screenshots show different ways I made the camera movements, some being all faster than others and think with the added camera movements to this animatic it will make the animatic lot clearer to a larger audience and also just a lot more effective.
𓏵‧₊˚ ┊
༘˚⋆𐙚。⋆𖦹.✧˚
°❀.ೃ࿔*
˙⋆✮
˖ ݁♬⋆.˚𝄞
*ੈ✩‧₊˚
⋆˚𝜗𝜚˚⋆
‧₊ ᵎᵎ 🍒 ⋅ ˚✮
꒰ ꒱
✶
જ⁀➴
ㅤ♡ྀི ₊
໒꒰՞ ܸ. .ܸ՞꒱ა
﹌﹌﹌﹌﹌
Here are all of the camera movements that I edited together. The other missing frame will be just added as cuts in premier pro when I get round to editing it and I am hoping that everything flows a bit more smoother and easier to read without having messy sketches of loads of arrows everywhere as I sometimes get really confused with it all. Some of these videos are longer than others due to the camera movement needing to be longer to include more sound that will be playing in the background as well as just needing to have people to focus on sections longer than a few seconds. A good thing about doing these camera movements is that it helps me understand how long my final animation is going to be and I was worriedI wouldn't make it too 2 minutes but I f=think I will with everything together I think it is going to be okay!!!. Using after effects has also just helped me think about my own other animations that I will be making in the future I totally want to use this software for animatic in the future or smother camera moments that I can't achieve in an animating software or for backgrounds moving.
˚₊‧꒰ა 𓂋 ໒꒱ ‧₊˚
୭ ˚. ᵎᵎ
⋮
。𖦹°‧
Editing the animatic together (week 11) (˶ > ₃ < ˶)


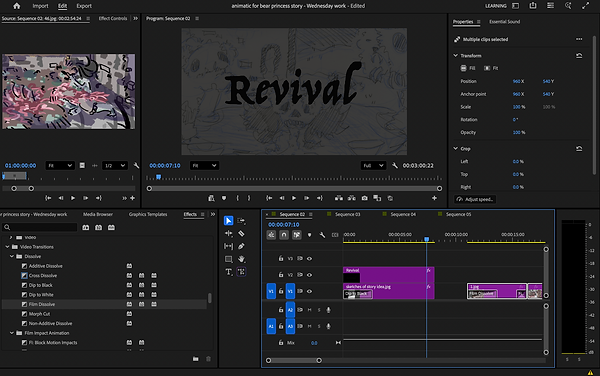


⊹₊˚‧︵‿₊୨ᰔ୧₊‿︵‧˚₊⊹
✶⋆.˚
⋮ ⌗ ┆
₊˚⊹ ᰔ
So this week back from Easter no longer a break. It's the final 2 weeks though so I suppose it isn't awful. It's just these 2 weeks are a complete crunch on work even though I feel confident in what I have produced. It's just I have to get things ready for the submission. It makes me just nervous. But considering I already made the camera movements over Easter I felt quite comfortable to jump right into the editing. The editing was so much more time taking and difficult than I thought it would be. I had to go through all of the frames I made to ensure that the timings weren't too long as well as with the camera movements. I did some of them once I put them within the sequence but it was too slow so I had to cut them up and change the speed of everything.
It took me around 7 hours to just edit all of the images to be the right speeds (As I also spent an hour making sure I recorded the small amount of dialogue that I have and I helped others with theirs as well as I wish i had time to do a bunch of foley and my own sounds but I just don't have the time for that at ALL i need to get this done not make it too complicated it makes me a little upset but uts alright!). I am really proud that I spent that long doing it because I was nervous when I started editing thinking I wouldn't finish this even being able to add sound. But listening to music and just completely absorbing myself into my work really helped. I decided to add a title to the animation so it had a sort of intro?? as I felt like just starting immediately from the first frame was a bit like throwing a viewer into the deep end without any first hook. I would of taken more screenshots but I did keep forgetting even though I spent a while on it but there also is no reason to constantly show the same thing that I am doing over and over again which is just cutting up images putting them in order and making some of them longer than others or some of them a lot shorter. I had fun though it was quite difficult!!
⏔⏔⏔ ꒰ ᧔ෆ᧓ ꒱ ⏔⏔⏔
This is the video without sound no ill admit watching without sound is REALLY boring and not fun but I am so happy with how all of the camera moves worked out and adding extra movements with in premier pro to make sure it still flowed properly and did just but hard cuts to then a smoother moving transition
⋆.˚
°❀⋆.ೃ࿔*:・°❀⋆.ೃ࿔*:・
Editing the animatic with sound!! (week 11) (¬`‸´¬)
To start of with the sound editing I went ot pixabay and spent A LONG time looking for the correct music to add for the background, I thought it would be good if I find the background music first so then all of the sounds I add afterwards have to not be too loud but also be able to hear over the music. I really REALLY like how it is like this, I almost just wanted to stop here because I think this is really cool but I knew I made the plan to add lots of foley and also it would improve with foley, it would just be music and I would still as the voice lines and maybe make it a little more clearer, it's just I thought it was pretty clear like this.
໒꒰ྀིっ˕ -。꒱ྀི১
﹌﹌﹌﹌﹌ִ ࣪𖤐゛ ⸝⸝.ᐟ⋆
⋆. 𐙚 ˚

✶⋆.˚ ☆⌒(ゝ。∂)

── ⟡ ˙⋆✴︎˚。⋆ ̟
༝༚༝༚


⭑.ᐟ
੭﹕﹒
So the sound editing for the animatic was pretty much the same process as the actual editing all of the images together but even more difficult. I had to make sure that I have multiple layers so I can overlap sounds over the music as well other sound effects can have more so then different sounds can work together (or at least I hope they will) doing this I am not done, I still need to complete it next week but I think that is okay because then I can use my time efficiently but, this was so hard it waan;t boring I had to constantly stay focused but the problem with having to stay focused usually I have something to keep me in the zone but when sound editing I need my hands quite often and both of them as well as I cannot put music or any podcast in the background, so that means for some reason it tires me more than it should, I wasn't tried to begin with but after I had done the first few scenes I felt so sleepy. THough I made sure to stay determined to do it because I want to make sure that this animation is really good to add to my portfolio in the future as well as its something that I am really proud of and all of the effort I have put into this project I just want to make sure the final product is good. All of the sounds I got from Pixabay and just that took a super long time as I had to find specific sounds out of thousands of sounds on the website.
With what I have completed though for this week I feel so proud even though I still do prefer the music on quite a lot over the one with all the other sounds, I did add a lot less sounds then I planned because when i first started editing the sound I tried to add as amany as possible and it became too hard to listen to and concentrate on what was going on and it didn't match the music. So I put sort of like a lack of sounds?? to what I planned, it's not really a LACK as there are still many but I think shrinking the amount of sounds was helpful. Next week of course I need to complete it but I REALLY want to add a bubble sound effect I completely forgot to do it this week but I am not doing it now so i make sure i use all of my time that i` have to work on this project because possibly next week I will find a cooler sound that I already have saved to my laptop. I am glad I have gotten this far and the way the animatic looks is super weird to seem I didn't know i could create something like that but I have and it makes me feel confident about the future.
‧₊˚ ┊
✶⋆.˚𝄞⨾💿✮˚.⋆
Here is the animation so far I am proud I mean this has taken me ages this week but I wanted to make sure I did enough this week so then next week I will have a little left to do so then I can really up the presentation and all of the submission requirements as that always takes ages..
Completeing the aniamtic ! (week 12) 𐔌՞ ܸ.ˬ.ܸ՞𐦯


❀
﹌﹌﹌﹌﹌
⋆.ೃ࿔*:・
⟡ ݁₊ .
☆


── ⋆⋅𖤓⋅⋆ ──
✶⋆.˚𓆝 𓆟 𓆞 𓆝 𓆟
I have completed this project. It is so weird to be saying that considering even though it feels like it has been ages the editing process didn't take too long it was all mainly planning to get me to this point. I am super proud. I mean I never thought I could create something 3 minutes long at all even if it is an animation. This week I just did the small part that I left for myself to complete at the end of the animation for sound as well as I went through and changed some parts or added some parts of sound. I made the slurping noise at the beginning to symbolise a bear drinking the water instead of it just sounding like bubbles. I also added lots of more bubble sound effects as I thought it improved the animatic and made it feel more missed in the water as a viewer. Considering this is the first piece of work I have ever done that could be classed as "gorey"/"horror" I do think there are parts that are lacking I mean my style that I used I do like and I think with the less lines it made the animatic look a lot more effective and readable but I think maybe it could be more colder not so inviting. Even with the attempt at making it seem cold and unnerving I still think my style holds this childlike feel which I mean isn't a bad thing that just how i draw and i mean the difference in the style on the concept of the story if quite a cool contrast but I think it would work better if it look scarier.
A lot of my own personal projects suffer the same fate but I am trying to develop my own style that I also will be able to change to different feelings. Besides that I really like what I have created. I think the sound editing could have been better. I did change some of it during this final week and I tired to fiddle around with the levels of sound and the transitions of how the sound changed but something feels slightly off about it, I am not saying tis awful I think it is really good for the first animatic I have made that I am proud of but something about the sound editing just puts me off. It could be because I have had to listen to it over and over and over again to make sure things match up and line up properly with the images so I may be a bit biassed but I still really like my work.
When I tried to export it into the final video it did actually crash and didn't export the full things, only doing up to one part at the end which freaked me out because I was afraid. I have lost some editing and pictures to the ether of corruption but luckily I had an auto backup that was saved right before it crashed so I fixed that backup and this time it exported correctly. Besides all of that there really isn;t much difference in the editing process, it was the same as last week cutting files up changing the levels of them overlapping certain sounds and having to listen to the same parts over and over again to male sure it worked. I think this has been suepr rewarding and has boosted my knowledge and confidence quite a lot, usually after something like this like last trimester I always feel underwhelmed but a final outcome because it just isn't what I want it to be and even though the sound slightly bothers me even with trying to fix it I really have learnt a lot from this project so many new kills that I will be taken further like drawing things physically and colouring them in digitally. As well as a lineless style that I think portrays my art better and I feel like I have learnt a lot about post production for projects, like writing a script is so much more helpful then i thought it was and world building isn't something i should put off it helps to expand the idea even further and help me think of ways to incorporate things like foreshadowing to backstories of characters. I really also proud of the motivation that stayed with me throughout the entire project usually by this stage i would of wanted to give up and just get this over and done with now as usually making final product bore me to death but this time I still had the motivation I truly felt passionate about this project and it didn't really feel like work when Wednesday's lessons would roll around every week of this trimester I was just excited to get to be able to think about my story and my character. I also think it is suepr cool that this whole animation that I have spent so long creating came from the first simple thing, a weird looking pot. It is so weird how objects can spark an entire world and creativity process of making a product.
I am really glad I have made this animation as it also proves to me that I can do it. In college I struggled quite a lot with making animations and didn't particularly understand the concept of them and would just animate all of the movement and be confused when people said that isn't an animatic. I thought originally that they were just the sketches of the animation.. no its to figure out timings and things and i will say learning how to do this in this project has helped a bunch I am glad i know understand the purpose of animation and they aren't just something that confuses and bores me I actually find them quite fun and enjoyable, being able to map out how things will go without having to draw the whole thing it gives me sort of hope that if. can make a good animation then the animation should also be at least a slight bit successful.
──── ୨୧ ────
₊˚⊹♡
˚ ༘ ೀ⋆。˚
'Final animatic?' (week 12) ૮₍ ´ ꒳ `₎ა
𓆝 𓆟 𓆞 𓆝 𓆟
˚⊱🪷⊰˚
★ˎˊ˗
Changes (week 12) ˙𐃷˙
Being very kind about it, my teacher explained that I got confused when she meant a swipe; she didn't literally mean a swipe as it just doesn’t work for a storyboard; it feels a bit like a presentation instead of something that could be turned into an animatic. I was told that zooming in or out was perfectly fine. I understood the art of the task for camera movements but I completely missed the whole swi[p thing. The swipes are meant to be things like dissolves and cuts to the next frame in a storyboard. WIth that feedbackI asked if I were to submit this what would I be told. the same feedback and because well I already knew that as the issue for the animatic so I just thought to respond to it now so when I submit the final thing to be marked I already responded to a part of the feedback of the work.
Of course I will get different feedback when i submit a different version and i know in class my teacher couldn’t just sit and pick apart my work so she had to talk to others, so I know I will still get feedback but to just improve what I already have I decided to just sell pretty much all of those sliding camera moves I did?? I got rid of them. I replaced them with just the images of the frames and added transitions that weren't slides this time. Some of the camera movements had zooms with them as well as the slide so i had to be careful on what I cut up and what I kept because I still wanted to keep the aiming action.
I was worried that changing all of the momentsI was going to have to re edt the whole sound track to match up with everything as I assumed it would get shorter??. I am not entirely sure why I thought that the length wouldn’t be the same jsut without slides the only thing that did change was the end because. had it up this camera movement which I accidentally cut up the sound and saved it without realising so i had to go through the end of the sound track and just reeling everything which wasn't too hard because it was literally just the last few seconds of the animation if it was like half of the animation I would of been more angry but I literally didn't mind doing this task I assumed it would be really difficult but because everything as already aligned it was literally jsut deleted and replaced.


˚˖𓍢ִ໋˚
°❀⋆.ೃ࿔*:・°❀⋆.ೃ࿔*:・
♬⋆.˚
.𖥔 ݁ ˖୭ ˚. ᵎᵎ
﹌﹌﹌﹌﹌
Completed animatic (week 12) ⸜(。˃ ᵕ ˂ )⸝♡
°❀⋆.ೃ࿔*:・
°❀⋆.ೃ࿔*:・
FRIDAYS LESSON (the projects I did this trimester are bellow!!!)
⊹₊˚‧︵‿₊୨ᰔ୧₊‿︵‧˚₊⊹
WALKING CYCLE PROJECT ( ˶°ㅁ°) !!
weeks 1 - 6 (Animation skills)
Practicing different walk cycles!! (๑ᵔ⤙ᵔ๑) (week 1)
As this is a walking cycle project to start of the image next to this text is practice I did in class with my friend emily from class as we sit next ot each toher we where told to just partner up with the person who sits next to us. I am the least confident in this ability to draw a walking cycle I have been doing it in theory for almost 3 years but I am so so so so bad at it, its why at the moment I a preferring illustration as its sort of like if you were to depict someone walking you might not do every frame or just even one to depict it all but doing it in animation scares me and because I was given feedback for trimester one I was told that I need to make my animation that I did in trimester 1's animation skills, not so wobbly and work on the expression and correct movement before moving onto lining and colouring, I totally agree I mean I have a tendency when I like something to just really go fast with it and try an get it done because I just want to see what the final product will look like so for this project I am going to try and keep in mind to make things clearer to a viewer and not so wobbly.
I have spoken to others around me about my own work and they say that I should try using different line weights for the outside of the character and then the inside of the character to see if that will help and I am totally down to try that for this project!!
Anyways beneath this text is other sketches I did following along to a youtube video that was shown in class (link bellow) that I then rewatched back in my own time to just practise different kinds of cycles as for this project I am really not confident in my ability. I think some are better than others but I am glad I did these sketches and practicing because it just helps me to figure out what my own character will be doing and how the gravity and weight will shift alongside them. The deliverable for the next six weeks I need to eventually have a fully rendered and complete animation as well as a character sheet.


ᯓ★ ⋆.˚
・・・・・⋆.˚ ☾⭒.˚
⏾⋆.˚· · ─ ·𖥸· ─ · ·⏾⋆.˚
༄˖°.⭒.ೃ࿔*:・
── ⋆⋅⋆.˚ ☾⭒.˚⋅⋆ ──
Re visiting adobe animate (week 1) (っ- ‸ - ς)
・・・・・
Now hopefully as you can see this is really not that well animated, as this was just apractice to remember the buttons and keys and how to use adobe animate. I have used adobe animate before (I ued it for 2 years all throught college) but considering we just switched over to a differnt animating software and I had to elanr all new key binds I just thought even though I know how to use adobe animate I should do the bouncing ball task to re try using it (everyone was set to do it but at the time I didn't do it in class I actually went home due to being really overwhellemed and I was having constant panic attacks).
Now something I didn't use for 2 years was the shape tool I never found it neceressy and if. am going ot be honest that was usper hard, I mean doing the hand drawn bouncing ball ws wuite easy and fun but the shape tool bouncing ball was so so so difficult I may of just done it completely wrong but I found trying to reshape something multiple different times and understanding the easing with a already pre madeshape was surprizinlgy difficult for me. I thought it would be easy I don't have to concertrate on making the ball the same size I can just copy it over, but no instead it found this the most frustrting task.
I really don't think the shape tool bouncing ball looks good but i have tried out something i didn't before and i think If I never is use the shape tool I feel like it may be for still things and not for moving things i the future because it just angeered me (though if I have ot used the shape tool for aniamting i will keep trying its not like i will just give up imeditatly I will try utill it looks good, thats what I did here I just sat fiddling around with a circled shape until I got something I was sort of proud of)
✶⋆.˚
── .✦
𖤐
Planning for the character I shall be using for the next 5 weeks >⩊< (week 1)


(..◜ᴗ◝..)
﹌﹌﹌﹌﹌
<---- this is a button for the moodbaord I created to assist me with the creation of this character for this project the moodboard is called "Trimester 2 - wak cycle porject (A Troubled florist)"
❀
⋆⭒˚.⋆
Here is a bunch of planning that I have one for the character design of the subjet I am choosing. Now for this work when I was told I was allowed to do any character I was exitied to just make any random character but it wasn't really ANY character I had to follow a list of things that me and the rest of the class was given. I don't mind and all I have to do is follow that list and the emotinal state and an still design the character how ever I want. So to beging with I wrote down all of the options and the nchose the characte and emtional state I want ot animate intpo a walk cycle I chose "Troubled" and "Florist". I was going to do a in love florist but I could rally tink of anythingt start from that for character design wise, I also thought I may do a laye student but I thoght that was too simple. I quite like my choice and as soon as I made a mind map I went right on to the sketching for what the final design may look like.
The design went though many changes and I was constatly refereing back to my moodbaordd I had created for different flowers I had saved to the moodboard to follow along with this idea I got when making my mindmap, i thought instead of just doing a normal florist that was troubled it would be cool of the florist was a flower themselfs or at least focused on a flower for their design. I had alot of fun looking into the differrent flower that I did and different outfits that Ithought may match the florist vibe I was going for. I am notthe best at making eciting character to design I seem to allways make boring characters but this time I really tried hard to mkae the character loojk good, now it is only a sketch but my character is a travelling florist (so has a big backpack with a sign on it so the i have a point to focus the gravity with, and I can make them more hunched over to emphasize the troubled feeling) and he is a boy flower because I just thought it was cool to have a male florist usealy I see florists depicted as woman and old men/woman in fiction nd because this florist is literaly a flowr why not go for a young male flower running a shop and his life is hard not getting any sells for his lofwers and he is troubled in thinking he may have ot close down his flower shop (he wants to keep it a moving flower shop so he can explore his world).
I wanted to keep the flowy and calm vibes that flowers give even if they are bright like tiger lilys so I gave my male flower florist a mid length skirt because I thought it looked cool ot go along with his design (as well as its pushing gender norms I wanted him to look femae but seem masculine I just thought it would be interesting to try and see if I could do that with a character becuse all of th first sketches I did where all heavily female based and I dont mid fmeinity buyt I wanted to break, from what is traditionally shown in place of a florist in a show/cartoon).
Something I need to do when I make his character sheet and full turnaround is to make his backpack a bit more travell looking likeas it is just a setch I put small bits and bobs I want ot include in it but I will make it look better in the final proper design. I though having his hands in his pockets would no only emphazied the troubled look but show how he is really thinking about his [redicament of possibly giin up his flower businss, I decided to not give him a mouth because Tiger lilys arn't a flower that eats lik venus fly traps and I reall;y want to play into the flower vibe. He has a tiger lily tail and a stomata popping out of his head :D as well as tiger lilys are spotty and I thought it could be a bit like acne pushingthe idea that he is a young flower .

Character sheet !! (*ᴗ͈ˬᴗ͈)ꕤ*.゚ (week 1)

To start of making his character sheet. Ithought it would be a good idea to plan out the final design in a sketch and using 2 images from my Pinterest board to understand the kind of colours I wanted to use with in my work. As you can tellfrom the sketch in my sketch book it is a bit different I made him have pointy legs because, well he is a flower himself and the tiger lily seems to have curly pointy petals. I thought it would be something cool to include in his design because I am trying to push myself to make more intersting characters for work. I decided how I was going to have stomata hanging from his head it sortof didn't make sense as looking at the photos in my pinterest mood baord they stand upward (I still kept the whole stomata Idea but now it is a hidden feature :D). Even though I had a pretty solid Idea on what I wanted him too look like he needed a name so I have dubbed my troubled tiger lily florist Liam. The reason he is troubled is because he is on a mission to find a fellow flower folk to give something beautiful too, too see if it will save someone life just like his florist buisness did for him but he is troubled because hes been travelling for SOOOOOO long he doesn't think anyone will take his idea for beauty in the from of a tiny flower when all of the people around him are flowers.
I know I didn't need to create a narrative for this character I mean it is just a simple walking animation that I haveot make but for me creating a narati helps me design a character better and really understand the purpose of their mood and if my person is troubled and I want to animate him well I gotta find a reason for is troubledness and now I have found it the making of this walking animation feels a bit easier!!


Here are screen shots for the images bellow which is the full turnaround character sheet for liam!!
This character I have so much fun designing because I had this narrative for him that I have made up I just felt more complied to create him to look cool and I really did spend a whole day doing all of the things in this section because I found drawing him and mkaing an interesting character was really fun. I became more emointaly attached to him as I contuined. But enough of how i feel about a fake character ment just for a walking cycle animation. This character sheet yes fun and mad me like Liam alot more but OH MY GOD. I struggled so hard with the height lining up and even though I have finsihed it I know some of it inst all the same I think when I do this again I am goingot try and make sure my intail sketches arn't too messy or atleast go overthe messy sketches s owhen doing the height chracter of things it is easier to understand.
Now I also hand coloured everything and once I got down to the shading I relaized i could of just used the piant buket tool on my lineart layer to make the whole process faster but I suspose we live and learn. The only problem is that I have a tendicey to leave gaps with in my lineart because I feel like it looks cool, I need to find a way to colour faster without having to do it single handily part by part slowly.
-ˋˏ ༻❁༺ ˎˊ-
.ೃ࿔


-`♡´-

Overall, Irealy like this character sheet. I just think, out of characters I have made in the past. This one is quite experiemtal and totally out of my comfort zone for designing, as well as I liked how I made him look sort of troubled in the character turn around I just really wanted to focus on how he feels physially because the whole point of the walking animation is too really show it physiclly i feel, so practicing it even in the turn around is proving to be helpful to think of more ways to depict it when I have ot start animating.

°❀⋆.ೃ࿔*:・.🌸˚𑁍.ೃ࿔*:・
As I mentioned I kept the stomata idea just as I little hidden feature so. Idecided to draw Liams head on what he looks like with out the big metal roof his backpack has and I really like the way he looks without it on, I am not sure if in my final walking animation I will atctually have a metal roof I mean i love it but I do want to show off the stomata, its hard so I decided to do a concept image of him walking in an area.
I did to a silly drawing next ot the head drawngs I did of Liam trying to give you a flower. I just have become really attached to him so I just had fun at this point.

For this concept image I kept the roof but after talking to my teacher about weather or not I should completely close of the character, and she told me I should keep the head exposed to show the flower hair and to have a cool flower like aspect to it. I agree as well a I think it might be difficult to draw the character completely closed off, I want to be able ot show the feelings

Just as practice for the character sheet and the feeling of this troubledness I tried drawing Liam walking hunched over I think when I actually plan it properly and animate the keys I am going to make him much more hunched over.
This was just helpful to see if my practicing with walking drawings I did earlier on had helped me understand walking animation better. I believe it has as these felt easier than it would of if I did n't practice. Not syaing i ma the best at walking animations or drawings now I am just saying I feel a bit ore confident because this task is quite challanginging.


ପ꒰ ˶• ༝ •˶꒱ଓ 🌸🤍
Practicing walk cycles (,,>﹏<,,) (week 2)
⋆。‧˚ʚ🍓ɞ˚‧。⋆
Now in the lesson I was told if I wasn't confident in just walking cycles in general I should practise just trying to do a normal walk cycle.
This proved to be so hard. I came into this task thinking it would be simple cause I felt like I aced the drawings without the moving aspect (just all the practice I did last week). But actually putting everything together got super confusing and I just couldn't get it right. It was really frustrating me and I sort of want to give up on this work because everyone around me seemed to understand the aspect of weight and how to do it. BUT!!! I persevered and asked for help!!
As I asked for help. I was told to use the Richard Williams walk cycle as a reference to being with and use it to understand how to do all of the different poses. The references I looked at I just looked at them on google as I do own the RIchard Williams Animators Survival kit book (which is where this comes from) but I was at uni when doing this first part of practice, and the book is at my house. Google still worked. I mean it still showed me what I needed to see.
Now to start off with I thought using this specific thing as a reference was cheating but realized I wasn't the only person using it as well as the teacher told me that, well it's important that I use the reference, I just felt like it was copying and not learning. But This did prove to help me to learn and understand how to improve the walk cycle and what I was doing wrong:
- First off I wasn't making it clear that there were 2 different legs and because of that I was getting confused on which leg that needed to move next so I did what the animation guide pictures did which is colour them differently. Also you will notice that these animations will not have arms. That's because we were told to just focus on the basic frame next and the arms are a whole other situation which is different.
-second I was making the movements of the legs too close to each other and they where working because i was just getting confused
- three feet are actually super important it helps convey the lift motion so I know that instead of the pointy feet I did for my character I should make them a bit more like feet, which can still be pointy but feet seem to be really important at least for me anyway, the feet made it easier to understand
- Four using references is okay and I shouldn't be ashamed as long as it helps.
Anyways after using this as a reference I felt like the walking animation wasn't actually too intimidating and that I could do it without completely giving up and trying to rethink what I needed to do. So I did a quick sketch of my character (also without the roof that he has in his turnaround because I was told just like I mentioned last week to get rid of it as the hair will be a fun part to see. With all of this I planned the walking animation again and I think this time the different planning stages went much better and I felt more comfortable. Not saying it was easy, this is a super difficult task. But the more I practiced the more I felt like I understood the main, important aspects of the walk. The weight, balance, the fact walking is just falling but cooler and proportions.
To help me as well I filmed myself walking around as well as my partner sent me a video of him walking because I mean his normal walk is just a very nervous, troubled looking walk and using all of these references helped me so much.

── ⋆⋅☆⋅⋆ ──

𓇢𓆸
For the sketch the design is exactly the same just with out the roof that was on the backpack nothing else has changed

The start of the final walking animation !! (˶ > ₃ < ˶) (week 2)
Here is the start of the final walking animation !!! I really like if so far, I feel from all of the rpactice and using the references that I have used you can feel the weight and the emotion more this time (it is currently only three seconds now but once I am doing things like the lining and addding amrs and detail it will change constatly as the only reason its three seconds here i I copied and pasted the walking animation well.. 3 times so I could see it longer)
I am afriad to start adding detail or even the arms but what made doing this animation easier than he rest of them I made sure I did everyhting on different layers so I wouldn't get confused when animating and that really helped!!
Something I am also proud of is I sent it to freidns that arn't from uni and they havn,t seen or know anyting about this project but they said that the animation looks as though the character is very TROUBLED or ANIXIOUS!! meaning that I am getting the point across, its readable!!!
✧₊⁺🕯⋆.˚୨ৎ


My florist character but without the roof illlustration !! (week 2) /ᐠ - ˕ -マ


As I needed to remove the roof, I thought even though I did a sketch in my sketchbook I should atleast do it with all of his colours and how he will look to make sure that I have a reference when I have finished the walking animation frame and can add all of the correct elements.
Even though this drawing is really simple I am super proud of it. I want to make sure that it matches the walking animation pose that I already have so then I can just copy what he looks like here but put it into moving action.
Because of my feedback from the last trimester I really need to work on less wobbly animation and show that I haven't just winged it, so this time I made sure that things like this character's hair have a specific amount of spikes on his head and stomata. As well as the amount of pink flowers on his whole outfit.
Something that I realised when doing the walking animation frame that I did already mention but for character designing I am going to keep it now, always as an important point to do, feet are surprisingly super important at least for me to understand which legs I need to move and to produce things like drag and different feelings. I am glad I have added feet now, but I still wanted to keep it like why I made them pointy so I added points at the end of the feet that stick to the same vibe.
°❀⋆.ೃ࿔*:・°❀⋆.ೃ࿔*:・
。𖦹°‧
-ˋˏ✄┈┈┈┈
੭﹕ ̊ ̟ ꒷꒦
Working on the walking animation (week 3)!!! ૮ ྀིᴗ͈ . ᴗ͈ ྀིა


.𖥔 ݁ ˖𓂃.☘︎ ݁˖
。𖦹°‧
As last week my lecturer didn't have time to see mine last week I asked her what i should do to my rough walking animation to make it look better, i liked it but I knew something was off, it worked but it just didn't have the right feel as well as the walk jumped near the end and didn't feel like a complete walking animation that could be lopped. Not only did I ask my Lecturer. I also asked my peers around me, as even though it isn't the same module this is a different module I made sure that the feedback I got from my experimental animation is still followed through. As I was told to make things more exaggerated and smoother. When I asked people they said I should add more frames to the drag section as it needed to show the weight that my character was using.
Now this may be a bit stupid but through the first tries I didn't use my drawings I did of my character and i figured out after people telling me to sue them that I could of made my whole process a lot simpler if I referred to my own references, I am not really sure why I didn't refer to it before hand. Though even referring to it, I still struggled greatly in making the movement of the legs be smooth, with enough frames as well as as I changed the leg movement I had to change the torso and I struggled even harder with that. I won't lie I was pretty overwhelmed this week so everything was just a bit harder than it should of been but I feel like i managed to make it look alright.


Now the next task was to make the arms, this is where I had to keep going through all of the layers and change things. I had to change the leg movements ever so lightly and I also struggled to understand in which way the arms would be without the bag on top of my character's back. I added that of course the bag is very badly drawn in but it gave me an idea on how I should move my character.
Now I know how to animate, not the best but I understand how to, I had to constantly ask questions and have people look over my animation and tell me what could be improved as I felt that this animation just wasn't going that well. I was told to stop doubting myself I mean, accordingly it was amazing but at the time I just couldn't see what others were seeing. I was super overwhelmed by this point and drawing wasn't helping so I took a break for a little bit and after taking a break and rewatching I sort of didn't understand why I hated it so much, the walk cycle looks alright, I just need to fix the bag, arms and i think to add a small stomp when the leg comes down to emphasise how heavy the bag is.
˙✧˖°📷 ༘ ⋆。˚
°‧ 𓆝 𓆟 𓆞 ·。
₊˚⊹♡
જ⁀➴
˚ ༘ ೀ⋆。˚
Rough walk cycle that I am pretty proud of!! (week 3) ₍₍⚞(˶˃ ꒳ ˂˶)⚟⁾⁾


═══════ ૮ • ﻌ - ა
🍮🥄 ˚₊‧
✰
Here is the animation that I did this week, after having that break and working on the more stompy feeling that I felt like I lost from my last week's animation I did, I really like what I have been able to produce. I know this animation cycle isn't AMAZING.
But asking questions really did help and getting people's opinions definitely helped, just the little stomp that was added makes it feel more like the character is not only carrying a head weight on his back but a heavy weight in his head as well.
Of course when I start making this line and smoother the characters arms and legs wont have one completely blacked out one, I have done that as I helped to see the difference in legs and arms. The arms for this animation proved to be much easier than I thought they would be and I really like them, even though they do much I feel like it keeps my character to portray this troubled closed off look.
The bag still isn't the most perfect bag ever but i really like it, hopefully from this animation you can tell that I want to add a sort of lift up apart to show how heavy the bag is with every step my character has to hoist it up their back just a little bit to make it comfortable to walk with. I think I could make it a bit better but considering this week my only task was to make it much smoother.
I am proud of what I have produced even if it was a struggle and it could still be better, I mean anything I do could always be better, but I came into this project with the thought of i wouldn't even be able to make something look like what I have produced here. So I would say personally this has gone so much better than I assumed it would go.
🃜🃚🃖🃁🂭🂺
( •̯́ ₃ •̯̀)
⊹₊⟡⋆
Secondary action added in walking animation (week 4) (˶ > ₃ < ˶)


This week I had to do my walking animation from home because my teacher wasn't in. I had to add secondary action and I wasn't really sure how the meeting was set up to have a little tutorial about secondary action so I read my own version of Richard Williams animation book, and I found a page that helped me insanely when doing this from home.
When doing this animation I have been afraid and going back and forth, constantly changing what I needed to do, but when I work from home I feel much more comfortable because there isn't a lot of noise everywhere and it's just me. So when doing this work I was super comfortable and just managed to do it without freaking out. Of course I spent a while going back and forth changing the drawings I was doing to make them work how the book told me too.
Doing this I assumed I was going to do awful and I wasn't going to be able to get anything done at home but doing it to me was the same as merging anticipation and squash and stretch together, and from my experimental animations I did in the first three 3 weeks, I was told to exaggerate as well as in this project I have been told to exaggerate as its a cartoon doesn't have to be exactly perfect its aloud to be a bit different to reality just as long as it has the principles of real life and feel real. Doing the hair in this animation I wanted to make sure that it had a long stretch/drag as my character lifts the bag up on their back. I never wanted the hair to be all insanely bouncy as I want it to reflect the troubled feeling my character is experiencing.
Making the antenna in the head I struggled for a while but I came to the conclusion that for adding all of these different parts I need to do them on separate layers, with different colours so I don't get confused on which part is moving, and how to add the secondary action.
IT was super hard with out a teacher there to ask but because she wasn't there it made me have to think about my own work, and I was looking back and forth to my book and making sure that it followed along with what i have learnt at uni so far with this project specifically.

‿‿‿‿
<𝟑 .ᐟ
⋅˚₊‧ ୨୧ ‧₊˚ ⋅. ᯓᡣ𐭩

⋆˚𝜗𝜚˚⋆


・・・・・
❀

‿‿‿‿
˚₊‧꒰ა ✦ ໒꒱ ‧₊˚
The next step after the hair was to add the clothes, this is where I spent a long time having to change things, trying out different layers and different techniques. The best way that i found to do the skirt was to do it, by making the long flowy trousers first then going back through after making the trousers look good, make it look like a skirt instead. I think the reason that helped me more is because I found doing just the skirt was super difficult because I couldn't understand how to do the skirt as one object as I was getting confused on how to show there was legs underneath without it being just sort of a floating body and loosing the leg animation that I worked super hard on.
Doing the shirt was just as difficult as I found it confusing on how to make sure that the shirt moved differently but at the same time with the skirt. I was thinking that when I wear a similar outfit to my character, my shirt moves with my skirt but still has its own movement as well, so I had to go back and forth to understand that. But unlike the leg animation I didn't mind that it covered the torso because even though I spent ages last week going back and forth trying to fix it, I still just wasn't really happy with the torso but the t-shirt I added covers it so I like it better now.
˚ ༘ ೀ⋆。˚
Animation with all of the extra parts I added !!! (week 4) ₍ᐢ. .ᐢ₎ ₊˚⊹♡

⋆˚☆˖°⋆。° ✮˖ ࣪ ⊹⋆.˚
‿‿‿‿
⭑.ᐟ
I went back to the bag and made it just a bit more detailed on how it will look finally, I also turned the opacity down on the parts that you won't be able to see underneath the clothes, I think it is pretty good considering I did this all on my own research and exploring through how to make it look good. Of course I like it but I expect next week to come by and hopefully my teacher will be back in and she will most likely tell me how to improve it.
If not I will be doing the lining next and just making the animation look like a completed walking animation. This will officially be the first animation that I have tried my hardest to make sure it isn't wobbly and change in proportions as well as my first officially good walking animation that makes sense and isn't just people moving weirdly.
I personally don't think I will ever understand a walking animation just from my head but doing this and having the whole process and the understanding as well as a book to help me and look back on it. I just have realised that using references and going back and forth is okay, it doesn't have to be perfect the first time around.
(⸝⸝๑﹏๑⸝⸝)
Lining the animation ૮ ྀིᴗ͈ . ᴗ͈ ྀིა !! (week 5)


So for the purpose of lining up I thought that my teacher was going to have to change things and make me redo things, but this is the second to last week from needing finished things and she knows we have a life project. Though as my teacher wasn't in last week she didn't see any of the progress I made, I was told that the progress that i have made since she last saw it was incredible and the fact I need to work on keeping proportions correct, I was told that I am slowly getting better at it and this is an improvement from my animation that I made last trimester.
The lining took not as long as I thought, I thought it was going to be such a long process but I mean doing everything on different layers really helped. I never really do that because I always feel like it's a waste of time but planning everything. I did this animation and it really really hel[ped. I managed to just line and understand what things needed to look like immediately. I only had to fix things a few times, especially the head because I struggled with the hair drag but I managed to do it in the end. I thought the lining was going to look really bad. I have a tendency to make it all wobbly and I am not saying it isn't wobbly, it is still pretty wobbly but compared to other animation because I really used everything I have been taught this year it worked much better.
Though doing it this way has made me realize why people have a team of people working on an animation as even this simple animation has taken so much time and working hard for hours.
𓏵‧₊˚ ┊
・・・・・
﹌﹌﹌﹌﹌
。𖦹°‧
˚. ᵎᵎ
Here are videos of the lining. When doing the lining it was suepr confusing to see all of the different layers and ,multiple times I had to constantly turn on and off layers to make sure everything worked. When I showed it to my teacher and also my peers, everyone really liked the skirt detail I did and it looks like there really are legs underneath them. I am so glad everyone saw that because it is my favourite part of this animation as well as the part I am most proud of.
𑁍ࠬܓ
༘⋆


⊱ ۫ ׅ ✧﹌﹌﹌﹌﹌﹌﹌﹌﹌
𓂃˖˳·˖ ִֶָ ⋆🌷͙⋆ ִֶָ˖·˳˖𓂃 ִֶָ
Flat colour ( ˶°ㅁ°) !! (week 5)
As this is the last week before hand in (which is next week but we still get to work on it next week just before we hand it in). I got to do the flat colouring. To be honest even though the requirements are to have a complete animation with colour I really didn't think that it would look like this. I thought it was going to be really good... bad and not very smooth and I would struggle with the one thing I struggle all the time: proportions and wobbliness. But I mean with getting A LOT of help and using books and media to hep[ me this helped me create something that I am actually quite surprised that I made. I really didn't think that I would be able to make this at all like, when I started I was so negative about this project, I always struggle with the understanding of movement, I understand faces slightly just not really walking and things, especially because I struggle with things like anticipation and exaggeration.
Though I am proud that I managed to get to colouring. I was also nervous about the colouring and this felt like it took so long. I know the original planning and going back and forth doing different versions most likely took longer but the flat colouring took so so long and it was slightly driving me crazy. With some of the flat colouring. I made the design quite complex with different colours. When I started doing it I got nervous that this would be where I started to make my work worse and be disappointed in the effort I put into it. I was afraid that the different spots and colours would wobble all over the place but instead I made sure I went through each frame very carefully and I recorded my progress as well so then I could no only watch it back to see if I had made any mistakes because when I am doing work usually I never really seethe mistakes until i've submitted it and then I am watching back multiple times. But also so you could see the process of how I made sure the colouring worked well and wasn't wobbly and ruining my animation.
I am really proud that I managed to get h flat colouring done for this week, I was nervous knowing next week is the last week I can work on this before I hand it in, what if. i didn't complete it or what if it was awful and. got a low grade. But I really like what I have done and produced, the movement is the smoothest I have ever done so far in my animation career. As well as, is a design that I find really awesome which has made me be more confident in realizing I should just go with designs that I like as I shouldn't worry if the design is bad or awful, using the design I liked made the project more enjoyable.
❀
═══════
₊˚⊹⋆
⋆🐾°
Here is the flat coloured animation the last step is shading which I will be doing next week and if I do have time I may just add a colour to the background or maybe draw a field of flowers, But that isn't needed for this project it's just if I have the time to do that I will to make it look cooler and have a background so my character isn't just walking in a blank white space
Completing the animation (˶˃𐃷˂˶) (week 6)
˗ˏˋ ★ ˎˊ˗
So to complete the animation I wanted to add shading. But after adding the heading one I found I have a problem the opacity layers weren't working how they should they kept exporting as just normal layers and as you can see from this video it looked really bad as well, it was meant to be lower opacity to give the illusion of shading but you know that seemed to not work. Which I got really confused on why because that isn't how it should be I mean I have exported animate files with lower opacity layers before hand and it worked. But besides that issue I thought that the walking animation looked pretty.. well boring, I mean the walking animation I had done.
The task I have been working towards for 6 weeks done and I have done what i needed to do for the submission though I mean he was just walking in an empty space so I spent the last week working on a background, I didn't want a too like intricate background because the background isn't something I need to focus on thought I just wanted to add something simple. I chose to do a desert but something that I did wrong for the sketch that I am so glad i aksed about to the teacher so then when I made it better it made sense, but as the character is moving forward, the background doesn' t go forward it should go backwards, they are walking away from the scene not towards it, that's how walking works. But besides that I am suepr glad I added the basic background and worked on it because I mean one I have never done before and 2 it's just... I want to be able to make a convincing animation and every time I try to do that it just doesn't work, it always feels wrong.
Also doing a moving background is so much harder than I thought, having to to create a background to move properly to give the illusion of a character moving forward and not just walking stationary in the environment they are in is so hard, I would totally like to try it again, Like I would love to do another animation with a different background that may be better and more detailed, but it wasn't really a requirement for this animation so in theory I didn't even need to do it, I just did it because I wanted to try to do something.
・・・・・
ᐠ( ᐛ )ᐟ
Now as you can see I did actually add colour to the background I sketched in, for the other video, but for some reason the opacity layers still weren't working. But the way I fixed it was I used the alpha layer I did to the sketch I made of the walking cycle and that worked, I am still confused on why the opacity layers didn't work considering its worked in the past but that doesn't matter I managed to fix it eventually and if thats how i have to make shading layers to be opaque then thats how ill do it, it was actually easier than making the whole later a lower opacity as that function is hidden but the alpha colour on a layer isn't hidden its just in th tool bar so that makes it nice an easy.
˖᯽ ݁˖
˖ ࣪ ꉂ🗯˙🫐⃟.꩜‹—
Final animation !!!! (ノ^ヮ^)ノ*:・゚✧ (week 6)
˚˖𓍢ִ໋❀
˚˖𓍢ִ໋❀
Here is the final animation. I am so proud of it, it is like the best thing I have ever animated and it has taught me so much for future projects that I have to animate.
heres is what I learnt:
- Doing things on different layers is super helpful and in different colours so i dont get lost in what happens.
- Making simple designs is important as it makes the animation simpler and not too confusing.
- having unique ideas is something I need to keep going for and not being afraid to continually go for them.
- taking longer on the planning stages is perfectly okay as it makes the lining stages so much quicker and easier.
- Planning isnt bad/dont jump too far ahead from the planning to the completed stages slowing down like you did for this project helps so much, it may be more stressful but it certainly does help.
- using guidelines is so helpful
- line constancy is more important than I thought
Overall I really like this animation. It is super cool and totally something I never thought I would b abl to do, and I am glad. I have written down everything I have learnt from this project and this work because it really has been helpful in learning what is important.
𐔌՞ ܸ.ˬ.ܸ՞𐦯
AFTER EFFECTS - path animation (˶˃ ᵕ ˂˶)
weeks 7 - 9 (Animation skills)
Practice in the new software !! (˶ > ₃ < ˶) (week 7)
⟡ ݁₊ .
Now the video on the left is quite long. This video nobody really needs to watch as it is for me that I made after making the practice video on the right at uni. I would have screen recorded the video at uni instead of doing it all separately at home but the video would have been about 2 hours long considering I was super confused doing it at uni as well as super overwhelmed so I was working super slowly. I recorded the process on how I made a similar looking video just not with the same layout and colours. Simply so when I make my own version I know how to make the camera pan!!.
Now this project is all about making a moving background. I am allowed to add some form of character to make it more interesting but this is super important to create a panning movement on after effects with different ayer of a background, middle ground and a fore ground. One thing I am super bad at is backgrounds, mainly making them look good. Not so much making the backgroundI know how to draw one, it's making them look good with things like colour schemes and the drawing style i am going for. To be honest for this project I didn' t think I was going to be that enthusiastic about it but after making the practice version I actually quite enjoy this software. Of course I have learnt super basic skills and as a class we all saw an old students version of this project and it looks really cool on what we have an option on creating.
This project I really want to work on colour. I am trying to get better at using different colour schemes and I want to really try this time as with backgrounds and characters and different elements i can do it all separately but once putting it all together everything ends up looking a bit wrong and a bit all over the place, and sometimes flat or way too bright to look at. It's a problem that I have but I want to work on it. I also want to keep trying to develop my own style and from last project to this project they will look quite different. I did have an option to make a background for the walking animation but I didn't want to. I want to try something different and I also already did a background in photoshop. I am going to be honest if this background planning works a lot better I am going to be so happy because I always struggle with things like camera planning and even if I know only a little bit on what to do on after effects it will be enough to be able to help me elevate my work and add cooler looking backgrounds with a bunch of different aspects to it all. For some reason when doing it all on one forum like animate for example, I always struggle to do the background. I can do the movement then it comes to the background and I just get confused and then there's too many layers and elements and it just doesn't look how I want it to look.
But hopefully this short project will help me understand backgrounds a little bit better, as well as I gotta add sound to this animation!! which I am super excited about!!!
──★ ˙.𖥔 ݁ ˖ ̟ !!
✮⋆˙
Planning for my own version of the path animation (っ- ‸ - ς) 𓋜 (week 7)
⊹₊˚‧︵‿₊୨ᰔ୧₊‿︵‧˚₊⊹


For the planning of my version of the moving background. I had many ideas, and I also had to make sure that my planning was short and simple, If I had more time i would be exploring a lot more but this is a short project that i dont really have the luxury of spending around a week on the experimentation, as well as I am also doing other projects alongside this one, and the puppet project is taking up a lot of time as well as i have plans to do other things like going to a concert this weekend. But for what I have planned I really like all of the different options that I came up with.
Usually I hate coming up with multiple different options as I always end up getting stuck on what to choose, though this time with my work and I think this might just be the influence of everything i have been doing this year, us. I am so much more open to writing down everything I am thinking about.
It actually helped me sort through everything I wanted to do and what could actually develop into something and it was not just a loss of an idea that I got stuck at within the first few drawings. Now when doing this planning I thought I was going to go for the choice that I think I would always go for which is the more fantasy and imaginative route. But instead. Of course I really liked the fairy idea. I love fairies and I think it would be cool to have lots of different layers for the grass and bugs and things but I also developed a bathroom scene and the fairy idea is something that I would usually and always gravitate too. The bathroom scene I developed could have been a party or just someone having a bath. I am not sure why I gravitated towards this one considering I thought the fairy one would be the one I was going to do considering my track record on the way I work, I based my moodboard off the bathroom one.
I think it's just something that is so different to what I usually come up with that it feels more exciting to develop. I also had ideas in my head about the fact that I want to work on colour schemes for this project and I added lots of different references for the kind of way I want this project to look like.
I always have had the same thought that I have to have one style for everything but, to be honest i have so much more fun developing things with different looks and having such a difference in the way i can draw creates for a more exciting hopefully portfolio in the future for applying to jobs and things, so I actually think exploring different styles now in uni is helpful and showcases my different work qualities.
I decided that of course I want a bathroom idea. I mean the moodboard in the biton below this text perfectly shows the fact I want to do the bathroom idea more. During the planning I did think about maybe having it all as a fisheye lens or maybe stretched perspectives, but I want to keep this project simple, one because there isn't much time to get it all done and two because I really want to focus on colour (of course doing the brief and having all of the deliverables for this project is important but my personal goal is colour)
This will take you to my moodbaord it is called 'Trimester 2 - Moving after effects background' ---------------->
ᯓ★
⋮ ⌗ ┆
✶⋆.˚
. ݁₊ ⊹ . ݁ ⟡ ݁ . ⊹ ₊ ݁.
Finalized concept ٩(^ᗜ^ )و ´- (week 7)
꒰ঌ ໒꒱

Here is the finalized concept. And it is a concept. It may change a little bit in the future (next week) when I actually start making it more but here is the idea. I wrote down all of the different parts of the layers I want . I also wrote down other parts that I know I want to move. For the different parts in the layers I think I want the pan of the camera to go right to left so the final thing you see is this girl smoking a cigarette. The kind of feeling I want is this uncaring depressed soul but I want it also to be bright, for a hurtful look on how this person is affected but so uncaring of their life. The reason I want this feeling is for personal reasons, at the moment my health isn't doing great this week. I have been to the hospital and I have had multiple blood tests and I want this project to sort of be my outlet for how I am feeling. Everything is quite a lot with uni and having to independently support myself but at the same time I am chill and kind of uncaring. I mean I didn't care so much that I ended up in the hospital thinking I was fine.
Also I am really excited to do the style for this project. I really like this style. I draw in it sometimes personally in my own sketchbook, but I have never used it for a project or anything work related and I am super excited because I really do enjoy drawing like this. I am not sure why I don't use it for work related things considering I like it so much, when doing work I always have this sort of expectation of my work that needs to look sort of how other things look in the world to stick with how media is fed to an audience these days with a simple style, dotty eyes, and sort of anime looking bodies. But this style is my personal favourite and I don't use it as I don't really see it in the media that often, it is a thing just not as often. Though I have realised this year that doing things uniquely and how I want to is better as I enjoy it more and I am not saying I hate my other style I draw in it because I like how things look but I think I should give this style a spotlight sometimes as I really enjoy drawing like this. I want this character in the bath to have a more natural living space as well as a natural body, not an exaggerated beautiful pretty one with perfect skin. I want pimples and I want to have things like body hair, I also want the background (as that is the main develrable) too feel more natural maybe i abut more exaggerated for certain people, But i know what it is like to live in a depression house/room with everything not being clean and uncared for and this is just how it is for a personal experience to me, i want it too be messy as also not only is it personal but i think it will make for a more interesting background with lots of different parts layered over each other.
✮ ⋆ ˚。𖦹 ⋆。°✩
𖦹 ໒꒱ིྀ༝⁺
Colour schemeing (。•̀ ⤙ •́ 。ꐦ) !!! (week 7)

˚⊱🪷⊰˚
༉‧₊˚.
I wasn't actually planning on re-drawing it digitally but I thought it would be a good idea considering I am going to have to make all of the layers separately and digitally anyway. Why not get in some practice!!! So I redrew the scene, and to do the colour schemes I was using my pinterest. mood board as reference and all of the colour schemes I saved to it I was also colour picking from there and making sure that I was trying as many as I could. I really wanted it to have a trashy, druggy vibe but I was sort of lost on how to make that also look appealing and aesthetic (not saying that those things are good are aesthetic but online/n media there is a sort of aesthetic that runs with it which of course isn't good but i mean I wanted to try and replicate it but through my own way and style).
I thought the colour scheme was going to be easy and I was going to find my colours really easily and simply but no, I spent 2 and a half hours just pondering and trying out things. I ended up with 12 colour schemes and finally a 13th one that I like the most. I am glad I did all of this experimentation before next week because then I know what kind of vibe I want for this project and how I want it to look. I didn't want to spend too long on this due to other projects but I mean I cannot rush certain things, they just sometimes take longer than expected. Even though it did take longer I am proud of what I have produced and it is something I am really proud of considering I have never looked and used colours this way before.
When I got more into the colour scheming I decided to go along with pinks more than purples and greens because I felt it came with this girly, trashy vibe and the purples and greens where creating this sick and toxic feeling which sure being addicted to drugs is a bad thing but I just didn't fit the kind of vibe i wanted and i kept going along with pink colour schemes until I found the one that i like the most.
I think re drawing it digitally also helped with how long i plan the pan of the camera to be, when I actually make this look better I want the layers in the background to not seem so close to the camera i want the main fore ground part to be all of the bubbles, I hope to turn the other layers in a darker/lower opacity to ensure that as an audience you can see all of the different sections.


﹌﹌﹌﹌﹌
૮ ․ ․ ྀིა


ꫂ᭪݁
⏔⏔⏔ ꒰ ᧔ෆ᧓ ꒱ ⏔⏔⏔


I really liked the pink but I got really obsessed with adding this bright green. The colour scheme below this text is the one I refer to because I think it showcases the pink much better as well as it isn't so eye straining and bright. I liked the brightness but for the feeling I wanted it just didn't work well enough I like the one beneath this text because it feels more dirty and more trashy. I also kept a bright greeny yellow colour for the one I like becasue it remind me of people who smoke alot that theri teeth go yellow.

Making the background and the assests needed to create the animation!! (˶˃ ᵕ ˂˶) .ᐟ.ᐟ (week 8)

For this week class was actually independent work so i got to work from home meaning i felt comfortable and was able to do work easier! Everything has to be its own assets and eventually on its own separate layer so when doing this I had to draw each part of the bathroom on different layers which did prove to be more difficult than I thought it would be. I originally planned to do all of the background things on one layer the for ground on another layer and then the middle ground on another layer, but I realised to version from one software to the other won't be the perfect size and it might be a bit different in shape especially if I need to make the camera pan. I may need to change the size of some things to achieve that anyway. Every single section was done separately and on different layers, but for the lineart.
It made that part quite simple because I was able to just focus on one part at a time. I wanted to make sure that this background is just better than other backgrounds I draw. I am not the best at doing things like this so doing the lineart i made sure the sketch was nice and clear and I didn't mess up the scale of things when lining it.
For some of the sketch parts I made separately which you wouldn't think you need to be separate, like the arm and leg hanging out of the bath. I made those on separate layers due to the fact that I want to make sure those parts move up and down giving it a more realistic feeling.
Due to the amount of planning and preparation I did last week and having such a clear idea in my head, instead of struggling really hard with drawing digitally I just enjoyed it. I am confident within this idea and I hope it works well and looks cool. I want to make sure that I am working confidently within my line strokes and the style I am drawing in.


FLASHWARNING!!
This is a timelapse of the colouring i did, i was flicking between the colour plan and the drawing that i did. the colouring was actually the funnest part. Usually I dread the thought of colouring knowing it is a repetitive action and there is so much to colour but due to the fact everything was on separate layers it made it seem like less colouring and I felt accomplished each time that I finished colouring one layer. it is definitely something i think i will do in the future as well as everything being a different layer makes it so there are less mistakes, i know it should be simple to do things on separate layers but sometimes i just get so caught up in one layer that i forget to add another one.
═══════
𑁍ࠬܓ
𐙚⋆°。⋆♡
✰
⊹ ࣪ ˖🕰️୭˚. ᵎᵎ🗝️
⊹₊⟡⋆
⋆˚౨ৎ ⋆.˚
𝄞𝄢

The final assests and ilustration! (≧ᗜ≦) (week 8)
˚。𖦹 ⋆。°✩
Here is the illustration that I was working on in photoshop. I would say that I think things do need to be smaller and larger but the good thing is that I can alter it when I put all of the assets in after effects to make the animation. When I did the sketch and line art the sizes didn't seem like a problem but now it is coloured and everything is much more clearer, I feel like the background of some of the objects need to be smaller to push the illusion of different layers. I am not upset with how this illustration looks. To be honest I am quite happy with it.
I like the shading that i added aI think it makes it feel more like its on different layers and plains to each other everything doesn't feel so flat. The one thing I really like is I know I wanted to add smoke to the drawing but I didn't know how to effectively do that but I added this sort of yellow mist over the drawing and I think it helped convey the feeling of a heavily smoked room. I also really like the shading I added I know I already mentioned that but I meant how I did it, I did the shading arts also on separate layers so then when i add everything to water effects I can keep the yellow glow I added and make the background look darker with the shading arts i saved.
The next images below are all of this. the asset capital and they have to have a transparent background due to next week everything I'll be layered over the top of each other as well as the moving part that I need to add. I am really happy with the moving leg and armament but you cant tell they are on different layers which is perfect as I want them to slightly tip up and down as if she is moving her body to music that i plan to add in the background. I really like the bubbles, I like that there see through when I started colouring the bubbles I didn't know whether I should go for the see through bubble look but I really like it , it just feels more real even with all of the bright pinks and colours that wouldn't usually be the depiction of something like bath water or smoke.





*ੈ✩‧₊˚
-ˋˏ✄┈┈┈┈
⋆.ೃ࿔*:・
𝜗ৎ
Making the after effects animation (˶>⩊<˶) (week 9)


⋆˚࿔
˚˖𓍢ִ໋❀
⋆.ೃ࿔🌸*:・
⭑.ᐟ
This was the last week working on the after effects animation. I am really proud as well. I mean I completed it, it had to be completed but I meant I completed it just how I wanted it to look. I didn't take too many screenshots as a lot of it was very similar to what I did in the practice version just instead everything was made into a 3d layer to give the video some depth as well as I used this tool called the puppet pin tool to move the leg and arm that I did because the usual anchor point way wasn't working but I am super happy with the different techniques I used, of course I had lots of help from my teacher but I am still proud that I have used this new software and actually created something I really like.
As I mentioned I had to add sound and the sound I added at home and I really enjoy adding sound, sound editing to me is super duper fun. I actually tried doing something new by adding a reverb on some of the sound to make it sort of sound hopefully a bit like she is in a bathroom, that took quite a while as I had to explore premier pro and also before I explored the sound I did accidently export the video completely wrong ending up with just a video of a stationary bubble. I am still not really sure how I did this but I mean it doen’t matter as I fixed it to produce the final product!!
ᯓ★
Final animation
✧。٩(ˊᗜˋ )و✧*。
ִֶָ. ..𓂃 ࣪ ִֶָ🪽་༘࿐
Here is the final animation I am really proud of . It is like the smoothest animation I have ever done. Of course the movement is that impressive but I am suepr proud of the layering and how the bubbles move. I think if I were to do this again I would make the pan a bit longer showing the character smoking but besides that I am really proud. This is seriously one of my most favourite things i have done this year, I love the colours, the sound, the movement I love it all!!